Schema Tagging Guide
Overview
Schema tagging is the process of annotating content on your web pages with structured data. This helps search engines better understand your content and display it more prominently in search results (like rich snippets). Milestone’s Schema Manager simplifies this process by providing an easy-to-use visual interface. This guide walks agency users step-by-step through the schema tagging workflow.
Step 1: Accessing the Schema Tagging Interface
There are two ways to access the Tag Schema section:
Option A: From the Schema Home Page
Log in to your Milestone account.
On the Schema Home page, locate the top-right button.
Click “Continue Tagging” to jump directly into the tagging interface.

Option B: Via Left Navigation
In the CMS dashboard, look at the left-hand navigation panel.
Click on “Tag / View” under the Schema menu.
You will now enter the tagging dashboard.

Step 2: Selecting a Web Page to Tag
In the dashboard, you’ll see a list of your website URLs.
Under the ‘Actions’ column, click the Tag icon (which appears like a pen or + symbol) next to the page you want to tag.
Tip: Start with high-traffic or key landing pages for maximum ROI.

Step 3: Choosing the Schema Type
When tagging a page for the first time:
You’ll see a set of prominent suggested schema types listed.
These are commonly used schema types based on your industry and content (e.g., LocalBusiness, Product, Event).
How to Choose:
Click on one of the displayed options to begin.

Or, use the search bar to find and select a schema type relevant to your content.

Or, click on ‘Skip & Start Tagging’ on the editor and use the drop-down to view schema types.

Once selected, the editor will load the most relevant properties for that schema.

Step 4: Tagging Content on Your Web Page
This is the heart of schema tagging—mapping website content to schema fields.
Tagging Basics:
Your live web page will be displayed alongside schema properties.
To tag content:
Click on a section of your page (it will highlight in orange).

Then, click the corresponding property on the right-hand schema panel (e.g., Description, Name, Address).
The tool will automatically tag and associate that content with the selected schema property.
Example:
If you click on a product name on the page and then click on “name” in the schema panel, the tag will be applied.
Step 5: Adding or Removing Schema Properties
To Add More Properties:
Click the “Add Property” icon.
This allows you to manually include additional properties supported by the schema type.

To Remove a Tag:
Click the three dots (⋮) beside the property.
Select “Remove Tagged Data.”

Step 6: Tagging Optional & Repeating Fields
Optional Fields:
Optional schema properties appear with a ‘+’ sign.
To tag them:
Click on the ‘+’ icon.
Select the content field on your page.
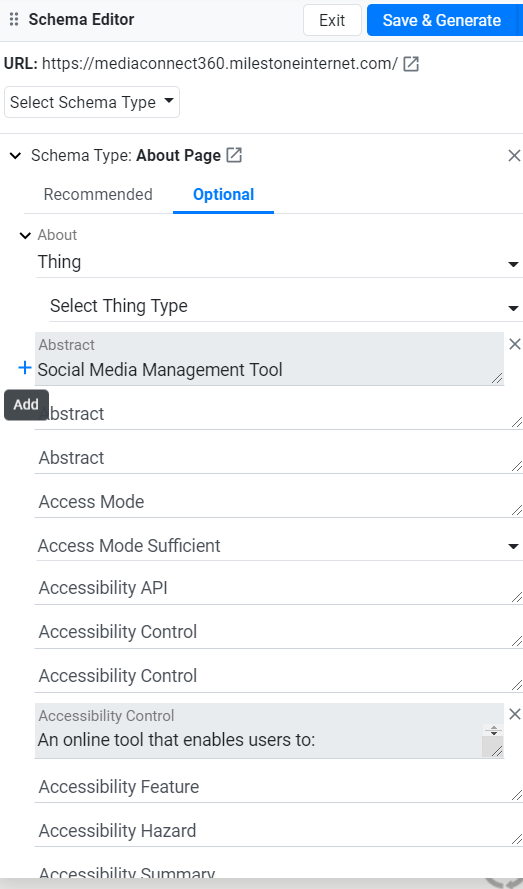
Dropdown Fields:
Some fields may offer a drop-down instead of tagging from content.
Simply select the appropriate option from the dropdown.
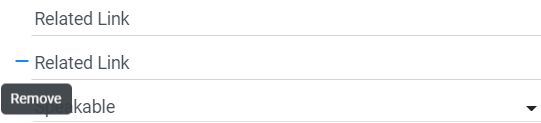
Repeating Fields:
For elements that repeat (e.g., multiple FAQs or events), click the ‘+’ sign next to the property.
This duplicates the property so you can tag each occurrence.

To delete any, use the ‘-’ sign.
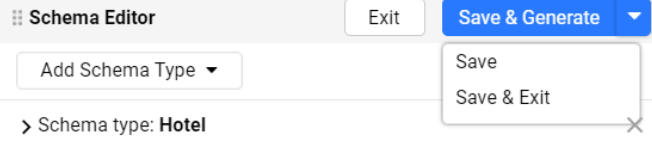
Step 7: Saving and Generating Schema Code
After tagging the desired fields:
Click “Save and Generate” to generate and validate the schema markup.
You can also choose:
“Save” – to keep the current progress without generating schema.
“Save & Exit” – to exit and return to the main Tag Schema page.
Schema Validation:
The tool will check your tags:
- Required fields must be filled in to proceed.
- Warnings can be ignored temporarily but should be addressed.
- Errors must be fixed before publishing.
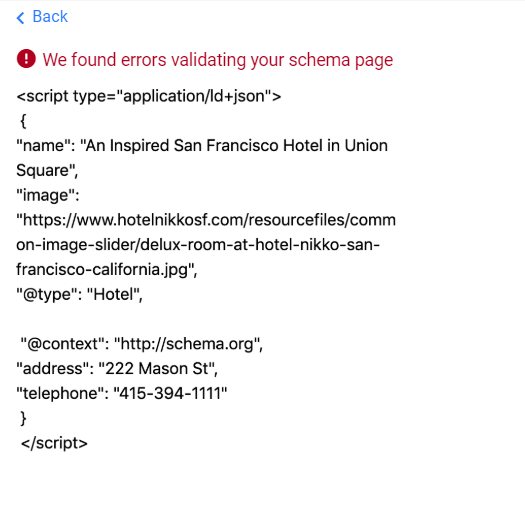
Step 8: Publishing Schema
Fix all errors highlighted during validation.
Once resolved, click “Publish” to apply the schema to your live webpage.

Schema changes may take a few days to reflect in Google search results.
Note: You can publish schema with warnings, but it's best practice to fix all warnings for optimal SEO impact, as warnings indicate additional tagging opportunities.
Glossary
- Schema Markup: A type of structured data vocabulary defined by schema.org that helps search engines understand the information on your web pages.
- Tagging: Linking or mapping content on your web page to schema.org fields using Milestone’s Schema Manager.
- Schema Property: A specific attribute or element of a schema type that describes data on a webpage, like “name,” “address,” “price,” or “rating.”
- Schema Type: A category or classification of content defined in schema.org (e.g., Article, Product, Event, LocalBusiness).
- Repeating Fields: Fields that appear multiple times on a page and can be tagged more than once (e.g., multiple reviews or FAQs).
- Validation: The automatic process of checking whether your schema tagging meets the required standards before publishing.
- Rich Snippets: Enhanced search results on Google that display additional data like ratings, event times, or product availability from schema markup.
Tips for Success
- Always tag at least the required properties.
- Start with key pages that drive traffic or conversions.
- Review Google Search Console after publishing to track improvements.
- Revisit tagged pages periodically to update or improve schema.