Release Mar 21 2024
Learn about the latest releases from Milestone CMS, Insights and Analytics.
CMS
Password-protected PDF Forms
To make RFPs secure and in some cases HIPPA compliant, Milestone CMS does not store form data on our databases and this information is now transmitted via a PDF. Let’s see how you can create HIPAA compliant forms using ‘Send Data Via Secure PDF’.
Milestone CMS > Manage Forms
Step 1: Click on ‘Manage Forms’ under ‘Marketing Tools’ in the left navigation panel of the Milestone CMS Dashboard.
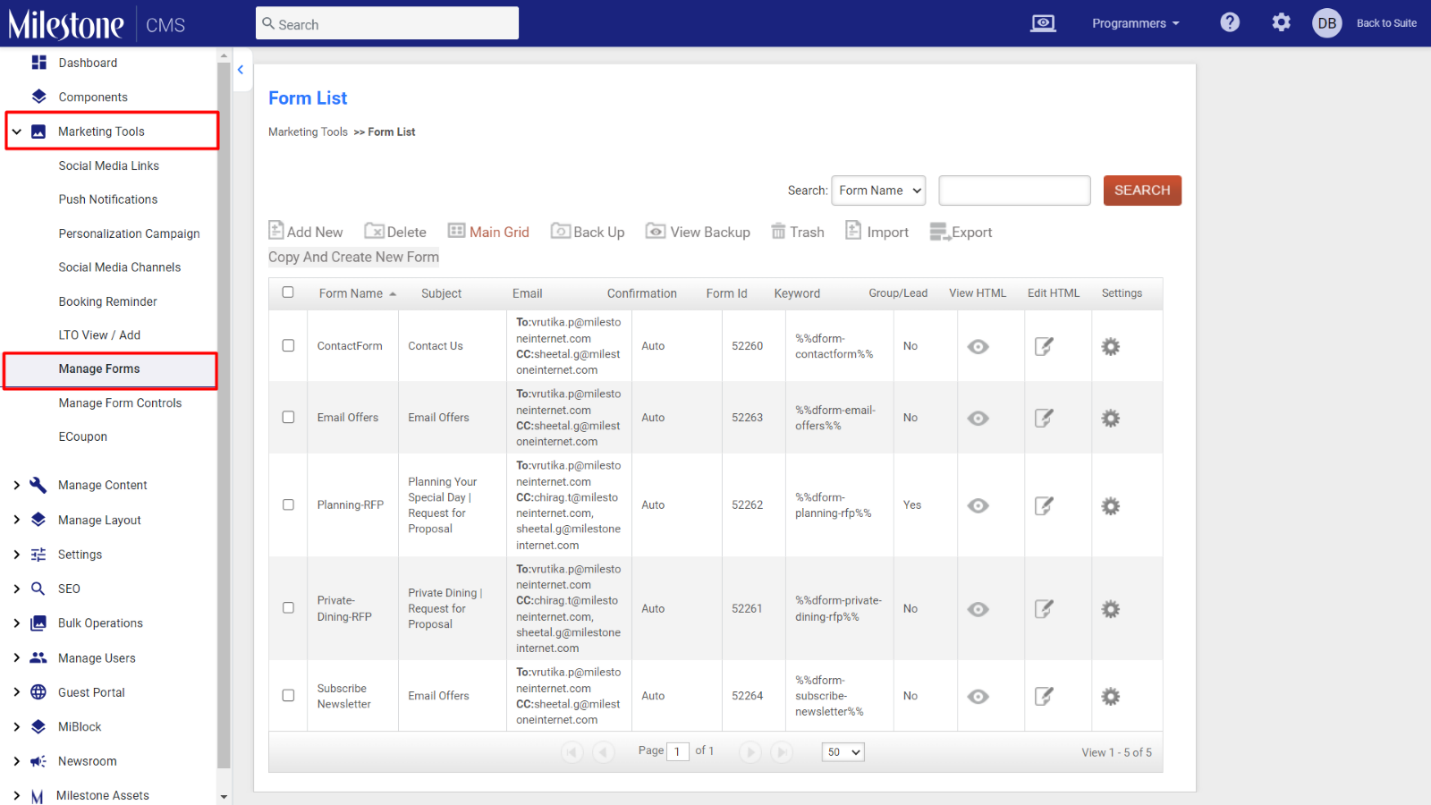
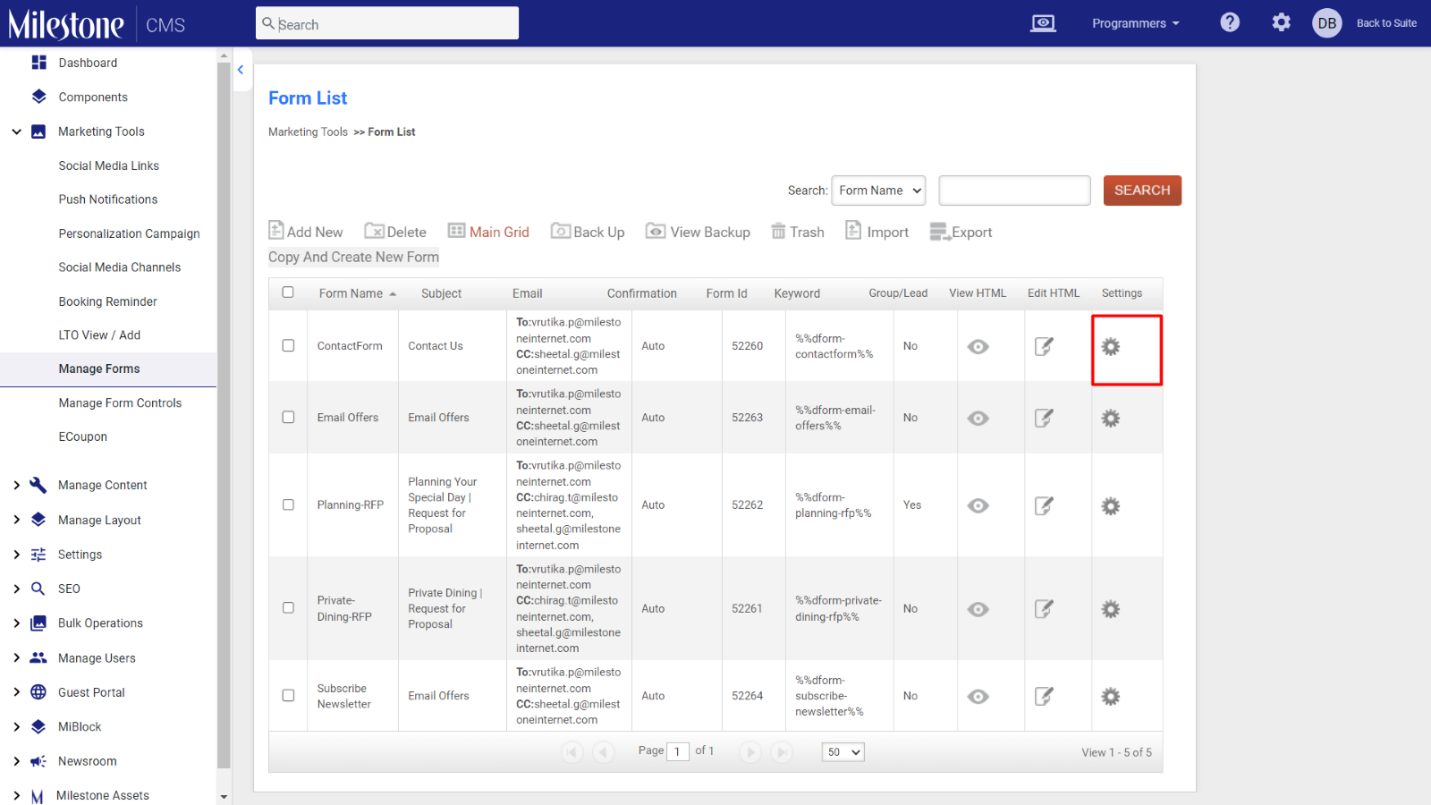
Step 2: You can choose to edit an existing form from the Form List by clicking on ‘Settings’ in the left most column.
Step 3: Select ‘Send Data Via Secure PDF’ on the ‘Add/Edit Form’ page.
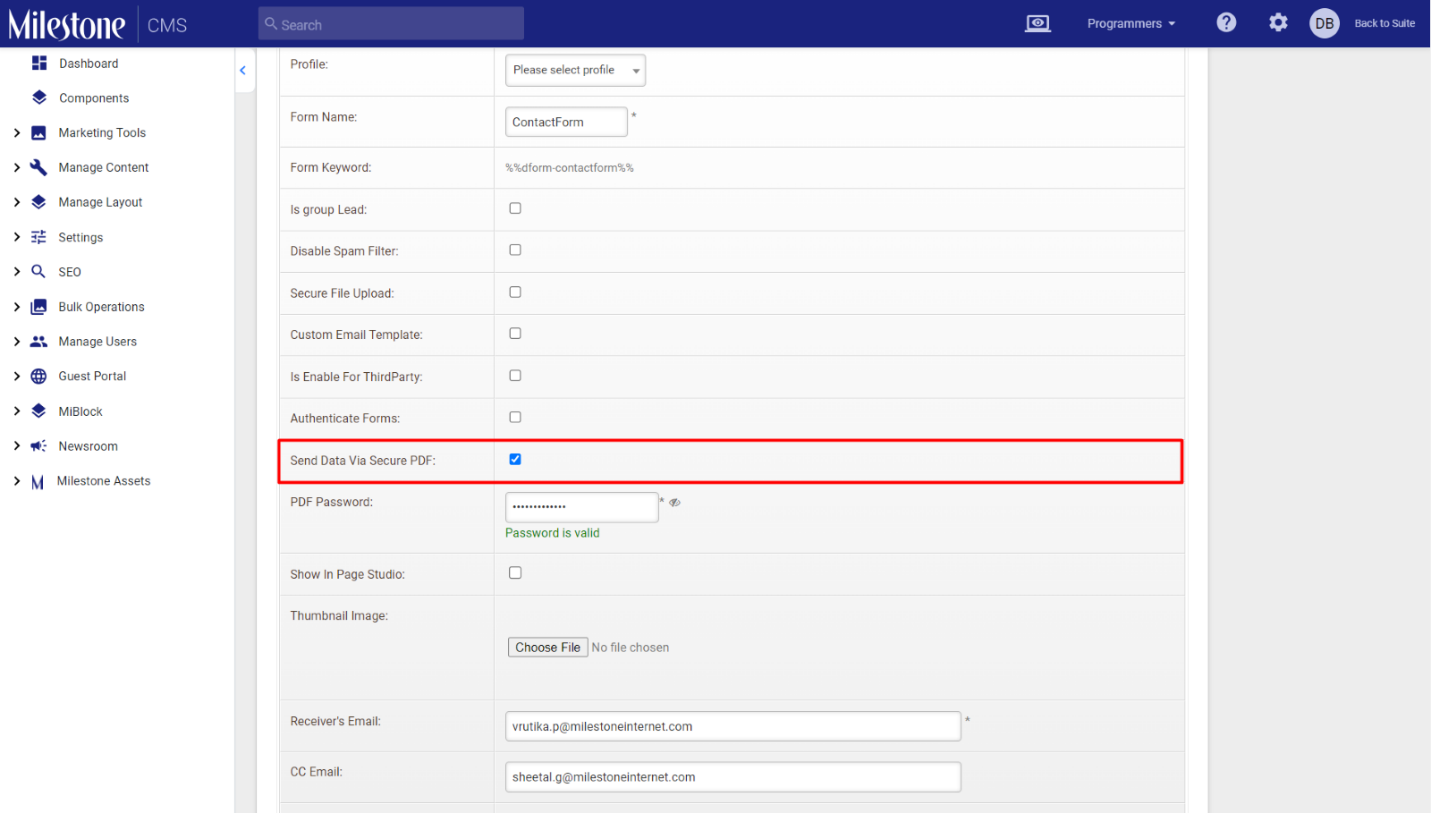
Step 4: Add a Password. The receiver will require this password to open the PDF.
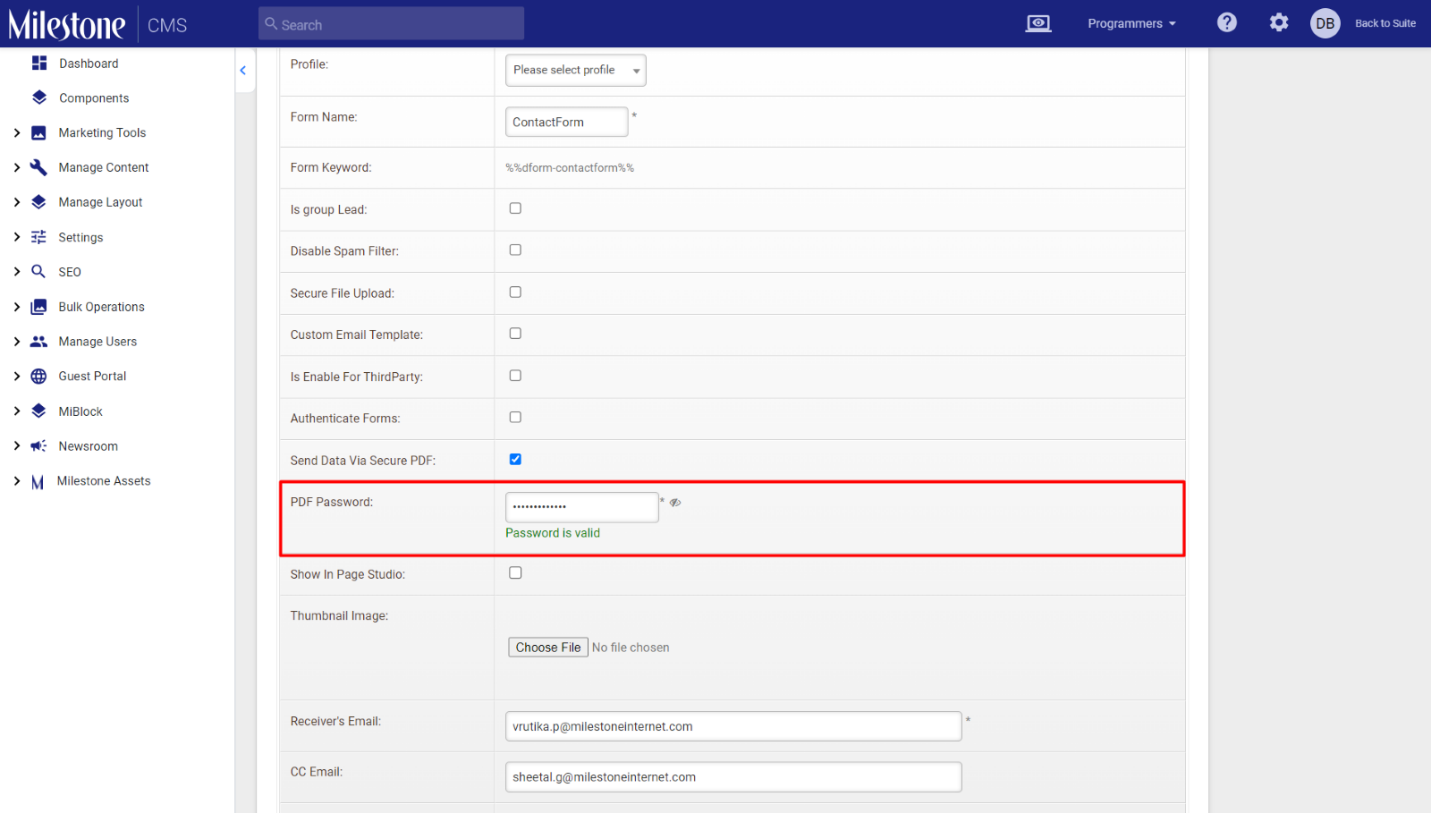
You can also view the password by clicking on the ‘eye’ icon next to the password field.
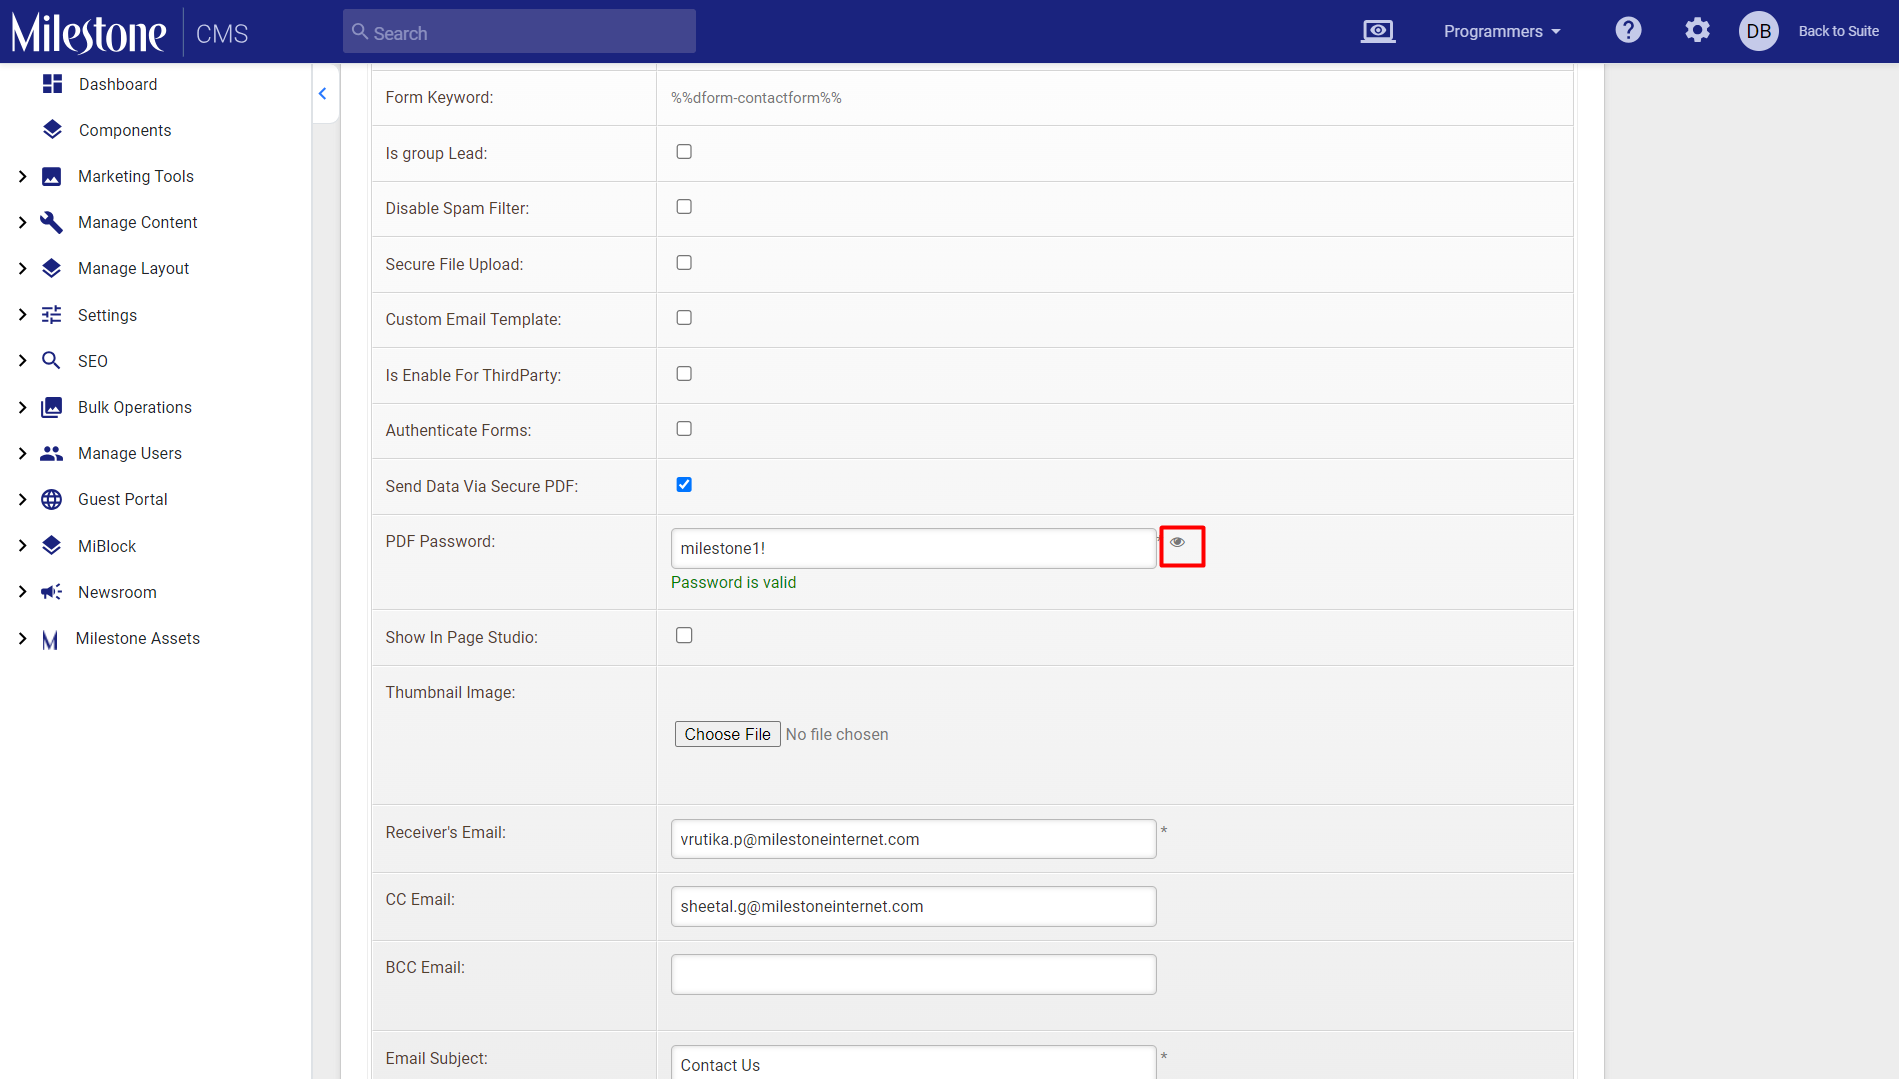
Step 5: Now, click on the ‘Email Trigger Details (To Business)’ tab.
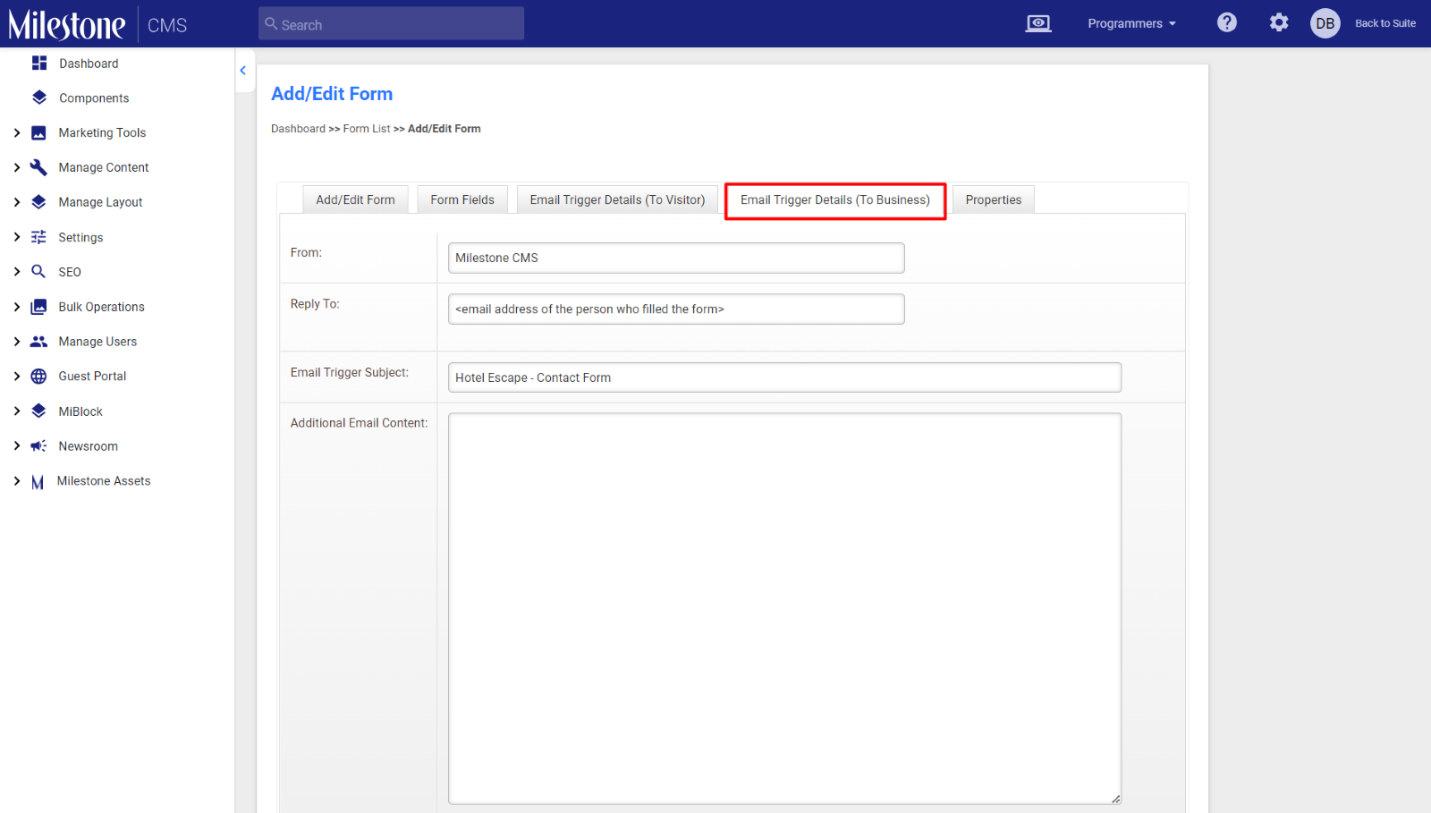
Step 6: Add a ‘PDF Template’ to determine the design of the form and click on ‘Save’.
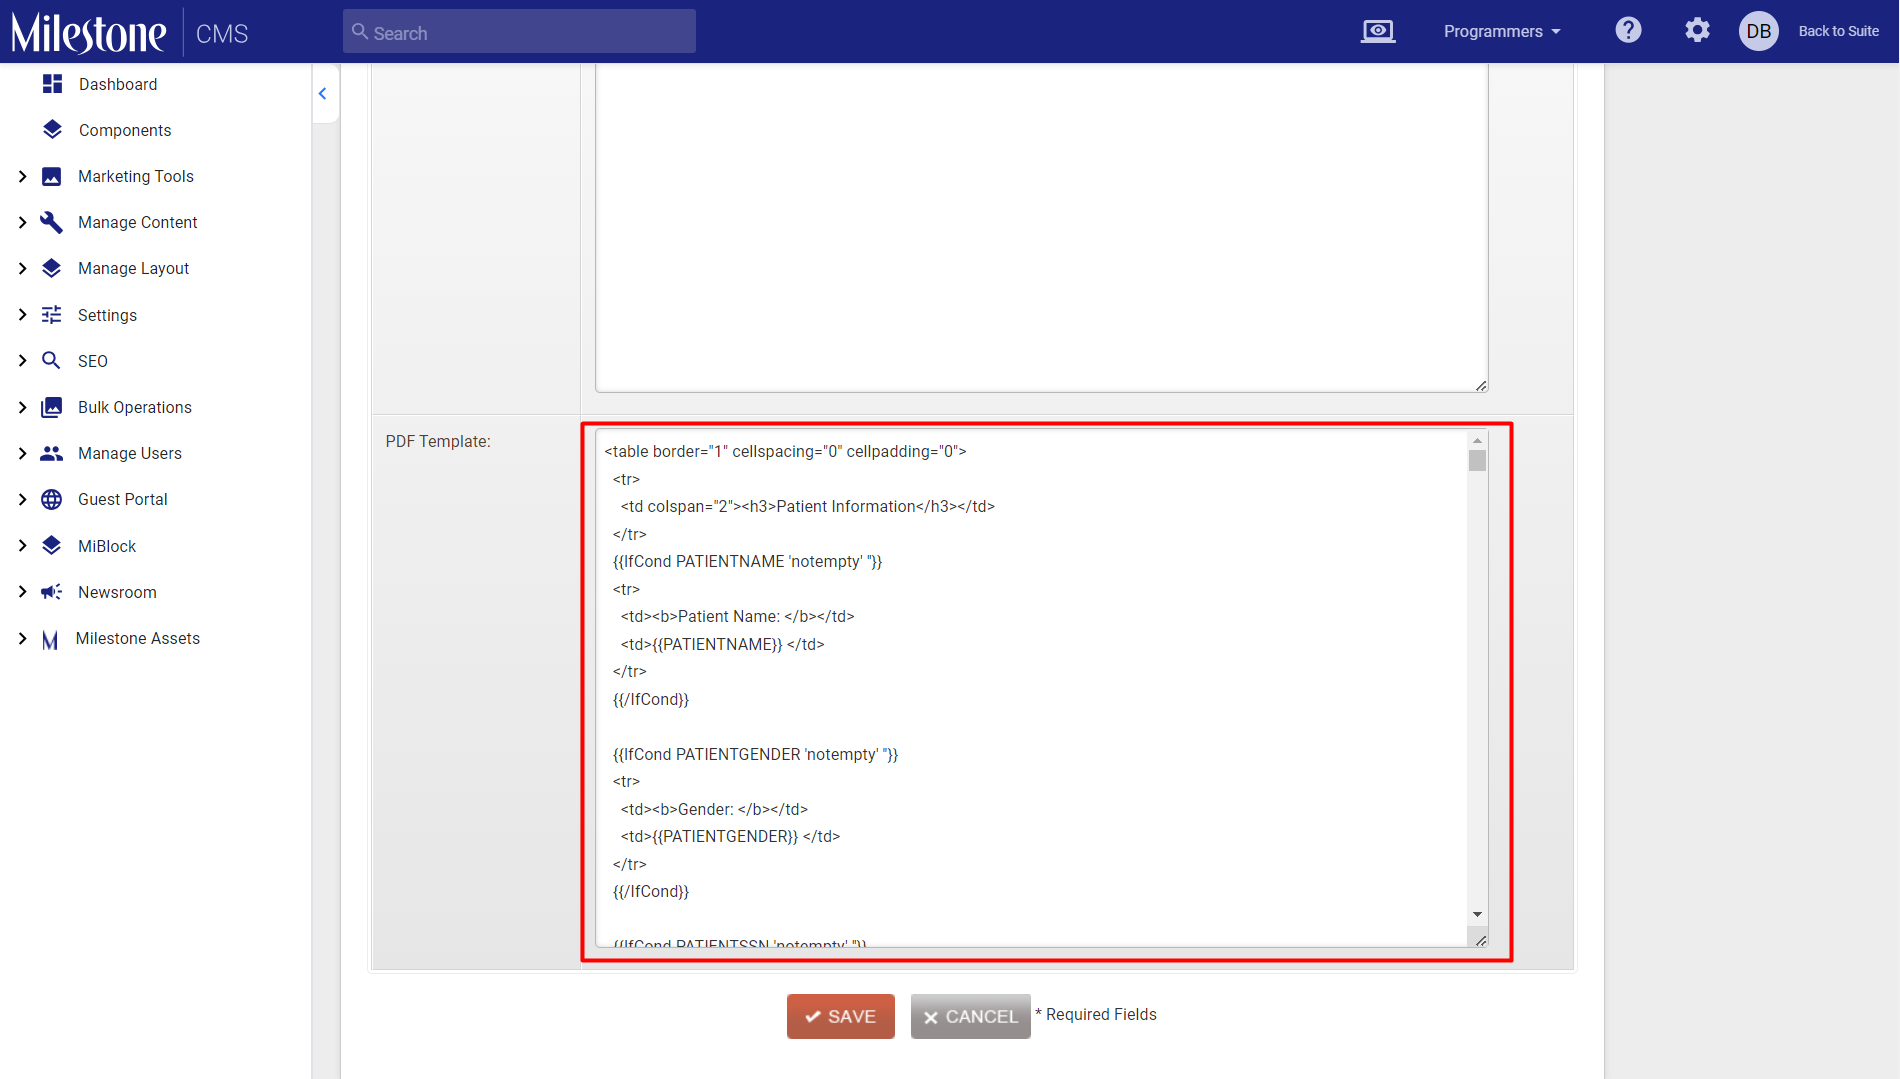
When a form is submitted it will now be sent directly to the business in a Password Protected PDF document.
Third Party Integrations for Forms
Milestone CMS lets users integrate their forms with third party CRMs for streamlining data entry processes as the form submissions are directly integrated into the CRM and improving data accuracy as forms data is transferred directly into the CRM system, minimizing the risk of transcription errors or incomplete information.
Milestone CMS > Manage Forms > Settings
Step 1: Search for ‘Manage Forms’ in the top search bar of Milestone CMS.
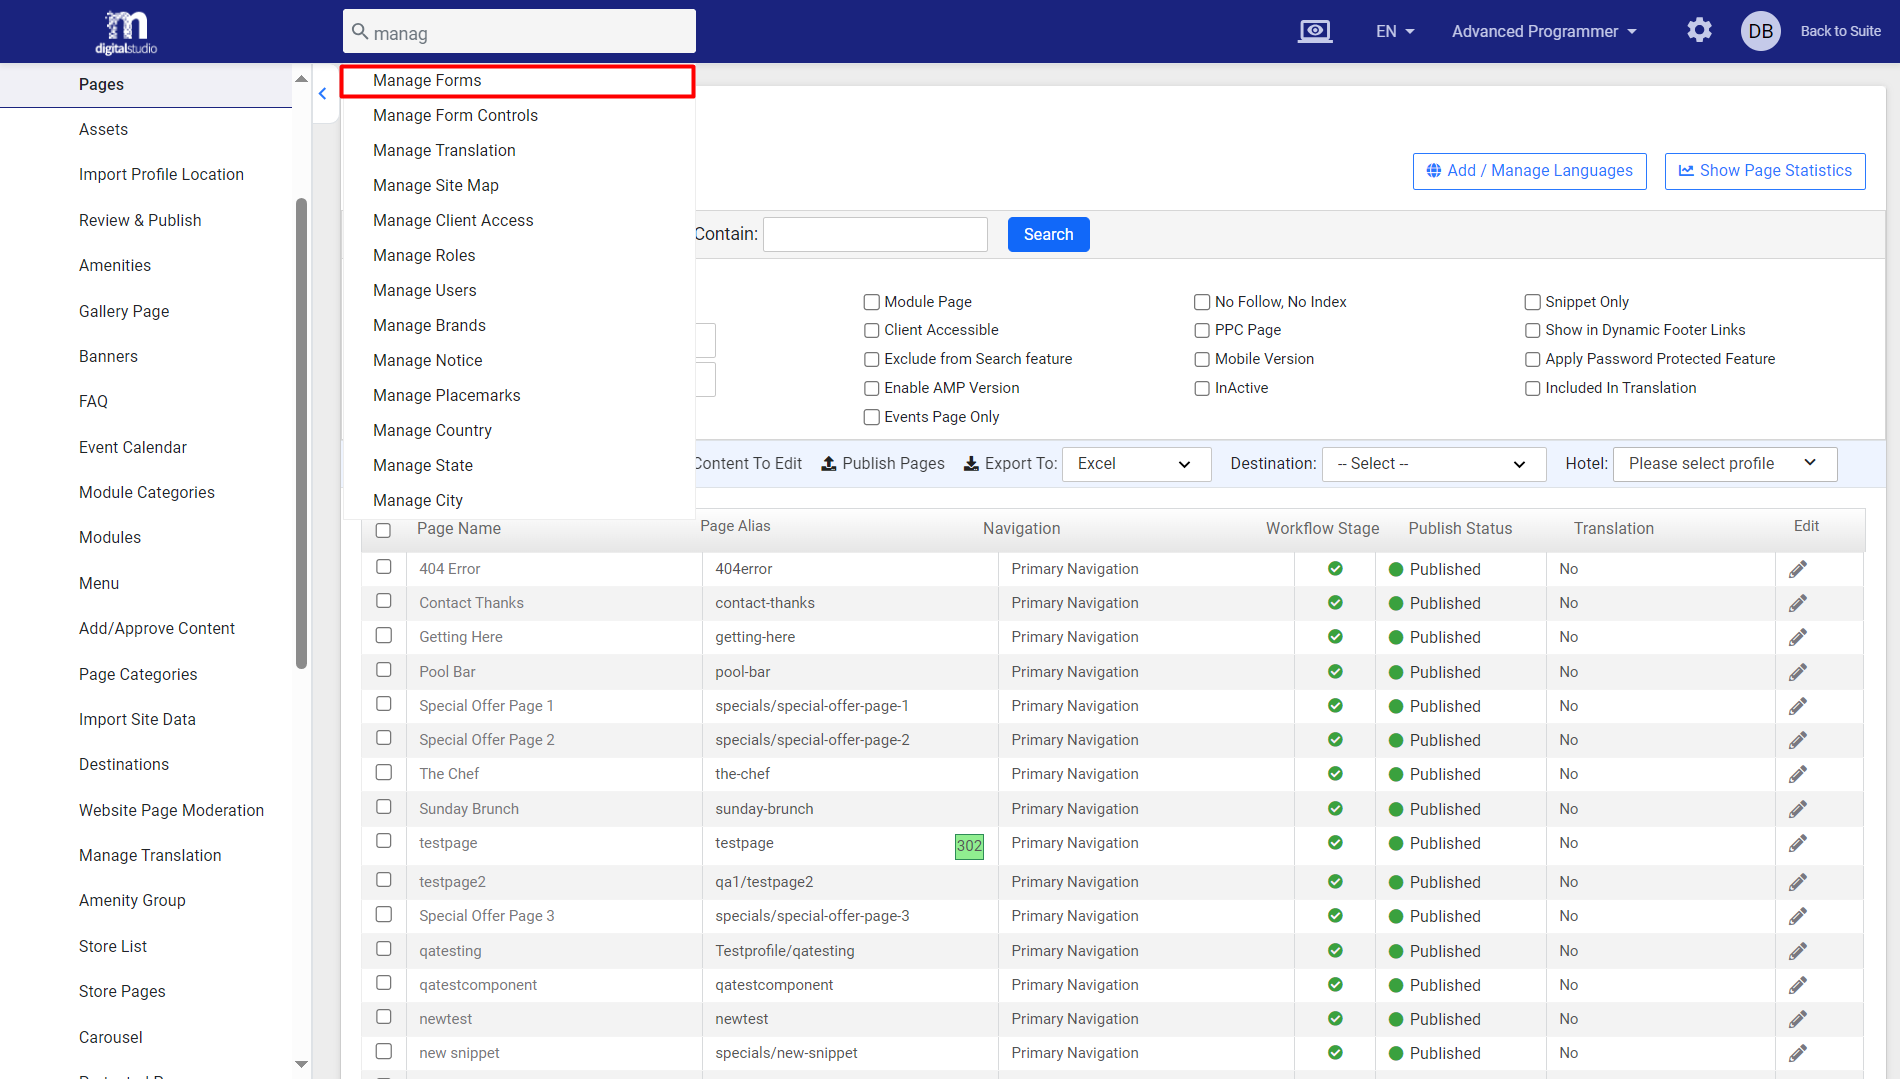
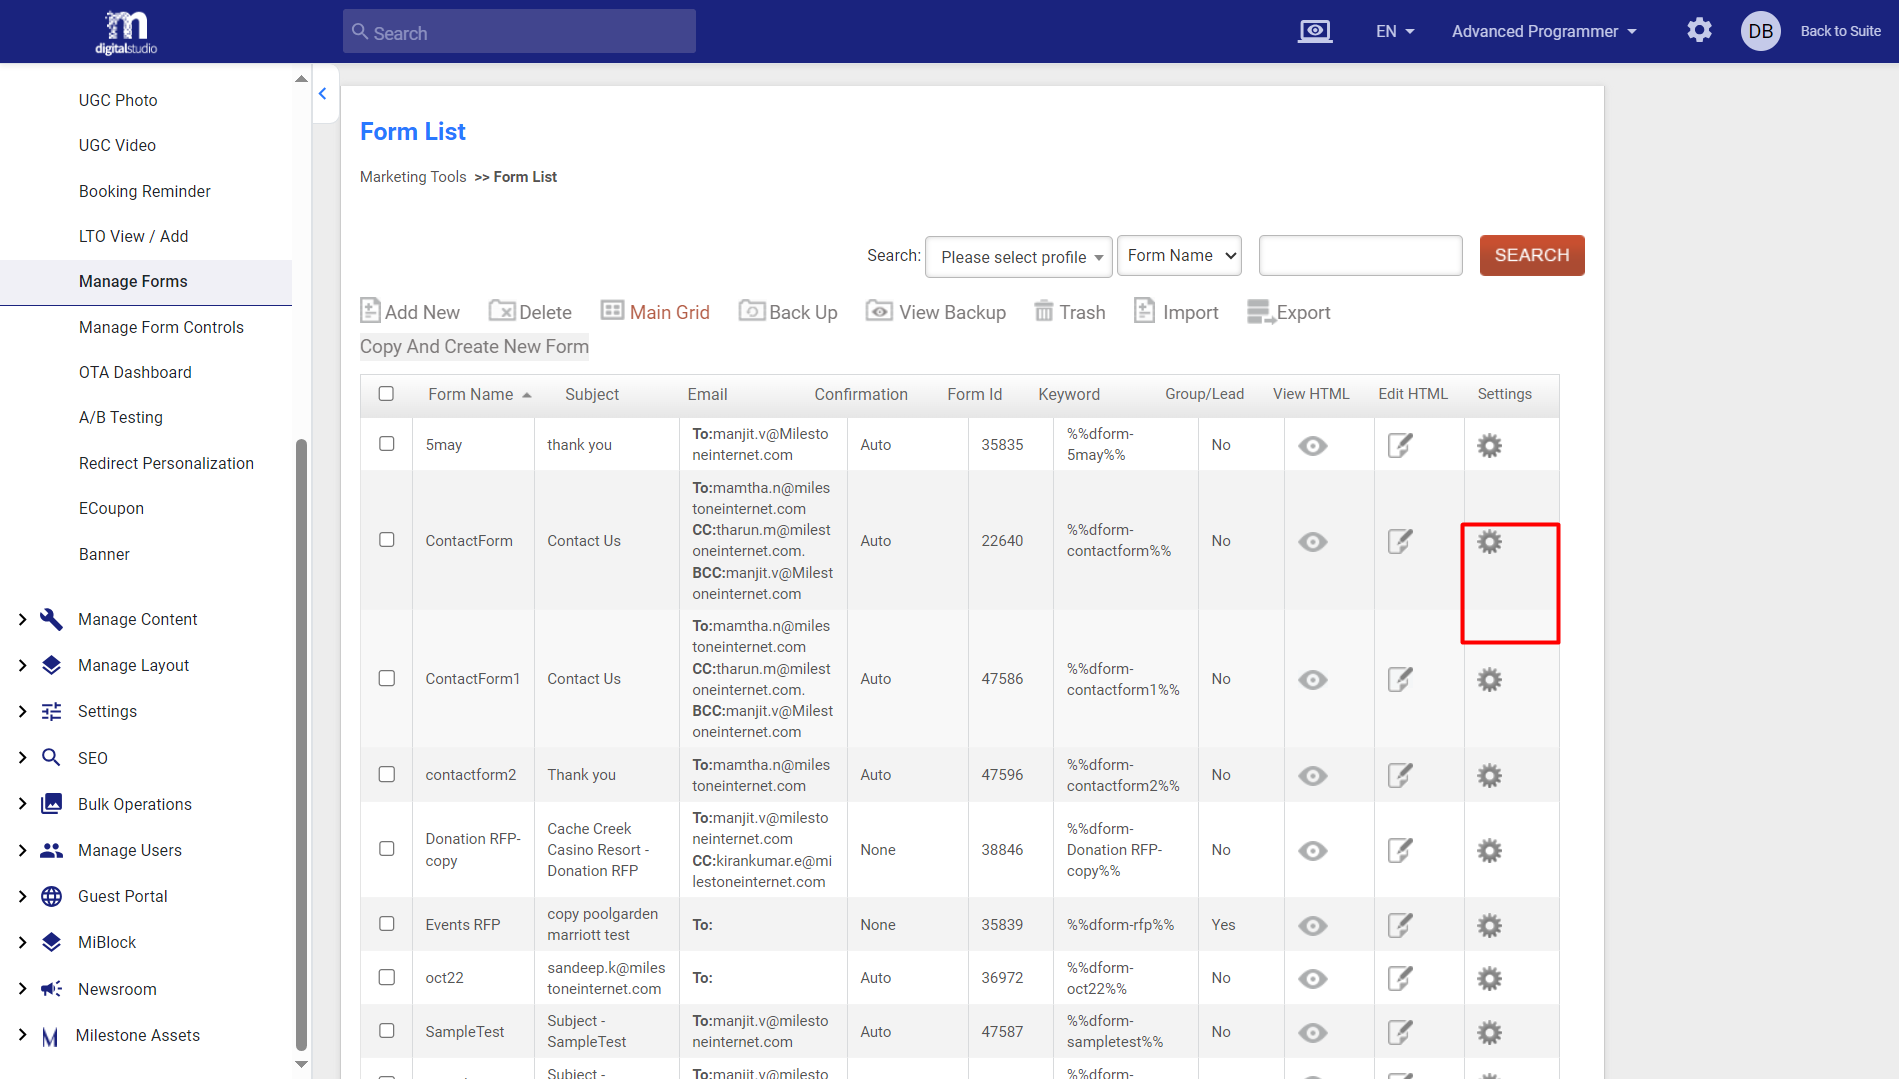
Step 2: Click on ‘Settings’ corresponding to the form you wish to integrate with a third-party CRM.
Step 3: Select ‘Is Enable for Third-party:’ and use the ‘Select Third Party Name’ dropdown to select the CRM you wish to integrate the form with.
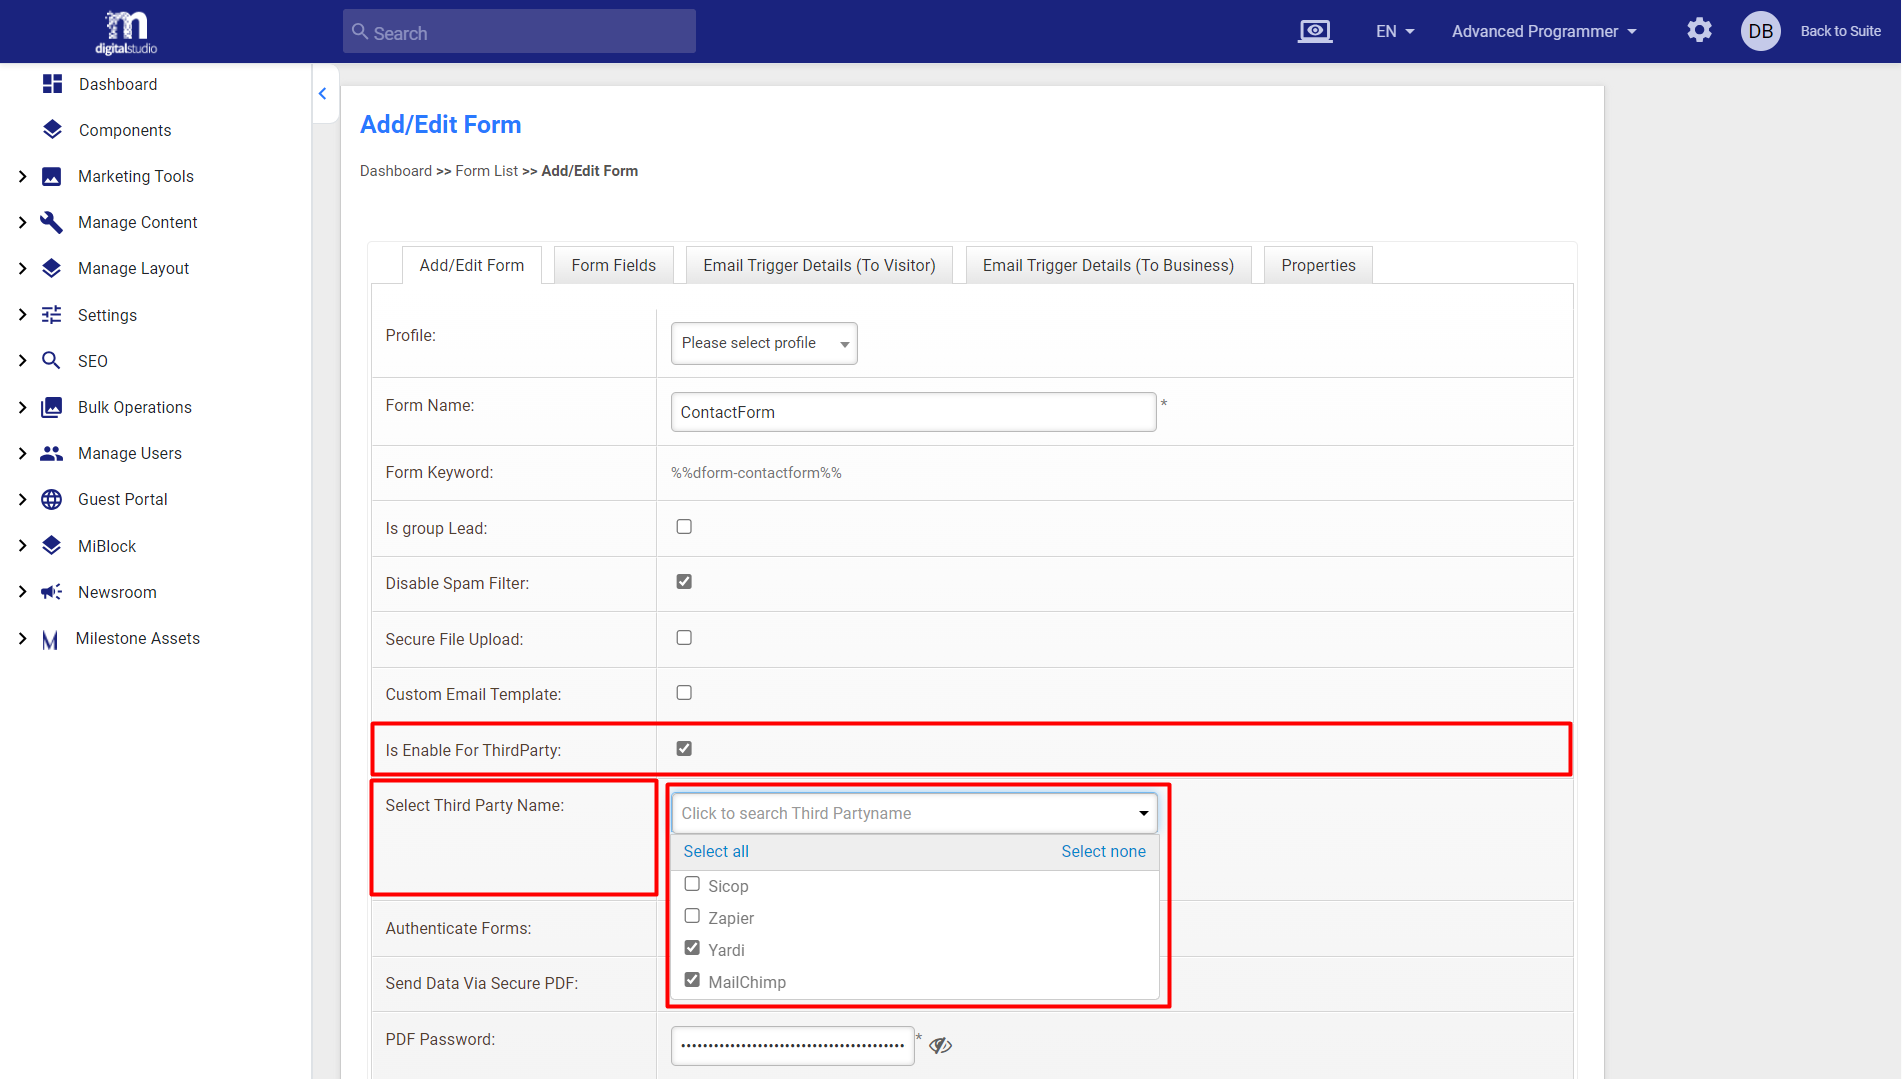
Step 4: Once selected click on ‘Save’ at the bottom of the ‘Add/Edit Form’ section.

Your form data will now automatically reflect on the third-party CRM as well.
Insights
INP data is displayed in Milestone Insights and DPR
INP observes the latency of all website visitor events (click, tap, and keyboard) interactions with a page throughout its lifespan, and reports the longest duration, ignoring outliers. A good INP (below 200ms) means the page is consistently able to respond quickly to most user interactions.
Milestone Insights > Page Experience > Core Web Vitals
Step 1: Click on ‘Page Experience’ in the left navigation panel of Milestone Insights.
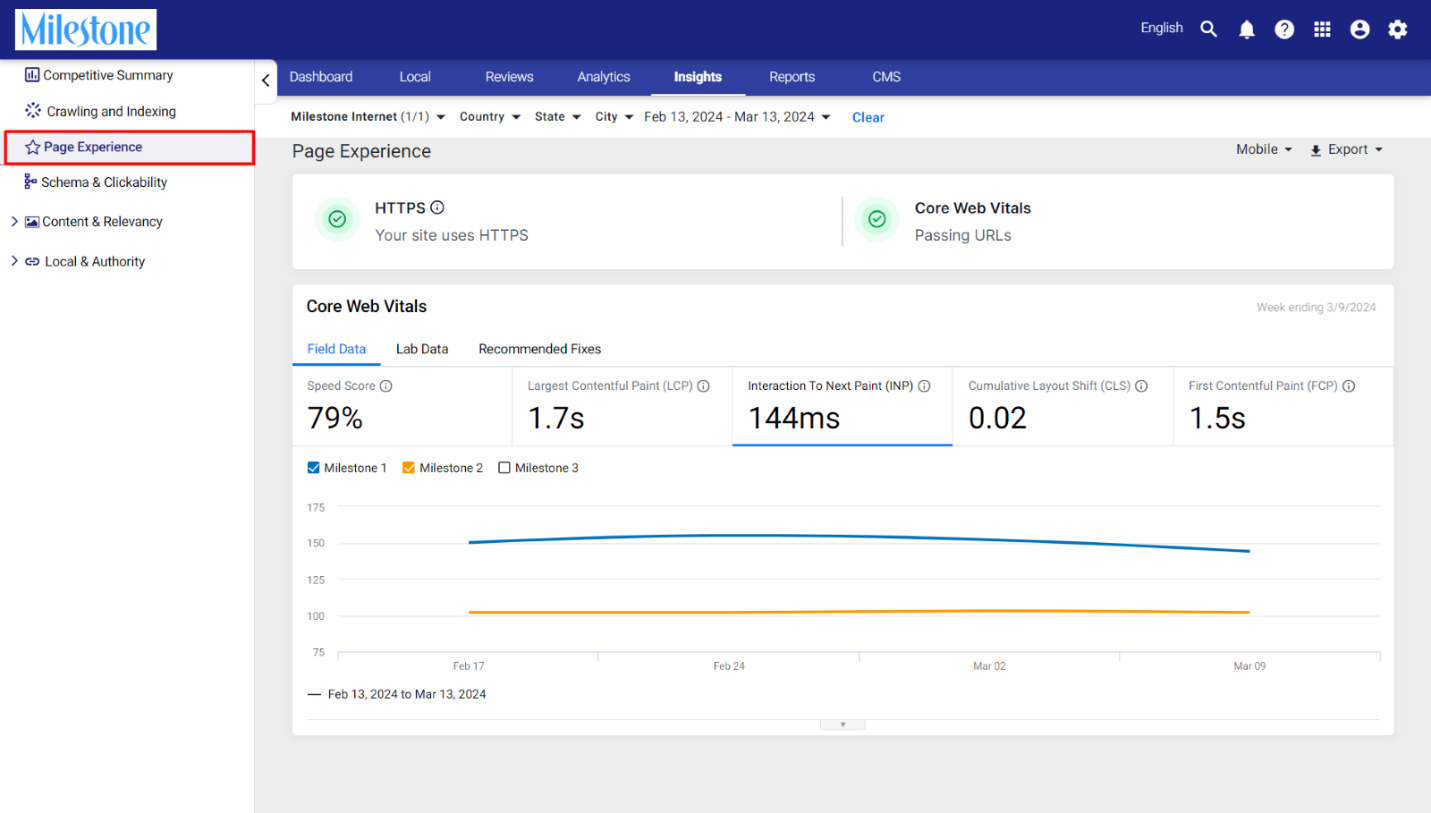
Step 2: Click on the ‘Interaction to Next Paint’ data tile in the ‘Core Web Vitals’ section.
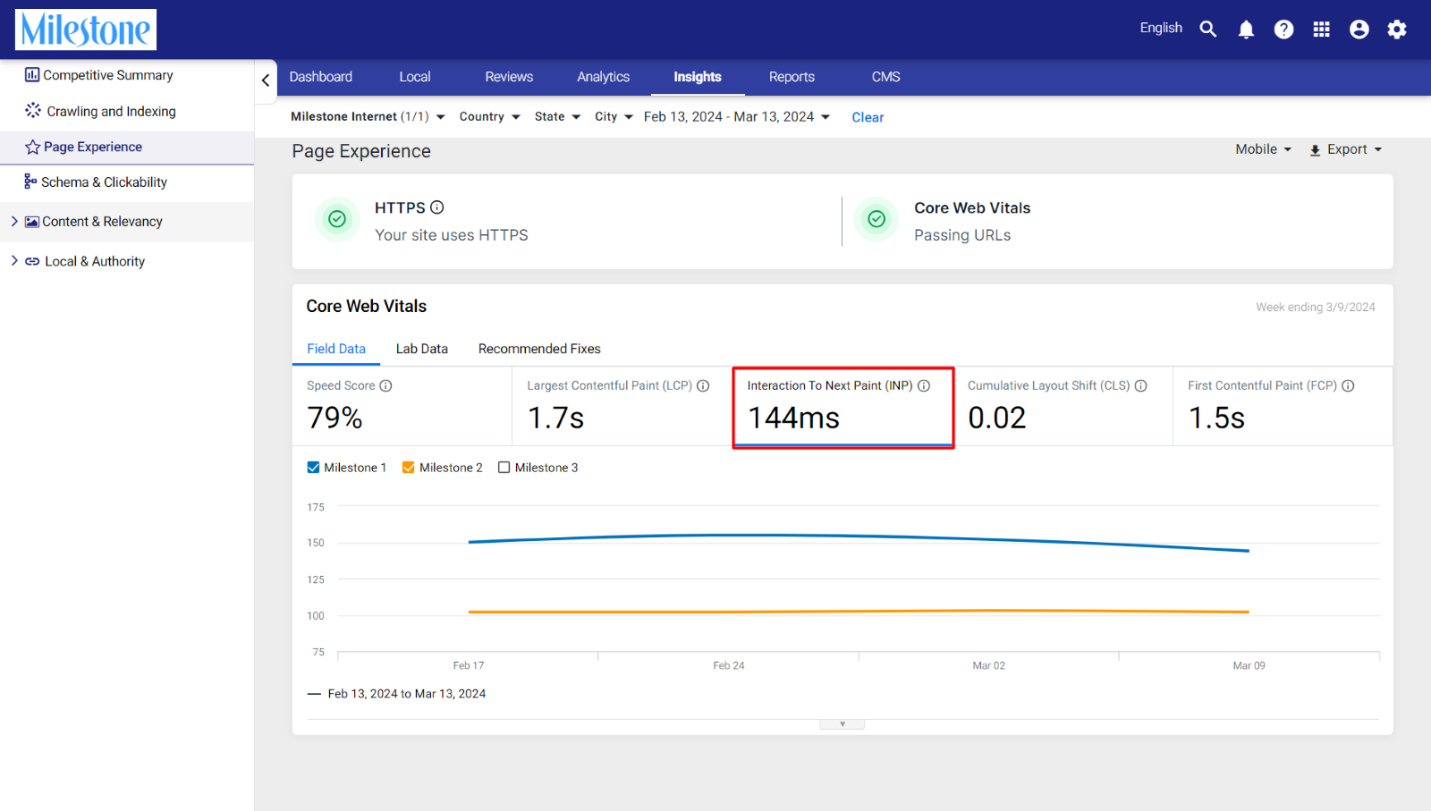
Step 3: You can select and deselect locations using the checkboxes to the top of the visualization.

INP data is also available in the Digital Presence Report within the ‘Reports’ section.
Milestone Reports > Digital Presence > Core Web Vitals
Step 1: In Milestone Reports click on ‘Digital Presence’ to view the Digital Presence Report.
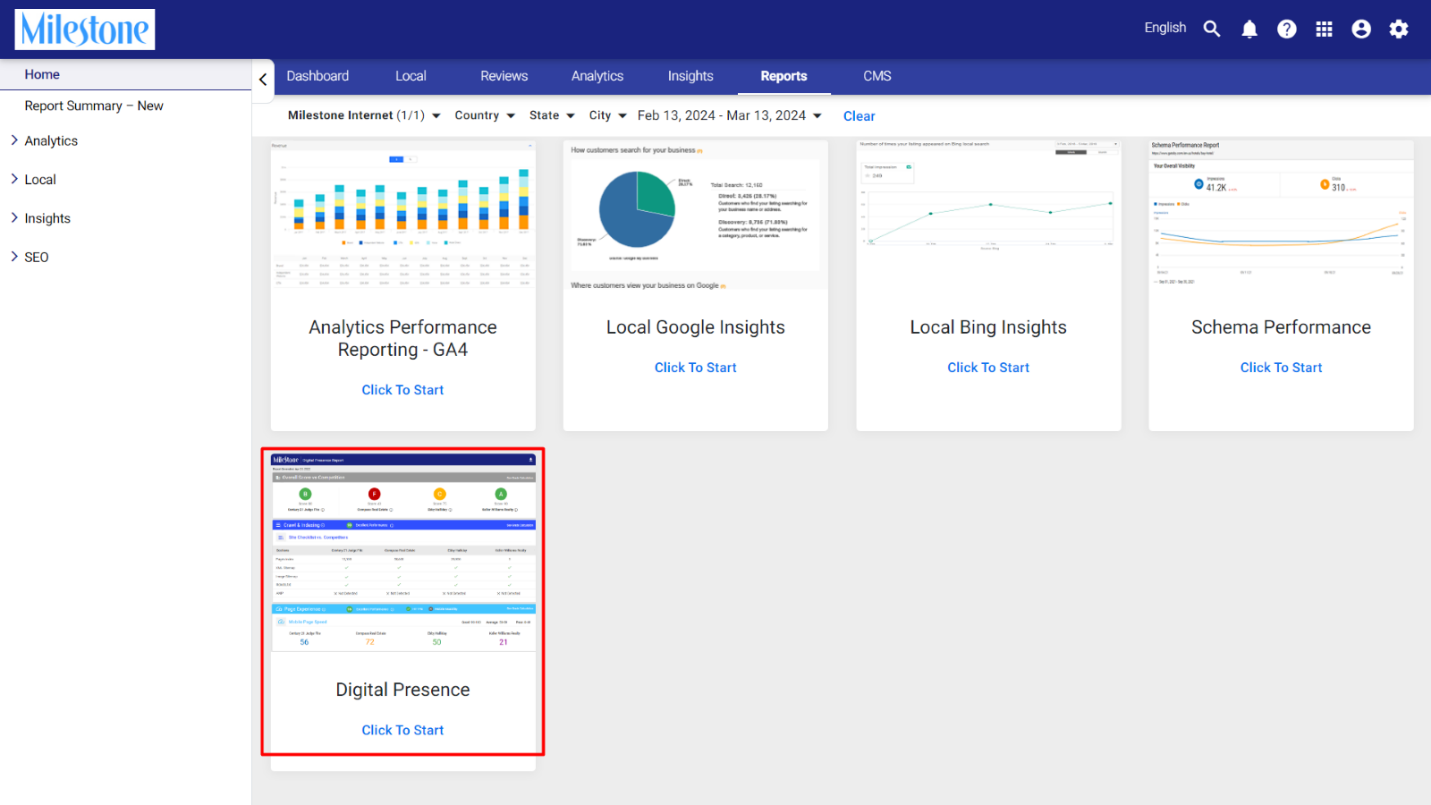
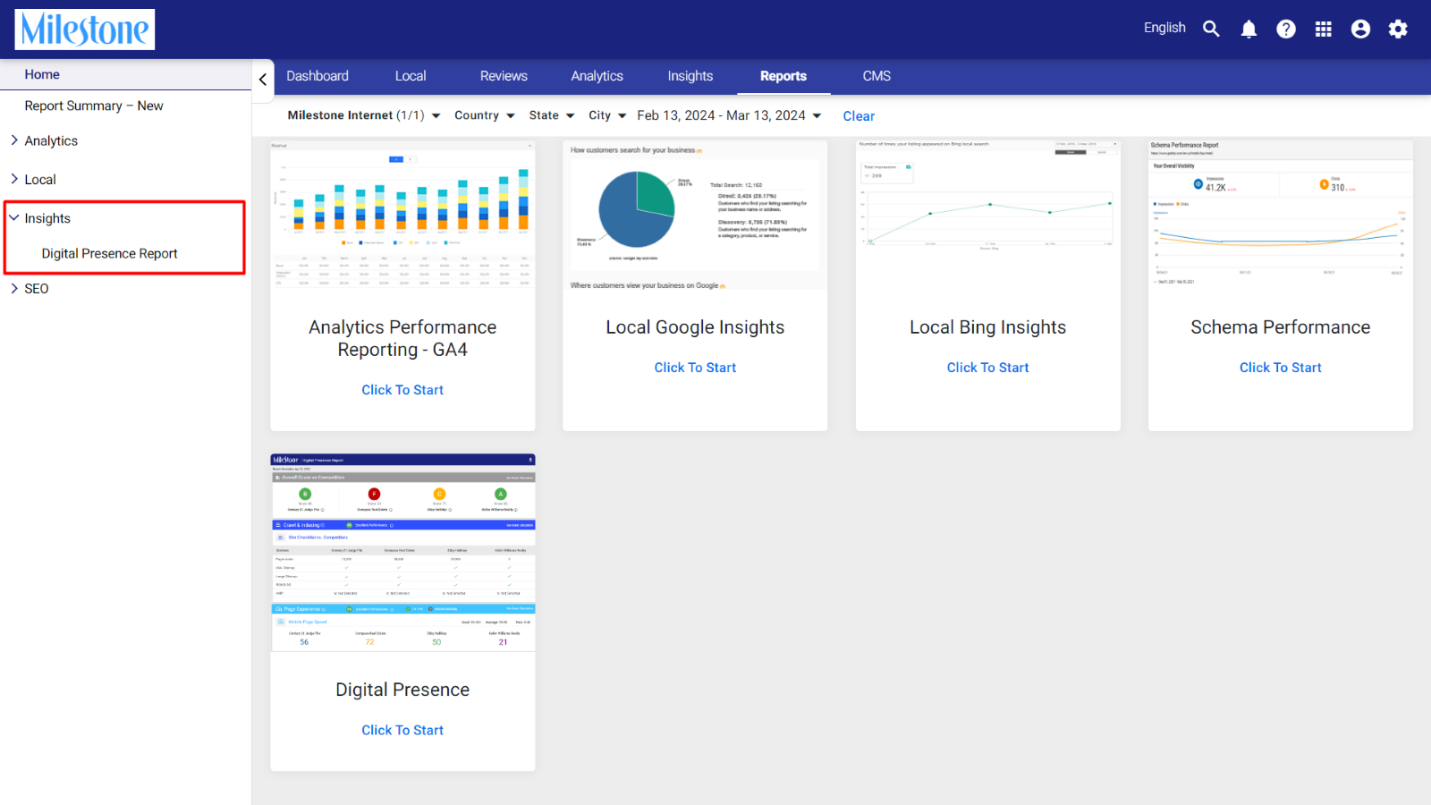
Alternatively, you can click on ‘Insights’ in the left navigation panel and select ‘Digital Presence Report’.
Step 2: In the Digital Presence Report you can view INP data under the Core Web Vitals section.
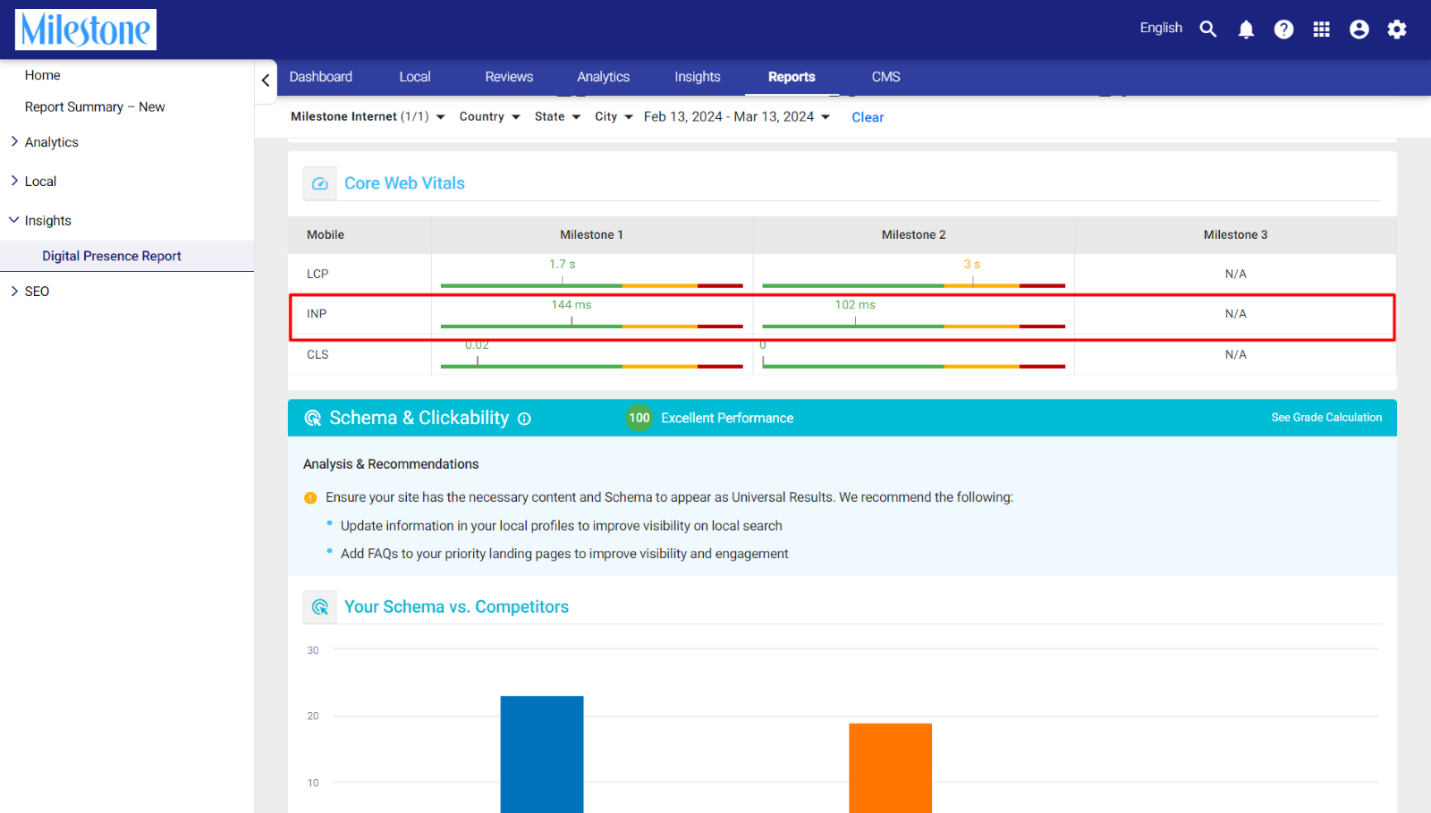
If the INP falls within the green section it is considered ‘Good’, within the yellow section it is considered ‘Average’ and within the red section is considered ‘Bad’.
Analytics
Encrypted Group Leads Data
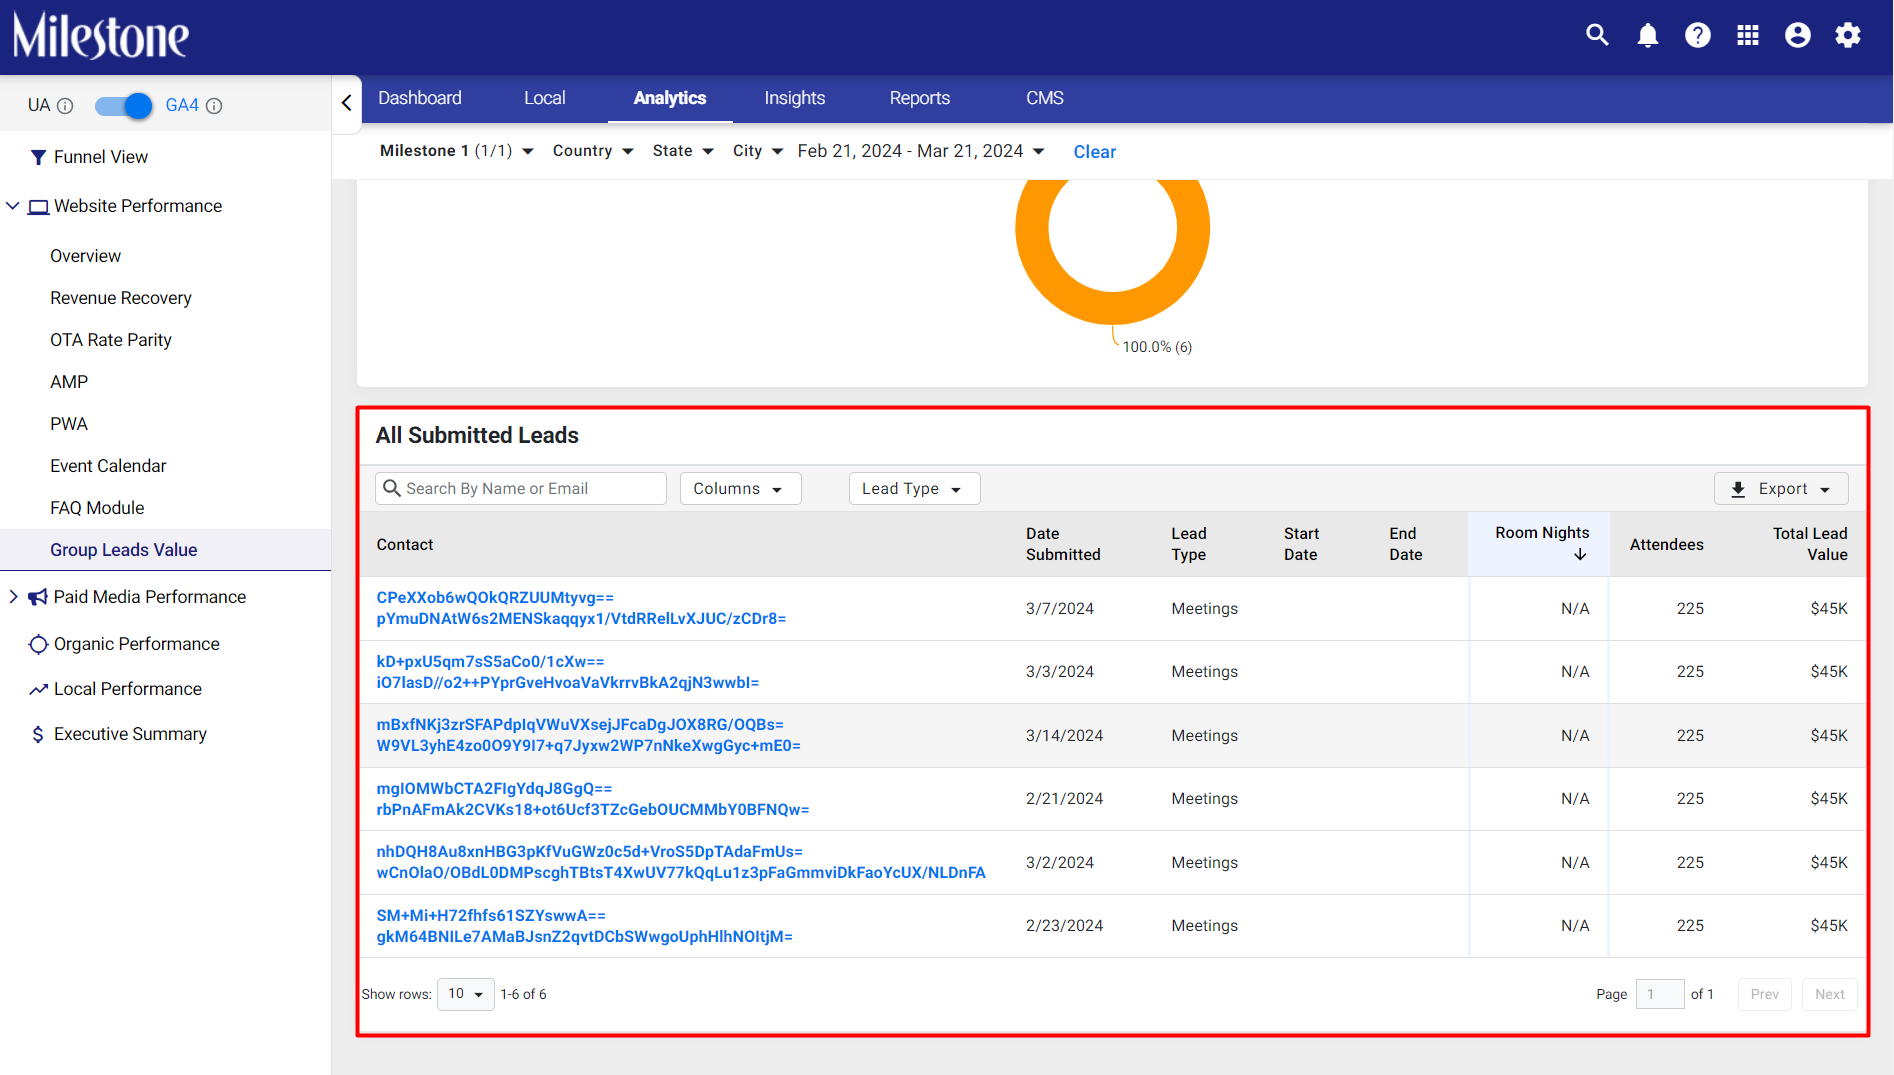
Due to a change in Milestone CMS RFP data encryption related to Personally Identifiable Information (PII) policy Milestone Analytics will now display encrypted data.
Milestone Analytics > Website Performance > Group Leads Value
Step 1: Click on ‘Website Performance’ in the left navigation panel of Milestone Analytics.
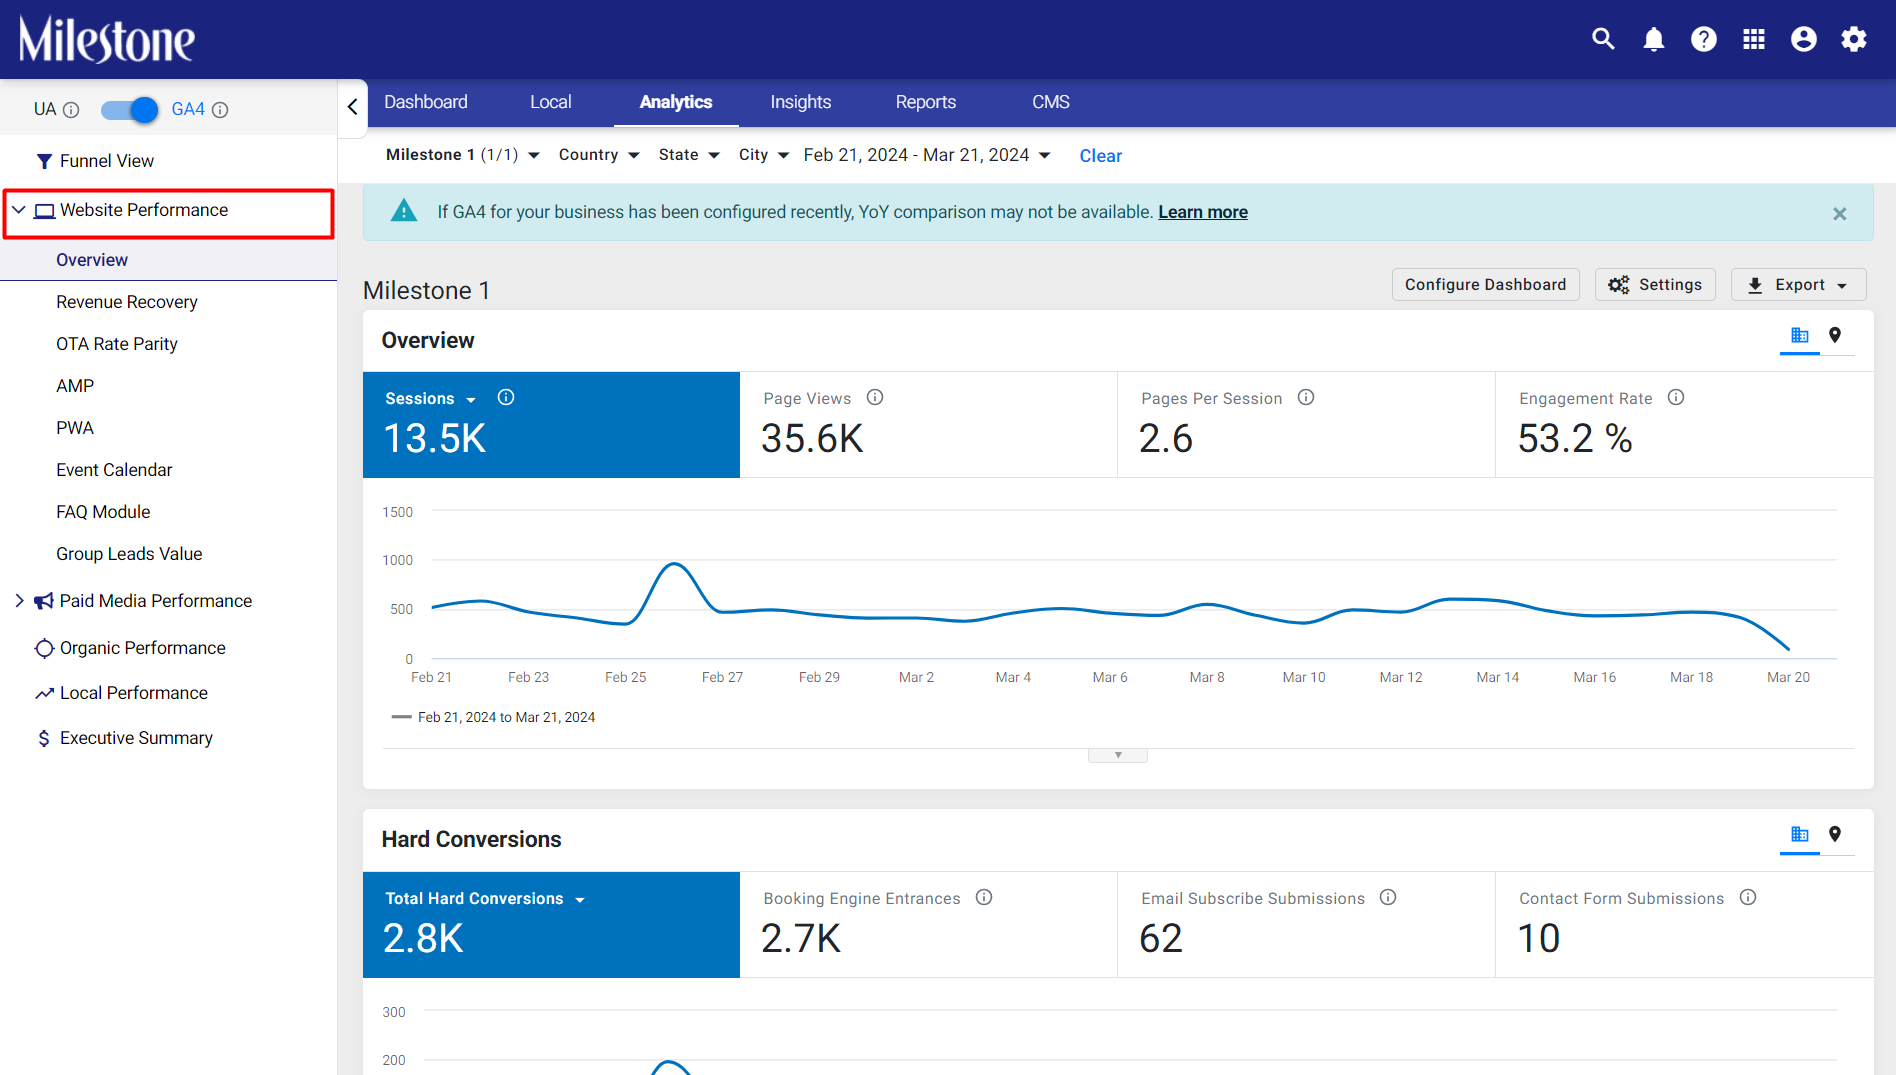
Step 2: Click on ‘Group Leads Value’ within the ‘Website Performance’ menu.
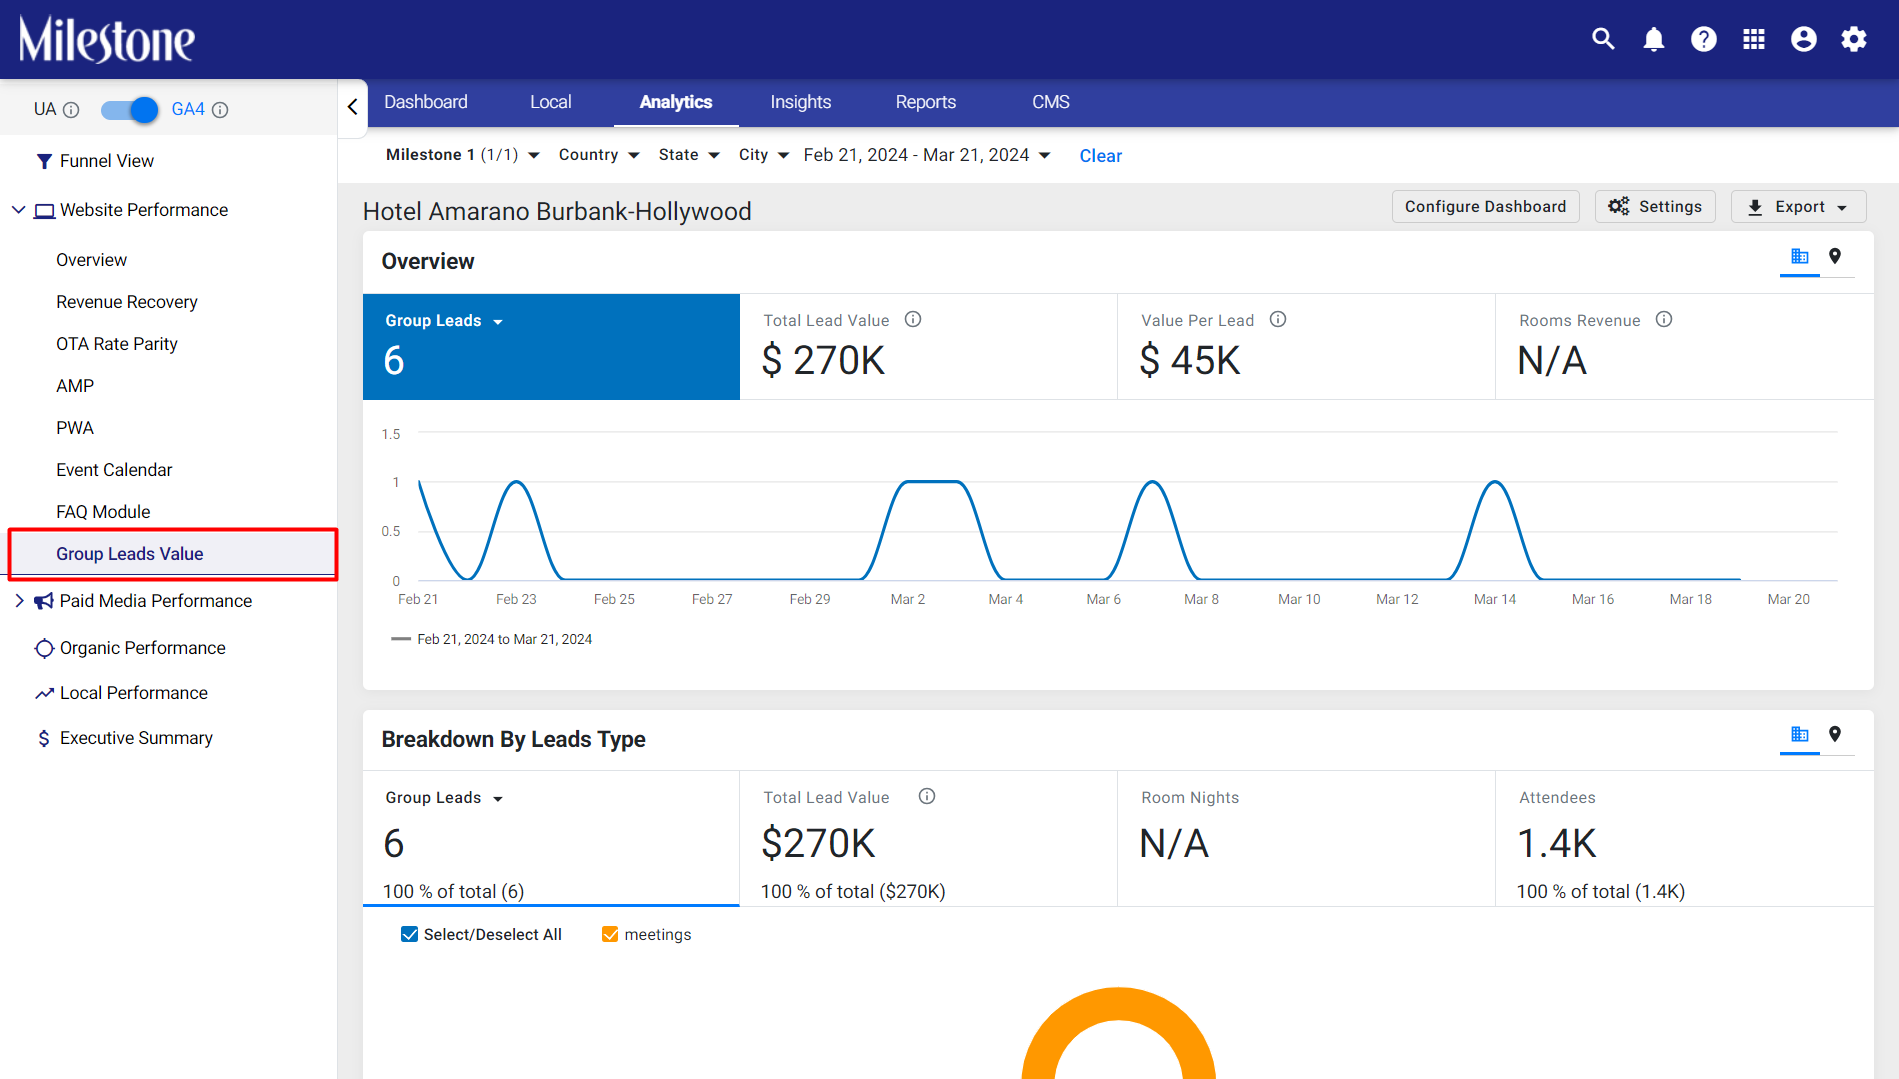
Step 3: Under the ‘All Submitted Leads’ section you can see that the contact information has been encrypted to prevent any instances of Personal Identifiable Information (PII).
