Photo Gallery
Your business can use the photo gallery to showcase your products and services on offer and create an immersive experience on your website. Let’s show you to update your content.
Accessing photo gallery
To access the photo gallery, on your gallery page, click on the edit button against any image.

Alternatively, you can click on the left-hand navigation, under ‘Manage Content’ click on ‘Gallery Page’.

Likewise, on the dashboard choose ‘Gallery Page’ or use the quick access search bar.

Editing categories
To edit the settings of a category, click on the ‘edit' button against the name of the category.

Enter the settings of the category:
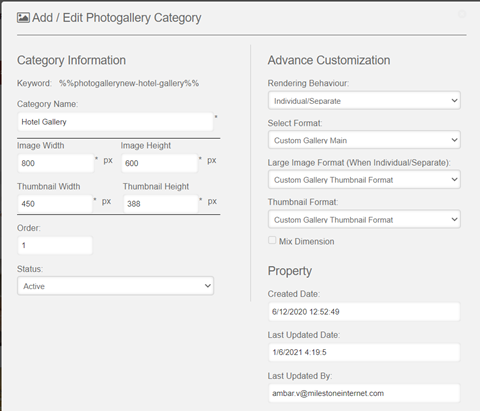
Category information:
- Name of the category
- Image dimensions
- Order of display
- Status: Whether it should be active or not

Advanced Customization:
- Rendering behavior: Whether the category should be displayed separately or together with other categories
- Layout format
- Image format
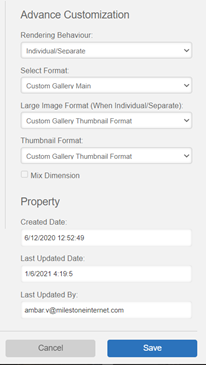
Once you’ve made edits to the category settings, click on ‘Save’.
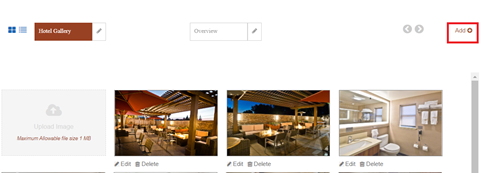
To add a category, click on ‘Add’.
Adding, editing & deleting images
To add an image, click on the ‘Upload’ button. Maximum size of 1MB can be uploaded. Upload an image from your local device.

To edit or delete an image, click on the corresponding buttons below an image.
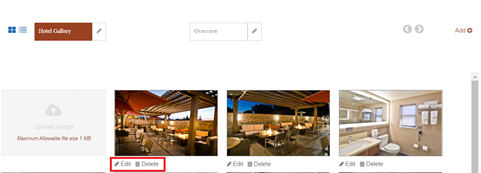
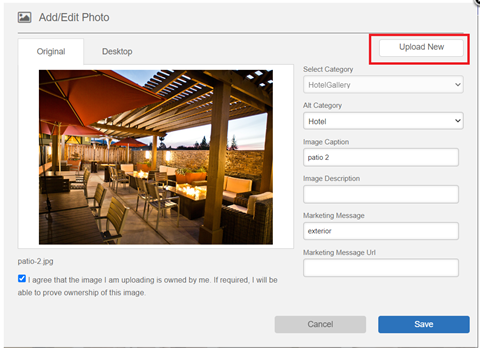
If you’ve chosen to update an image, select an alternative category (if relevant), image caption and description, marketing message, agree with the terms and conditions, and click on ‘save’.

To replace an existing image, click on ‘Upload’.
