Managing events
Adding an Event
Let’s help you add an event to your business website. To get started, log in to the Milestone Presence Cloud (MPC) using your client credentials. Now, follow the steps mentioned below to add an event:
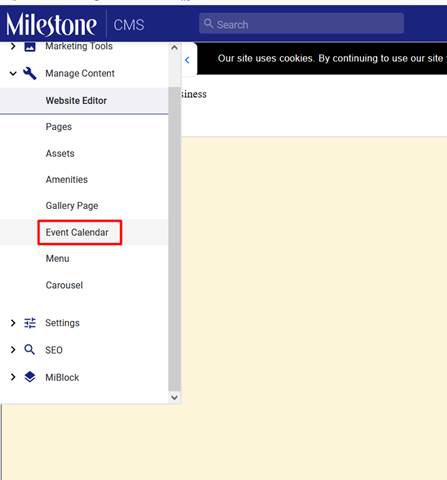
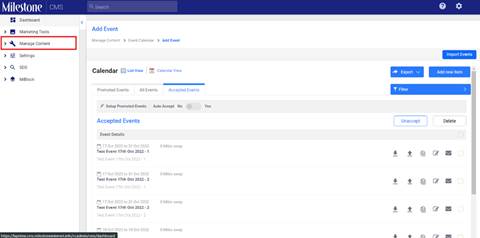
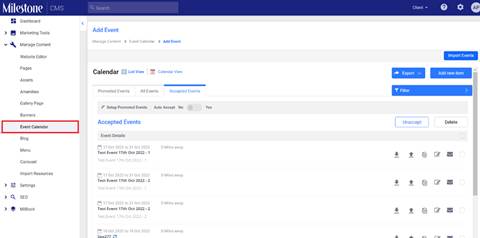
Step 1: You can access the Event Calendar from the Website Editor from the left Navigation panel. Click on ‘Event Calendar’ under ‘Manage Content’.
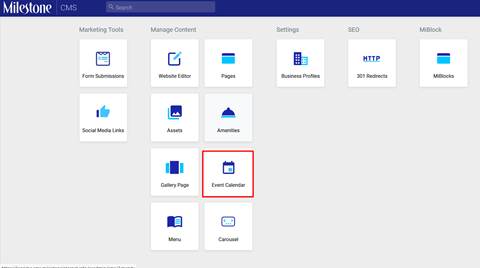
Alternatively, you can access the Event Calendar from the Dashboard by clicking on the Event Calendar icon under the 'Manage Content' section. You can also use the quick access search bar at the top, and type in event calendar.
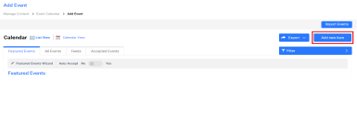
Step 2: Click on ‘Add new item’ to add a new event.
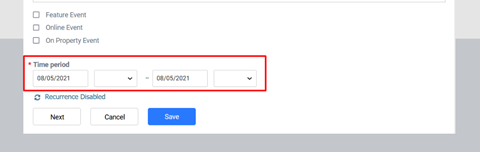
Step 4: Under'Event Details' you will now have to mandatorily enter all fields with *. So, you would have to enter fields such as 'Event Name', 'Category', 'ShortDescription', and 'Time Period'.
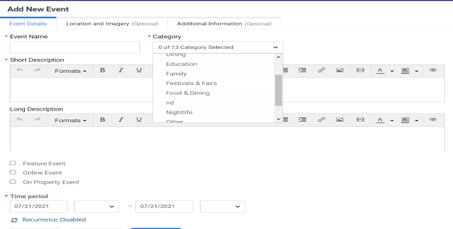
You can set up three types of events in the Event Calendar.
FeatureEvent: This is the main event you are featuring on your Event Calendar.
Online Event: This event will be held online. Events like Webinars, Online conferences, online releases, etc.
On-Property Events: These events are held at your business location.
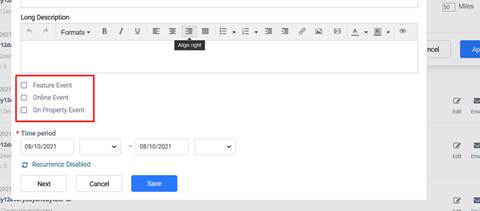
Important: Choose whether the event is a recursive or a non-recursive event.
If the event occurs periodically enable ‘Recurrence’ and set the frequency.
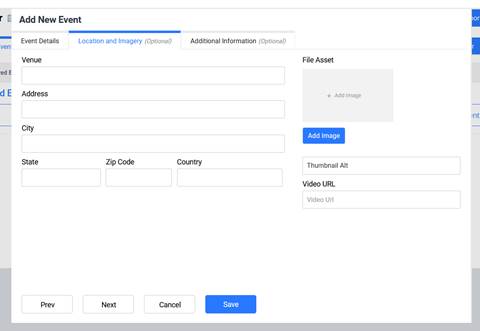
Under the ‘Location and Imagery’ tab, you can add the address and images of the event location. You can even add a video using the Video URL option.
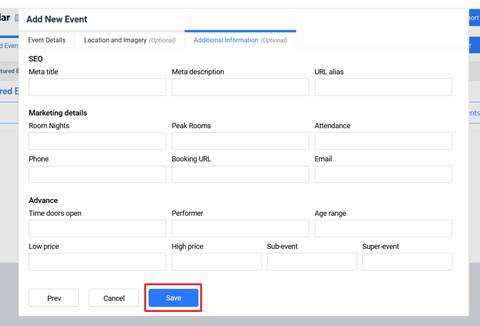
Under the Additional Information tab, you can add information for SEO, Marketing, and advanced information for attendees.
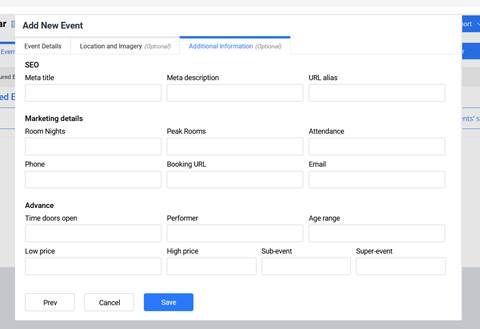
Fill in the fields and click on 'Save' to add the event to your Event Calendar
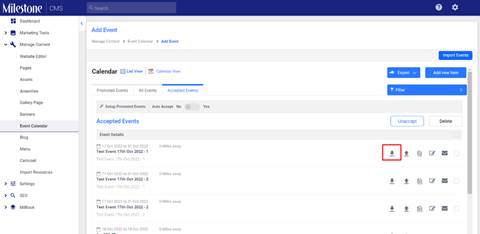
Featured and Accepted Events
Featured Events are third-party events that can be featured on your Event Calendar to increase traffic to your business. The details of events happening around your business location are fed into our CMS by an event discovery channel. You can set up the channel with your preferences by using the Featured Event Wizard.
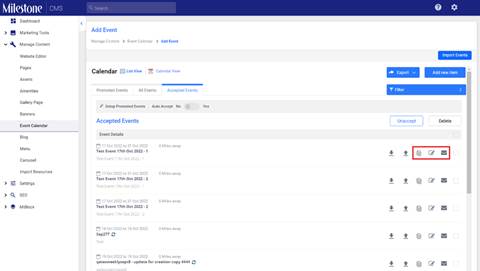
Accepted Events are those that you have personally selected to be displayed on your business website.
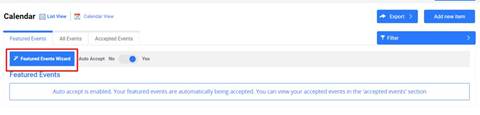
However, if you have clicked on ‘Yes’ for ‘Auto Accept’ of events, all Featured Events will be displayed as Accepted Events.
![]()
Choose ‘No’ if you wish to handpick the events displayed on your business website from the Featured Events feed.
You can also ‘Unaccept’ events that were previously ‘Accepted’ from the ‘Featured Events’ feed.
Select the ‘Event’ you wish to ‘Unaccept’ 
Click on the ‘Unaccept’ button

The event will be removed from your Accepted Event’ section. You can access this event again from the 'All Events' tab.
All Events Tab
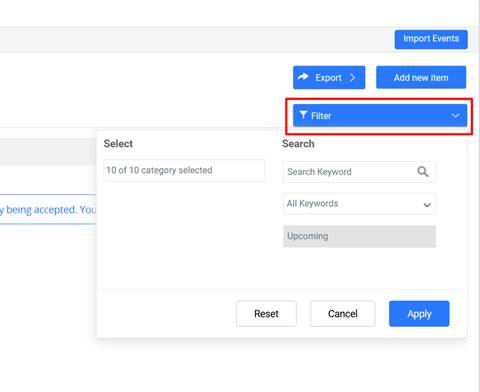
The ‘All Events’ tab shows you all the 'Accepted' and 'Unaccepted' events associated with your business.
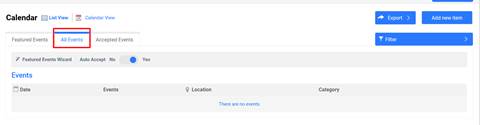
You can filter events by Category, Keywords, and Distance from the venue.
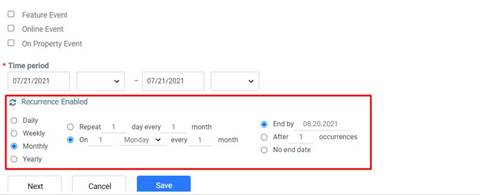
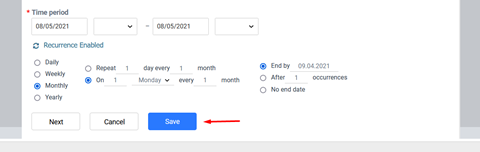
Recursive events and non-recursive events
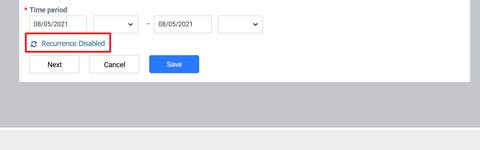
Step 1: When you are adding the details of the event and if it is a recursive event, click on the recurrence disabled’ button. It will automatically enable the recurrence of the event.
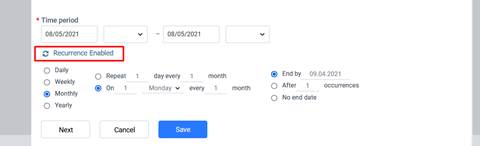
Step 2: Enter the details of the recurrent event
- Whether the event is daily, weekly, monthly or yearly
- The repetitions of the event and the day of the week of the event
- The end date of the event
- The time period of the event
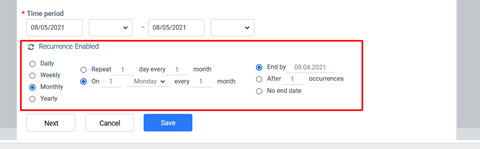
Step 3: Click on ‘save’ to ensure that the event is set up as a recurrent one.
How to set up a non-recursive event:
Step 1: For a non-recursive event, ensure that the recurrence is disabled.
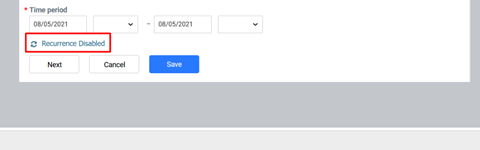
Step 2: Enter the time period of the non-recursive event and the timing of the event. Once all the details have been entered, click on save to add the non-recursive event.
Warning: Setting a recursive event in the non-recursive event mode will lead to the event page breaking.
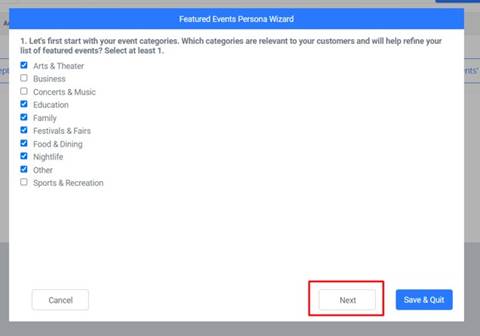
Using the Featured Events Wizard
The Featured Events Wizard is a tool that will help you filter the type of events that you wish to be featured on your website.

Add the Categories of the events you would be interested in featuring on your event calendar. You can select multiple categories.
Specify the maximum distance a Featured Event can be from your place of business.
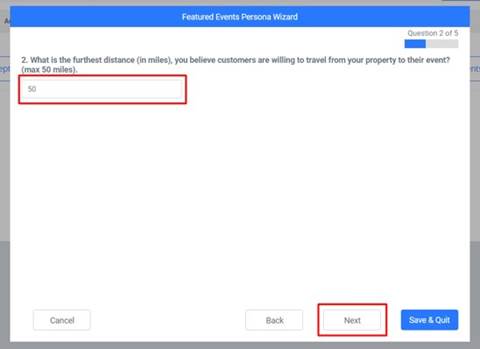
Please Note: Distances are in Miles.
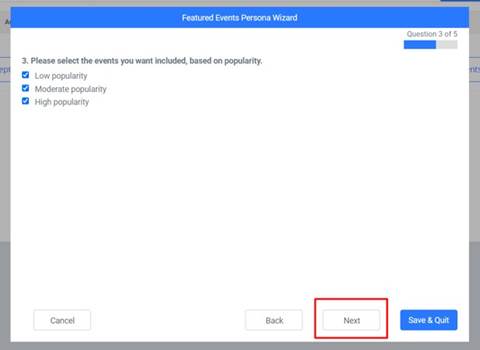
Select the size of events you wish to feature on your Event Calendar.
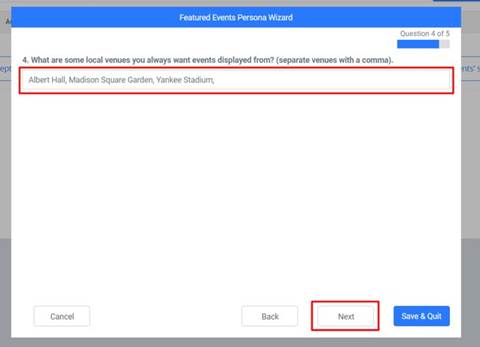
Enter the names of your preferred event venues separated by commas and click on next.
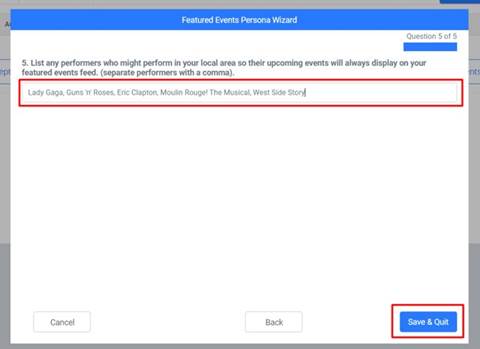
Enter the names of performers and performances you wish to feature on your Events Calendar separated by commas. Click on 'Save & Quit'. The 'Featured Events'section takes approximately 30 minutes to populate the first time.
The Featured Event feed takes approximately 30 minutes to populate the first time you set up the Featured Event Wizard.
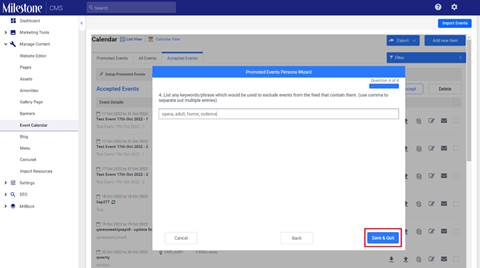
Filter promoted events
The ‘Promoted Events Persona Wizard’ allows you to provide keywords for events or event types that should not appear on your Promoted Events feed.
Path: Milestone CMS > Manage Content > Event Calendar
Step 1: From the Event Calendar section click on ‘Setup Promoted Events’ to the top left
Step 2: Question 4 in the ‘Promoted Event Persona Wizard’ allows you to enter keywords separated by a comma that you do not want appearing in your Promoted Events feed.
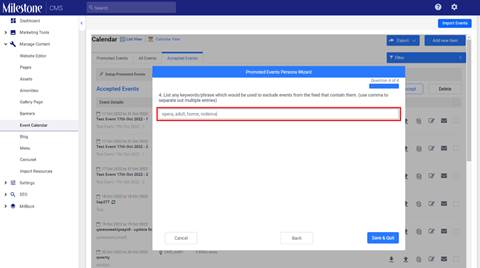
Step 3: Once you have added the keywords click on ‘Save & Quit’ to save changes
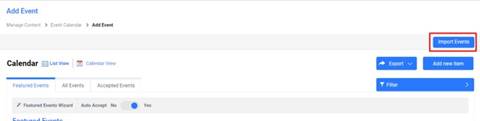
Bulk upload Events
If you have multiple events lined up, you can also choose to import Events to your Events Calendar. Select the Import Events option on the top right of the screen
Download the Sample Excel

Fillin the Sample sheet and save it

Please note: Changing any of the columns in this spreadsheet can lead to an error while uploading. The following fields are mandatory: 'Event Name', 'Category','Short Description', and 'Time Period'.
Upload the Excel using the ‘Upload from Desktop’ button
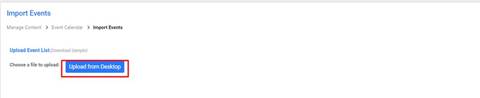
Once you have uploaded the sheet the events will be displayed in the Accepted Events section
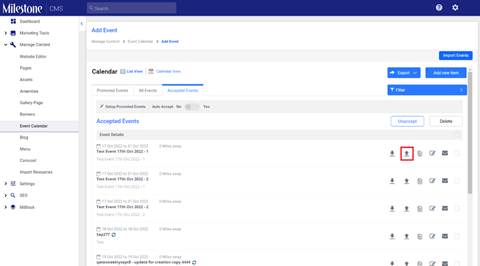
Editing & Deleting Events
You can choose to ‘Edit’ details of ‘Events’ on your ‘Event Calendar’.
Click on the ‘Edit’ icon to the right of the ‘Event’ you wish to ‘Edit’
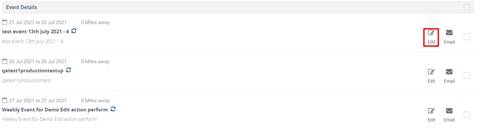
Make the required changes and click on ‘Save’

You can choose to ‘Delete’ events that you might have set up or 'Accepted' earlier.
Select the ‘Event’ you wish to ‘Delete’

Click on the ‘Delete’ button on the top right

If an event is ‘Deleted’ it will be removed from all three: ‘Featured Events’,‘All Events’, and ‘Accepted Events'.
If an event is part of a recursive series of events, deleting the event will result in the whole series of events being deleted.
Bulk upload event schedules
Milestone CMS’ Event Calendar allows you to update schedules for events using a spreadsheet, drastically reducing the time it takes to update event schedules for enterprise businesses.
Step 1: From Milestone CMS click on ‘Manage Content’ in the left navigation panel
Step 2: Select ‘Event Calendar’ from the ‘Manage Content’ sub-menu
Step 3: Download the ‘Event Schedule’ file by clicking on the download button corresponding to the event
Step 4: Read the instructions tab in the spreadsheet
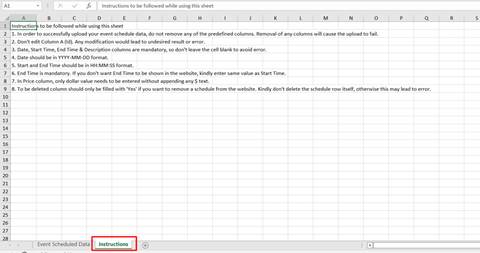
Step 5: Update the data in the ‘Event Schedule Data’ tab

Step 6: You can delete existing schedules by entering ‘Yes’ in the ‘To be deleted?’ column

Step 7: Upload the ‘Event Schedule’ file using the upload button
You can copy, edit and email event details using the other options in the ‘Event Calendar’