Role-based moderation
In this article, we’ll show you how to manage your content at scale across locations using the role-based moderation workflow.
To start, once a member of your business joins, you’ll have to assign him/her (them) as a user.
Assigning a user
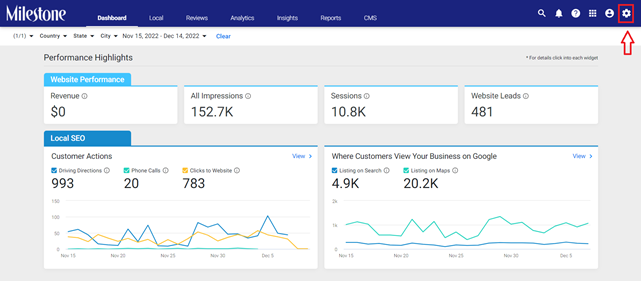
Step 1: Once logged onto the platform, click on the settings button on the top-right of your screen.
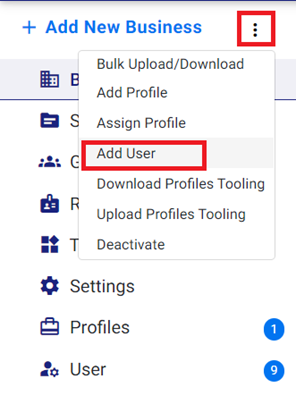
Step 2: Click on the 3-dot option on the left of your screen and click on ‘Add user’.
Step 3: Enter details such as:
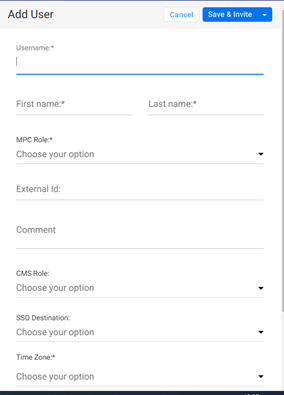
- Username
- First & Last Name
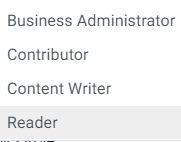
- MPC Role: Based on the designation of the user, choose between business administrator, contributor, content writer, or reader.
· CMS Role: Choose the role of the user on the CMS.
- Client: All Access
- Client content moderator: Can only moderate the content
- Client Content Writer: Can only write articles but cannot moderate or push articles live.
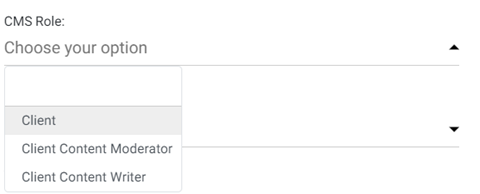
Once the details have been entered, click on ‘Save & Invite’. An email will be sent to the user to log in.
Note: No user can be assigned two different roles. Only one role will be accepted on the platform. First, choose the MPC role and then choose the CMS role for the flow to be seamless.
Overview:
Once you’ve visited the ‘Pages’ screen, if you click on 'Page Statistics’, you will see an overview of your content management.

You can also manage language translation by clicking on Add/Manage Languages.
Filters:
To find pages easily, you can use the drop-down filter options. Select Page Name, Alias, or Content and accordingly enter the keyword string in the search bar.

Additionally, select one of these options:

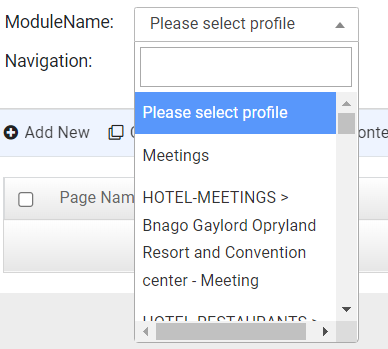
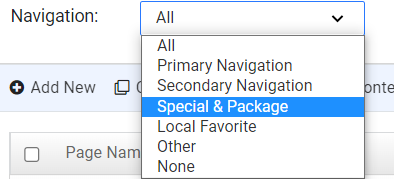
And then use these filters:
Module Name:
Navigation:
Moderation workflow
With client access: To start the workflow, those with 'Client access can select a page and then click on ‘Unlock Content to Edit’.

Once this is done, the page will be sent to the queue of the user with ‘Client Content Writer’ access.
With Client Content Writer access: Once the page has been assigned, the content writer can click on the ‘edit’ button upon selecting a page.
![]()
Once the edit is complete, the Content Writer needs to choose ‘Send for Approval’.

With Client Moderator access: Once the content writer has sent a page for moderation, the client moderator can now review the pages prior to publish. If there are changes required, the client moderator has the option to ‘Return Content for Revisions’ by clicking on the button.

If the content is satisfactory, the content moderator can choose to ‘Publish Pages’ by selecting the page and clicking on the button, thereby pushing those pages live.

Once the content is pushed live, the page will automatically be removed from the moderator's content bucket.