Release: Apr 19, 2022
New product releases from Milestone Local, Platform, Analytics and CMS
Local
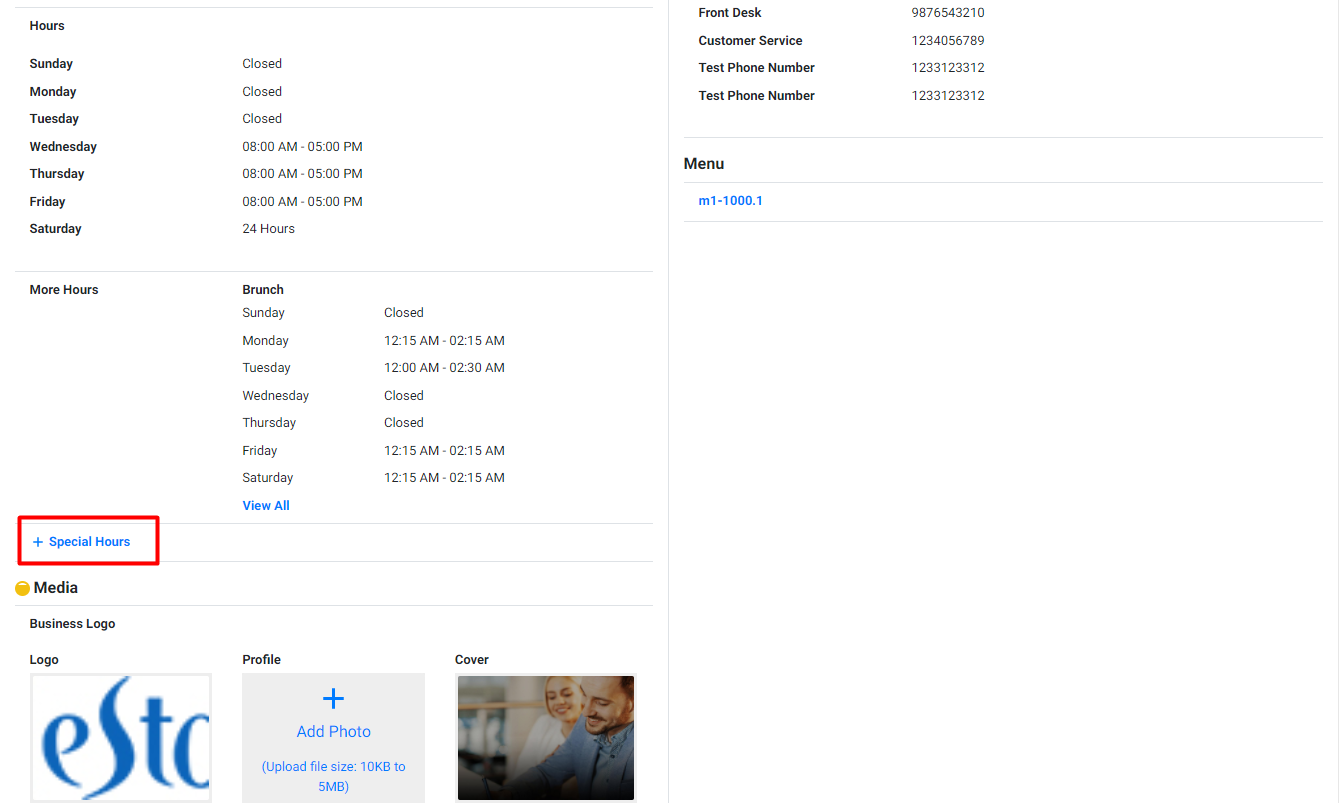
Special Hours for More Hours
Opportunity: Ensure your customers are aware of the services being offered on public holidays and other occasions.
Solution: Apply ‘Special Hours’ across ‘More Hours’ and ‘Business Hours’ with the click of a button, providing customers with a clear view of your business hours and services being offered on holidays and other occasions.
Path: Milestone Local > Listings Status
Step 1: From Milestone Local homepage click on ‘Listing Status’ in the left navigation panel

Step 2: Select the location for which you wish to update ‘Special Hours’ by clicking on it
Step 3: In the ‘Profile Summary’ screen click on ‘Special Hours’ to add new Special Hours for occasions
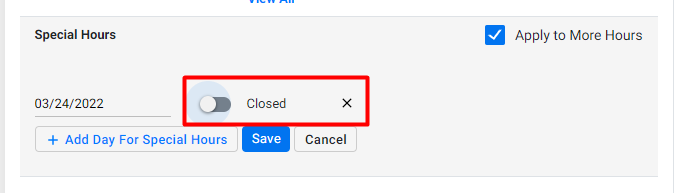
Step 4: Click on ‘Add Day for Special Hours’ to add the date to which the ‘Special Hours’ are applicable
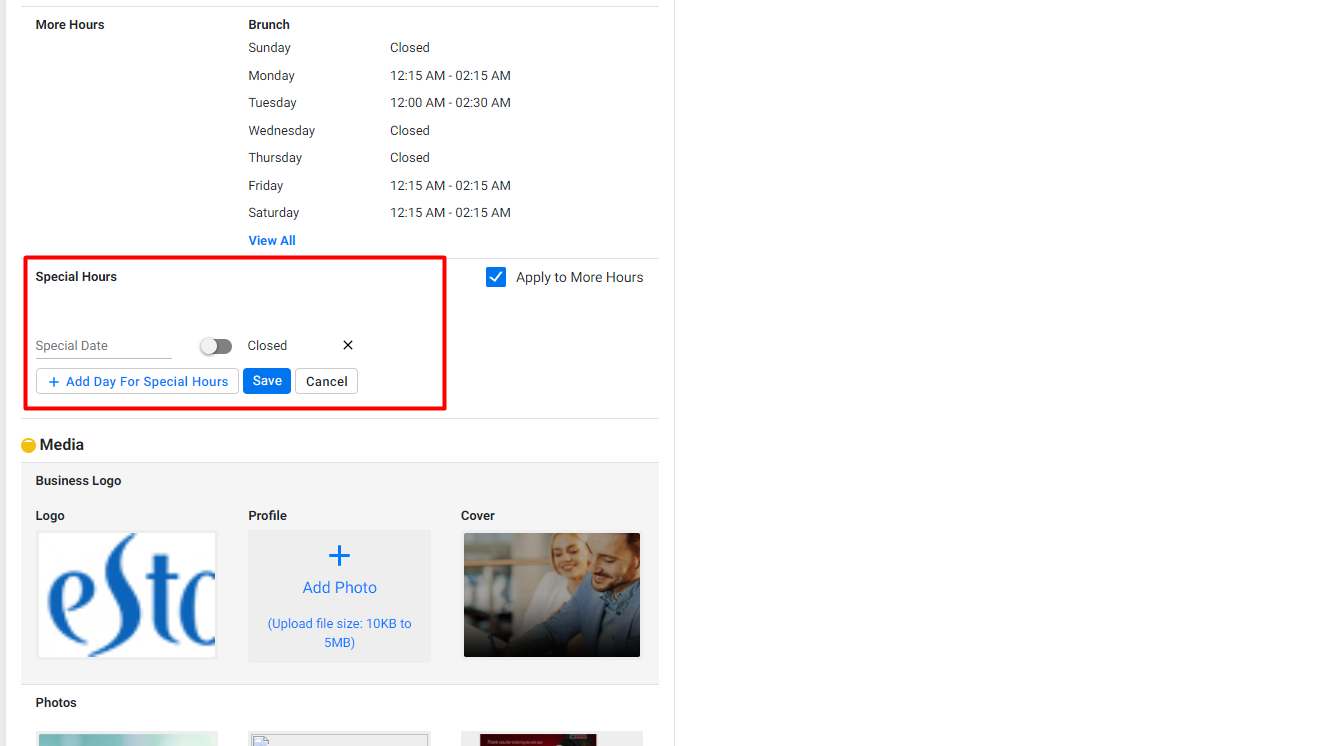
Step 5: Select whether the business is closed or open on that date using the toggle switch
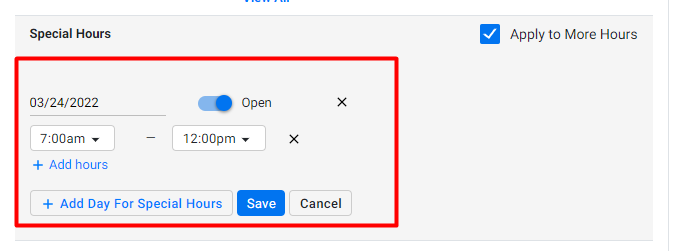
If the business is open but the hours have changed select ‘Open’ from the toggle switch and add the ‘Special Hours’
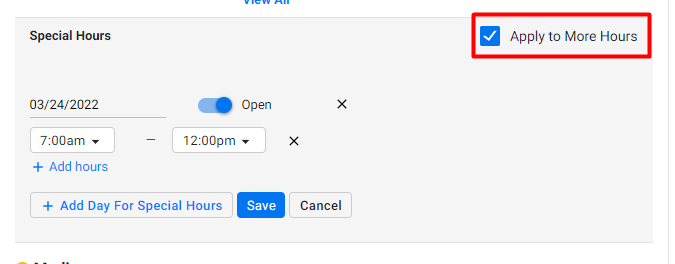
Step 6: To the right you can check the box to apply ‘Special Hours’ to ‘More Hours’ on your Google Business Profile
Once the ‘Special Hours’ have been updated the service offerings on ‘Business Hours’ and ‘More Hours’ will update on your Google Business Profile
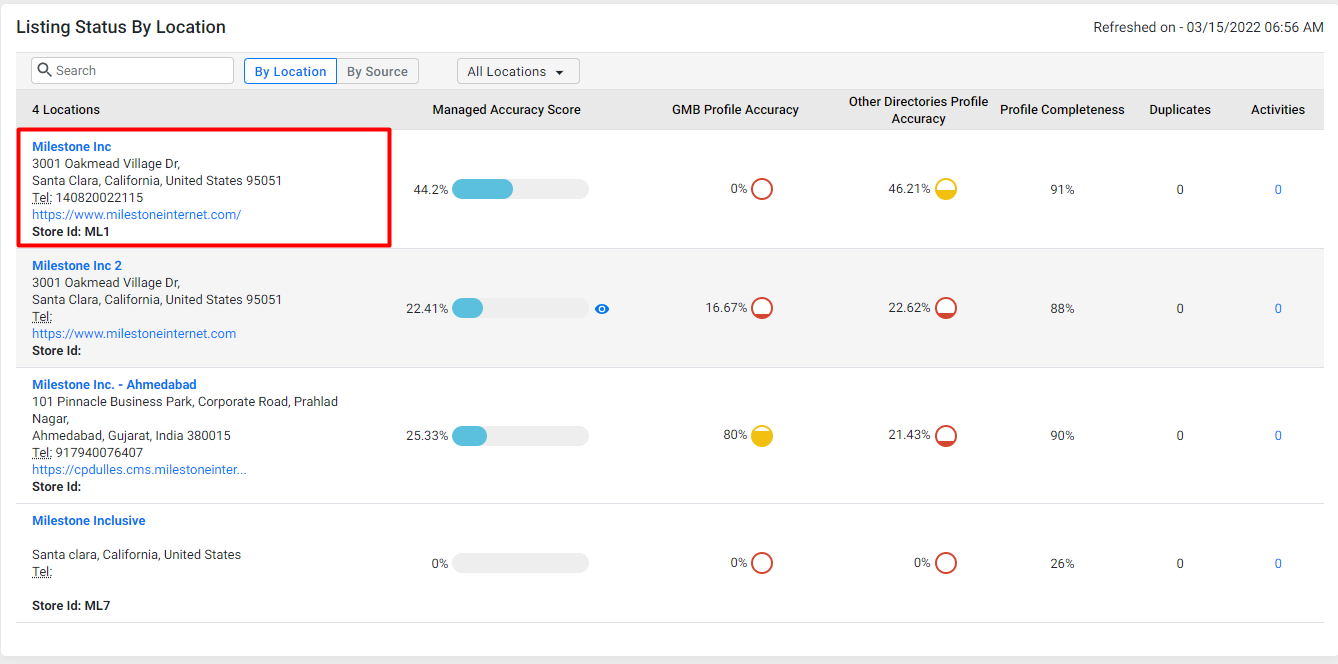
Permanently Closed
Opportunity: Manually marking a business location as permanently closed across multiple channels can be a time-consuming task, a centralized dashboard that can manage business data across multiple channels will drastically improve efficiency.
Solution: You can use the ‘Permanently Closed' to mark a business location as permanently closed across channels like Google, Facebook, Yelp etc.
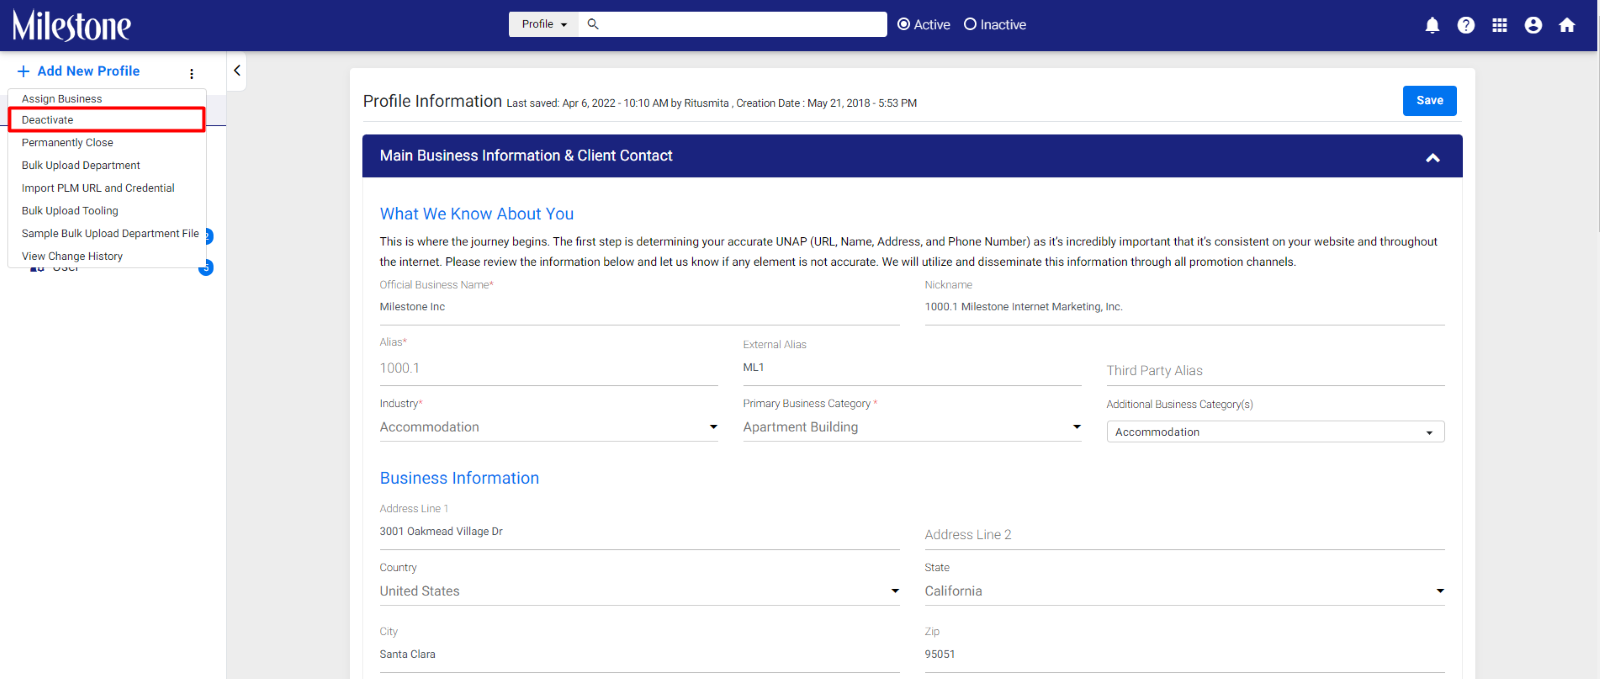
Path: MPC > Settings > Profiles
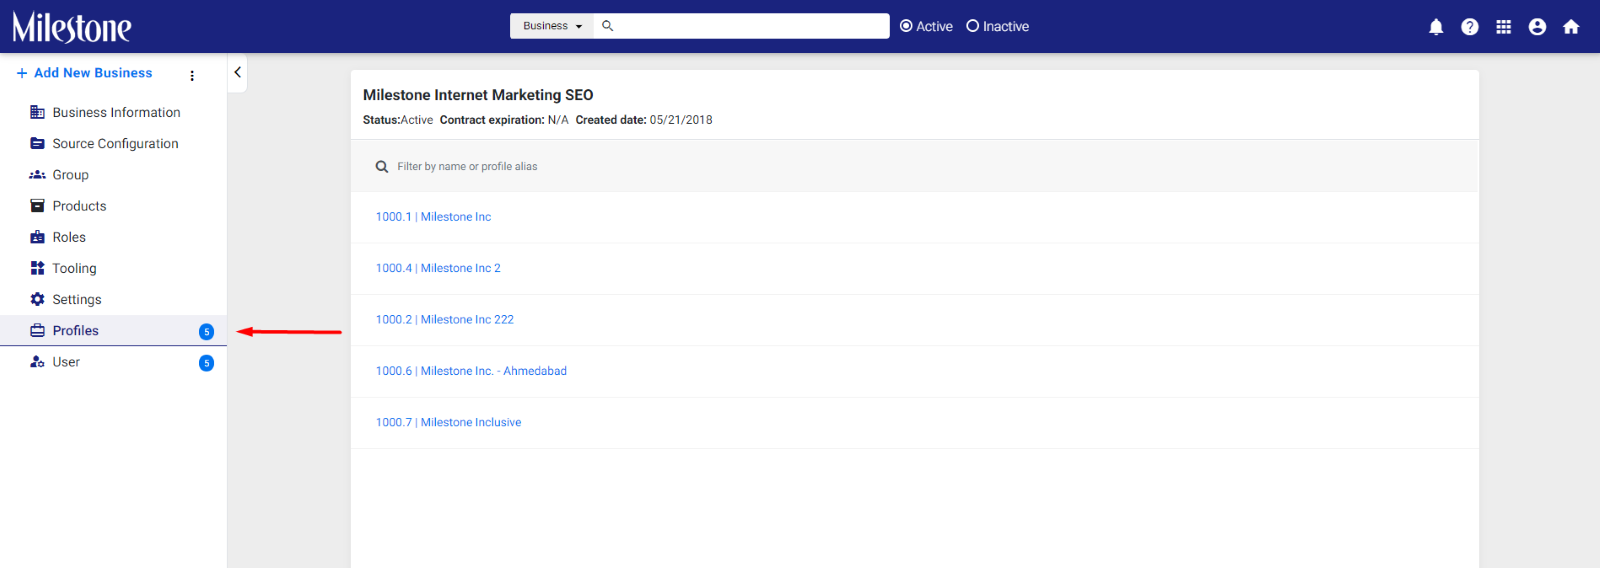
Step 1: From the MPC Dashboard click on the ‘Settings’ icon to the top right of the screen

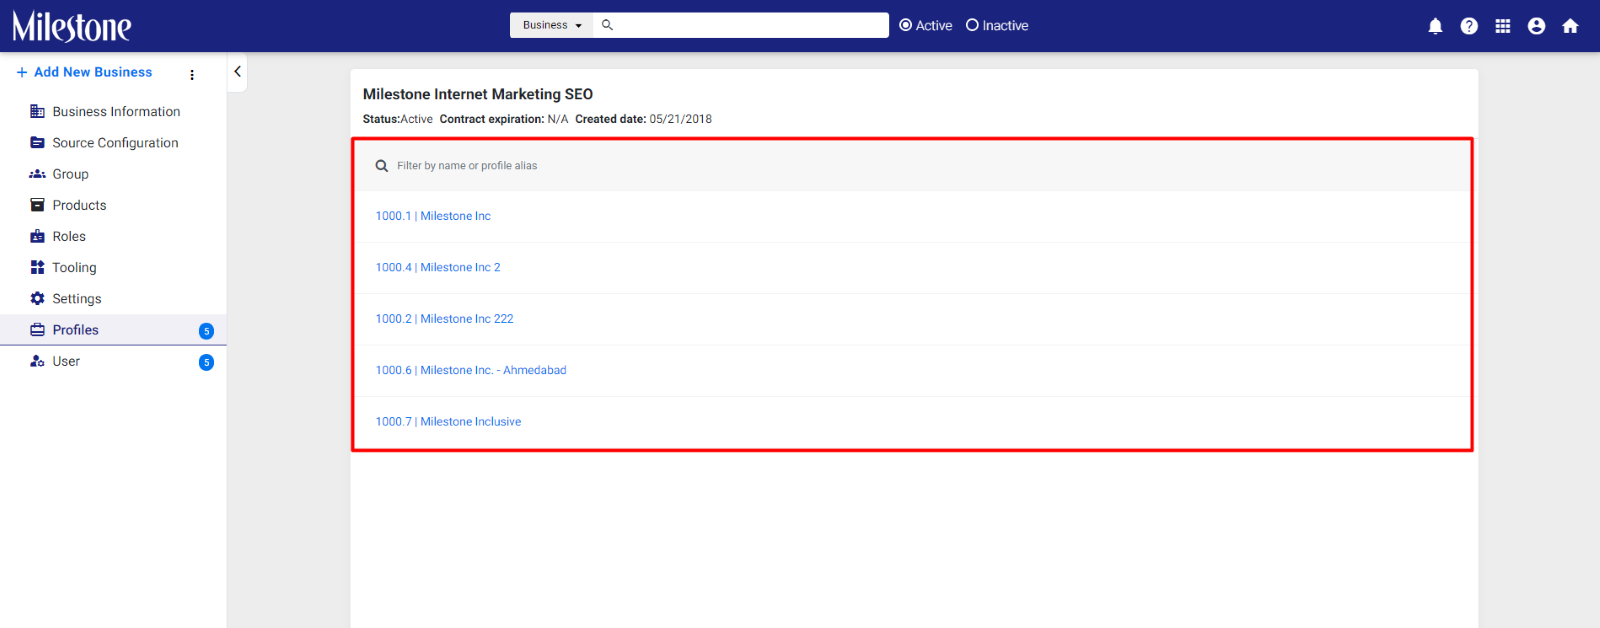
Step 2: Click on ‘Profiles’ in the left navigation panel
Step 3: Select the profile you wish to ‘Permanently Close’

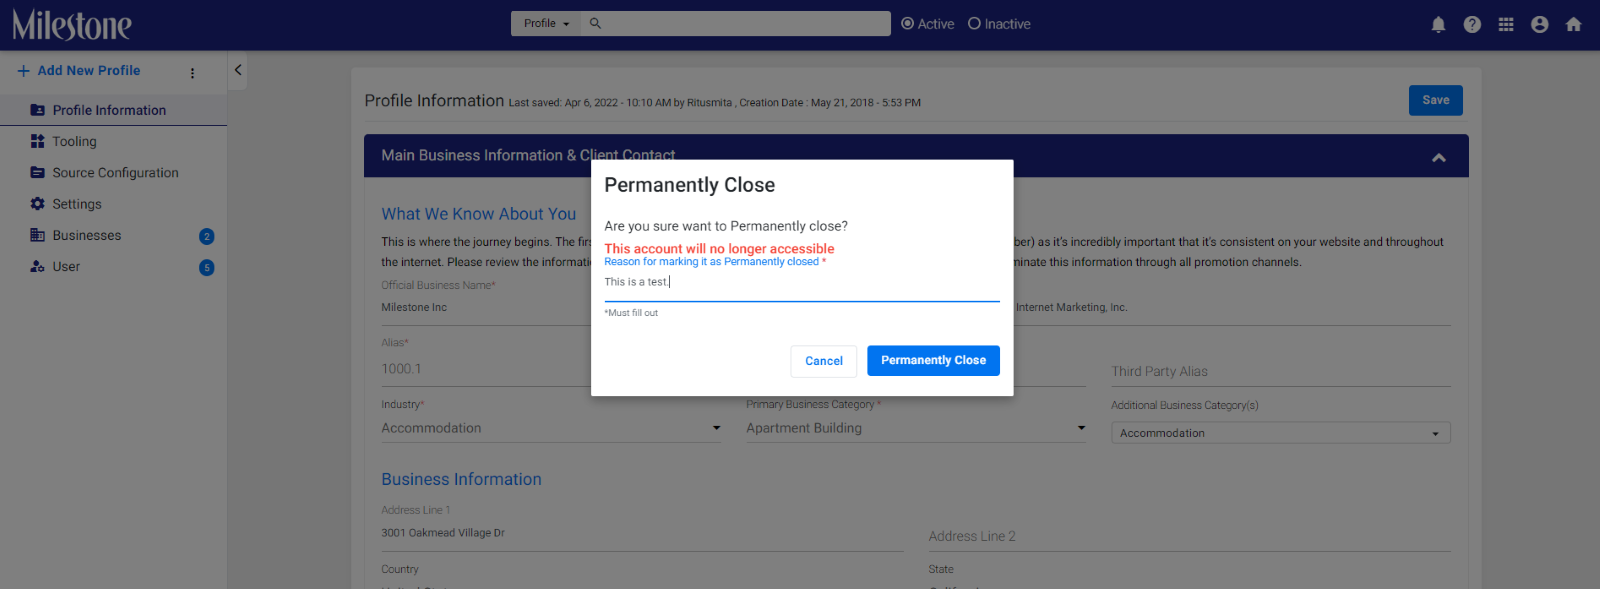
Step 4: Once you have selected the profile click on the three-dot menu to the top of the left navigation panel and click on ‘Permanently Close’
Step 5: Provide a reason for why this location is permanently closed and click on ‘Permanently Close’ marking this profile as permanently closed across channels like Google, Facebook, Yelp, etc.
Platform
Menu Sync
Opportunity: Apple Maps and Google support rich results for menus, providing data on prices and in some cases even the nutritional value of the dishes. This is a great way to boost your visibility on search.
Solution: Sync your menu data through Milestone for Apple Maps and Google to consume and product rich results for relevant searches.
Path: MPC > Settings > Profiles > Products
Step 1: From the MPC Dashboard click on the ‘Settings’ icon to the top right of the screen
Step 2: Click on ‘Profiles’ in the left navigation panel

Step 3: Select the profile you wish to ‘Permanently Close'
Step 4: Once you have selected the profile click on ‘Products’ in the left navigationm panel

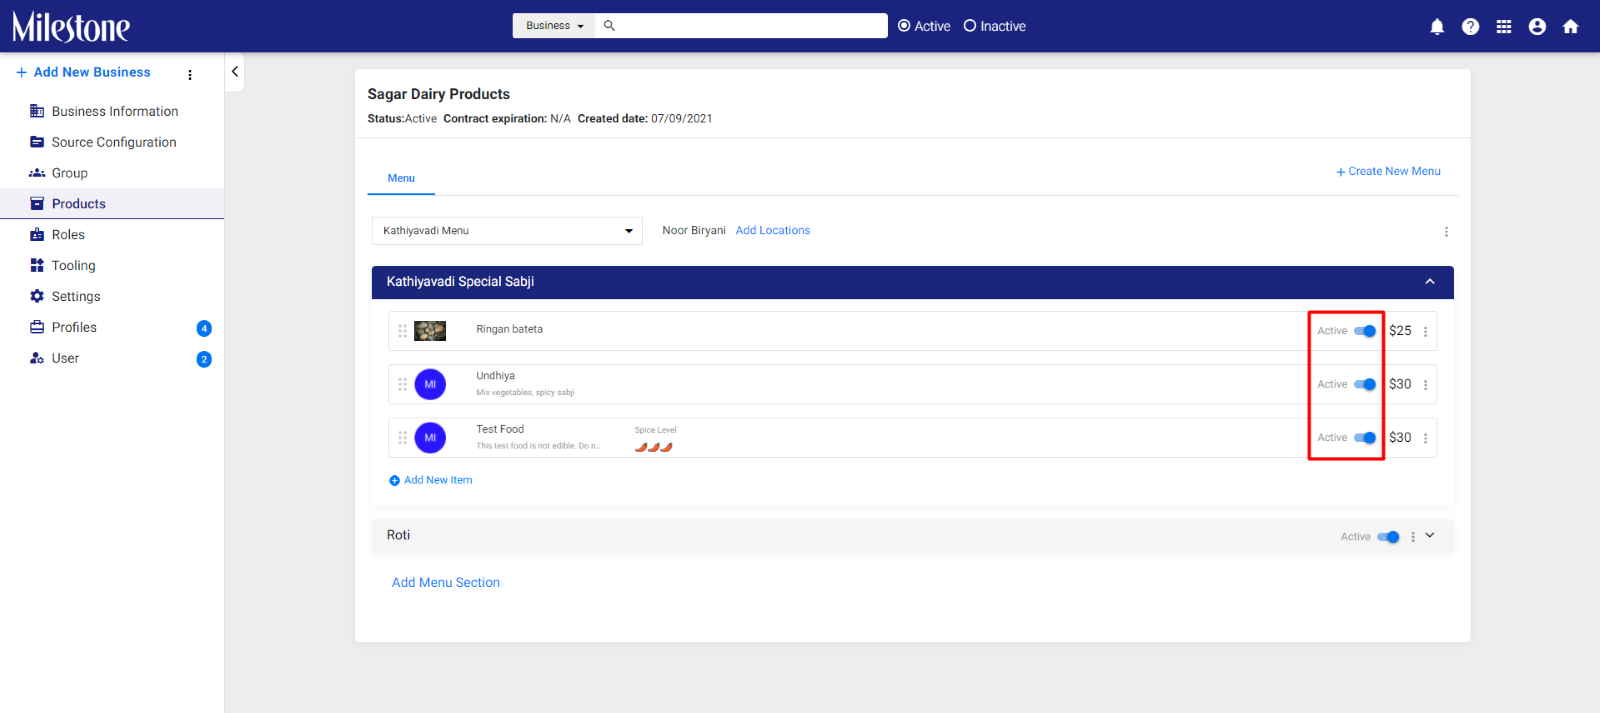
Step 5: Here you can view items you have added to the menu. You can add a new item by click on ‘Add New Item’
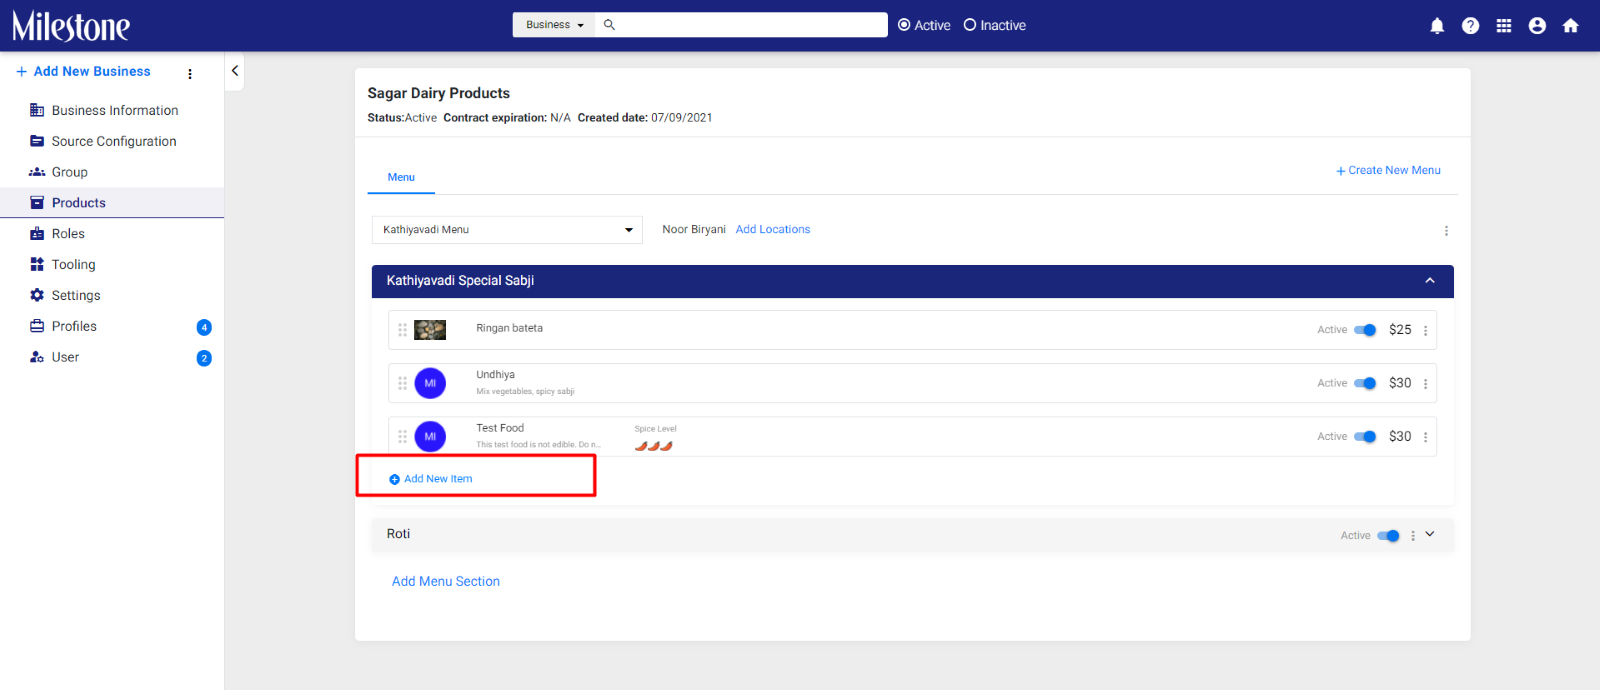
Step 6: Here you can add the menu item’s name and price. You can also add additional fields like Nutrition information, number of people the dish serves, portion size, preparation method, spiciness, and a photo of the dish
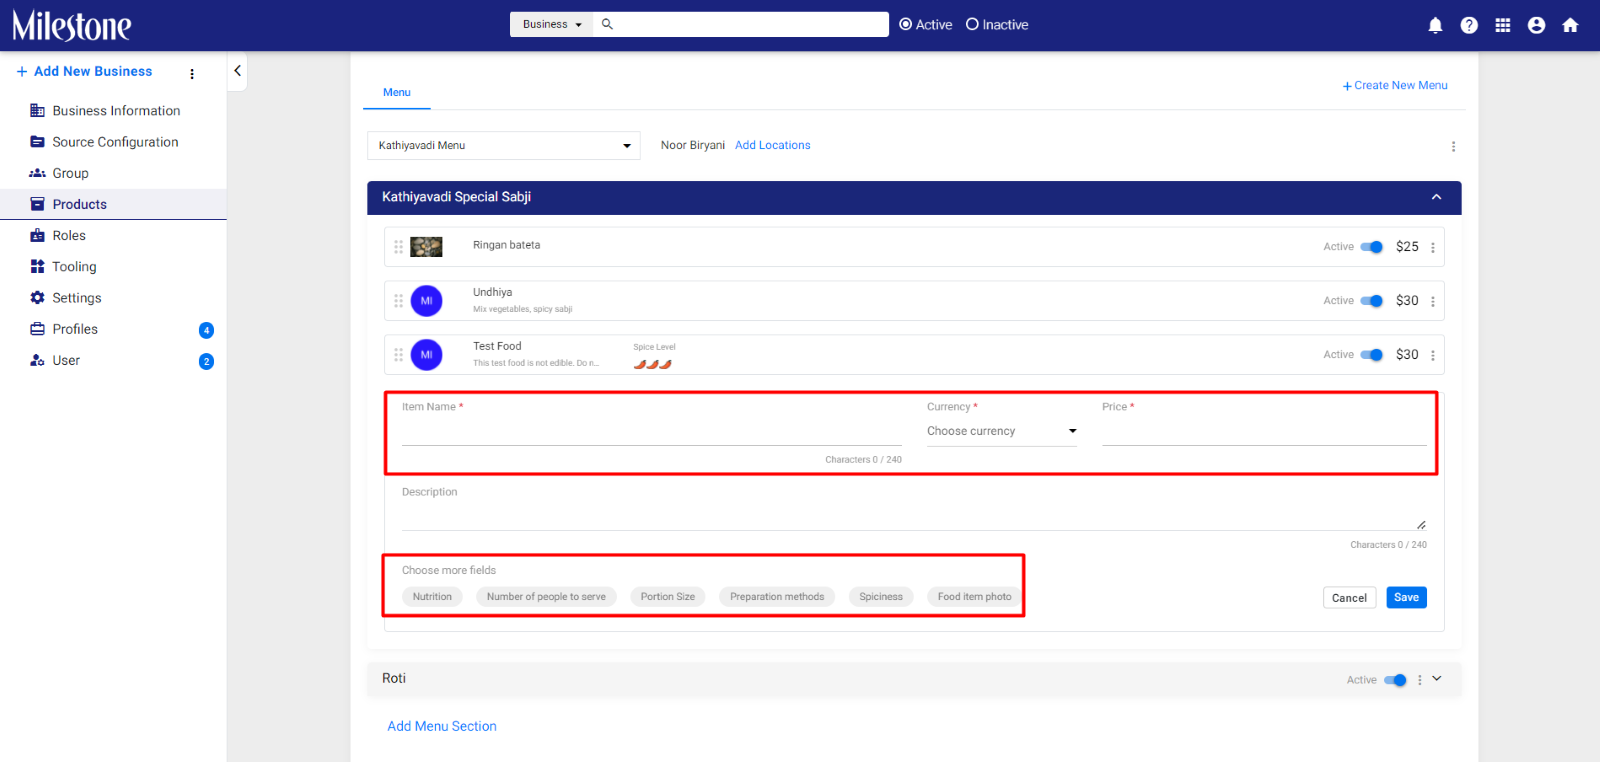
Step 7: Once you have filled in the desired fields click on save to start syncing your menu data with Apple Maps and Google Business Profile

Step 8: You can add or remove an item from the menu using the toggle button to the right
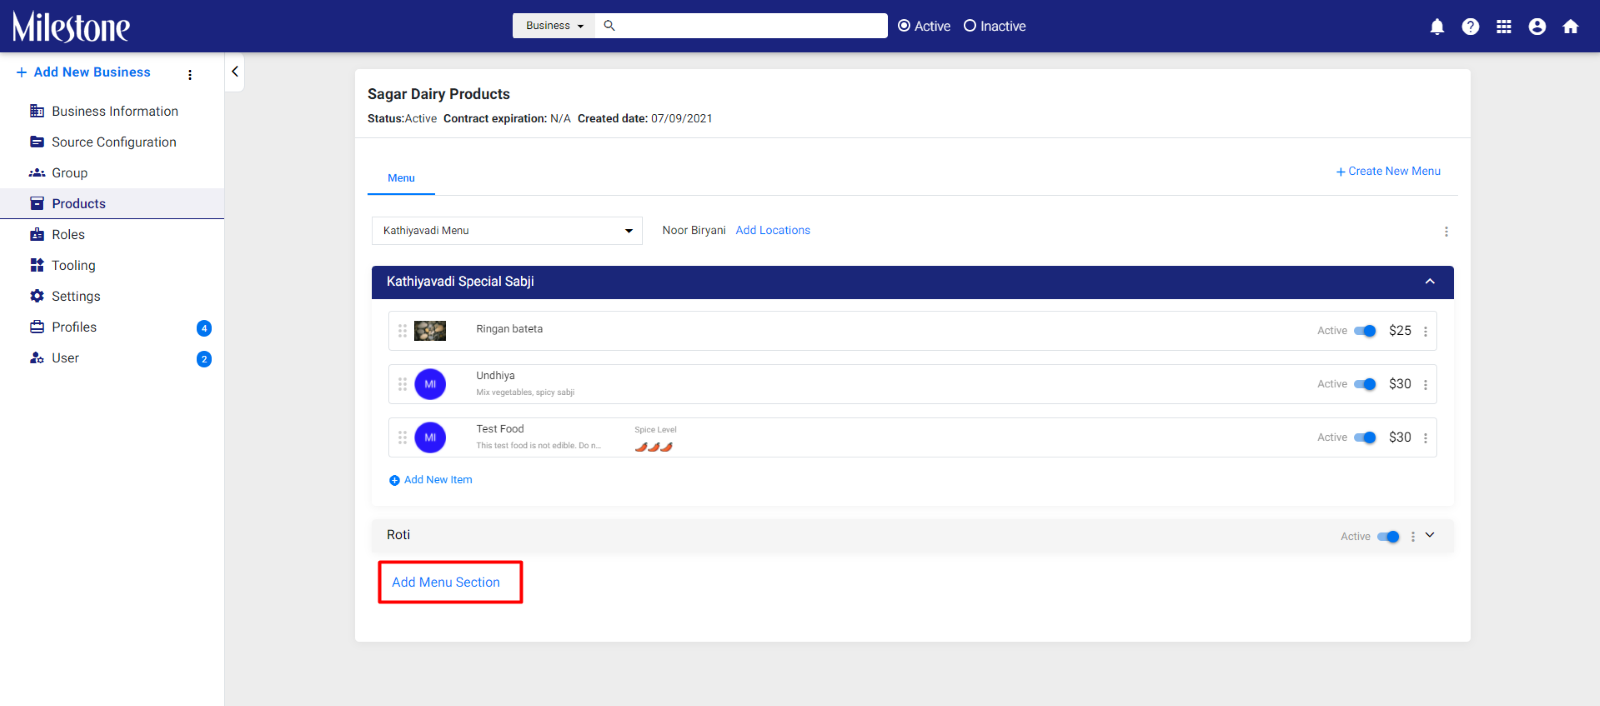
Step 9: You can add a new menu section by clicking on ‘Add Menu Section’ at the bottom of the screen
Analytics
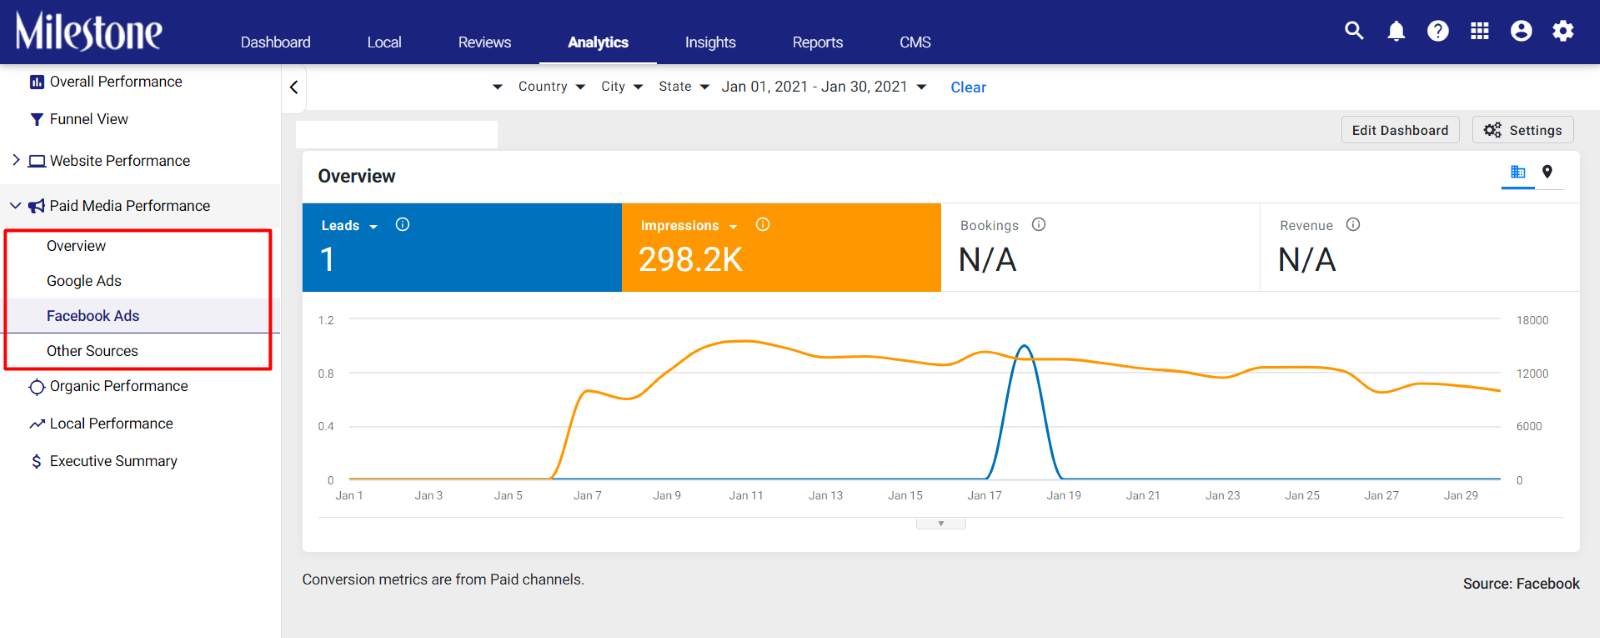
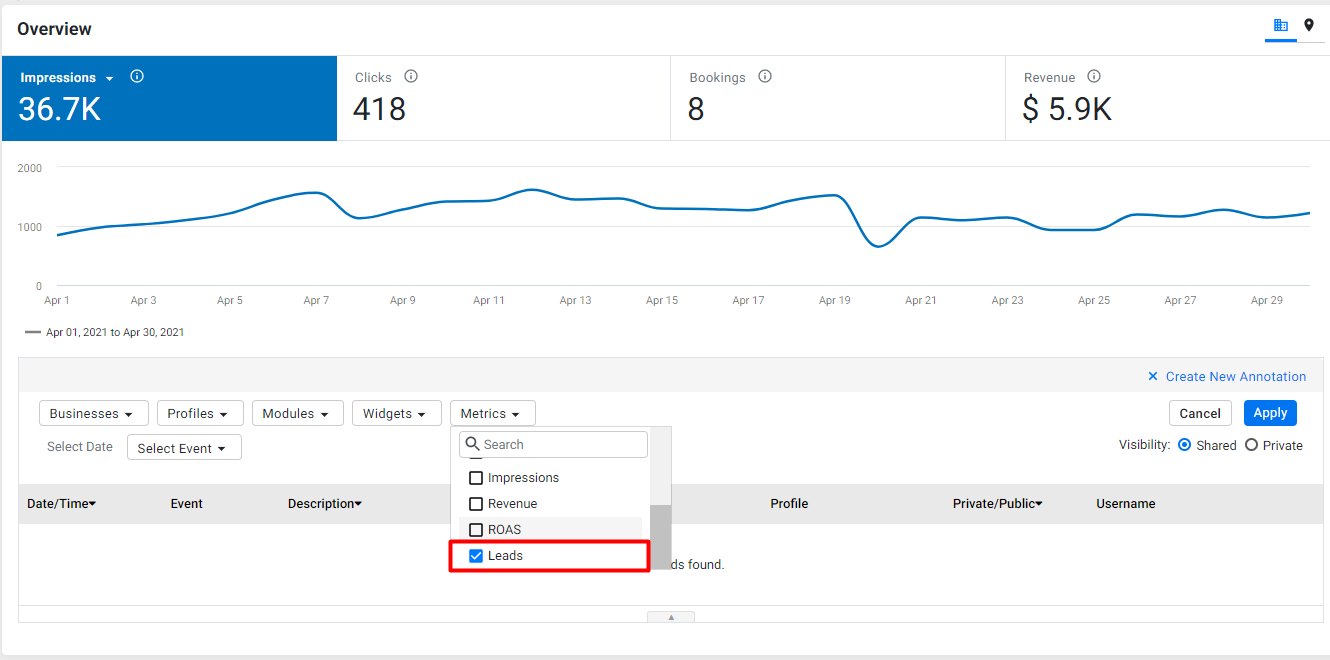
Paid Media Performance – Leads
Opportunity: A great way to gauge the performance of your Paid Media strategies online is the number of leads generated by it. Viewing leads for individual channels lets you determine the effectiveness of strategies by channel.
Solution: Milestone Analytics includes ‘Leads’ as a KPI (Key Performance Indicator) under ‘Paid Media Performance’ allowing you to view leads data from individual channels.
Path: Milestone Analytics > Paid Media Performance > Select Source
Step 1: From the Milestone Analytics dashboard click on ‘Paid Media Performance’ in the left navigation panel
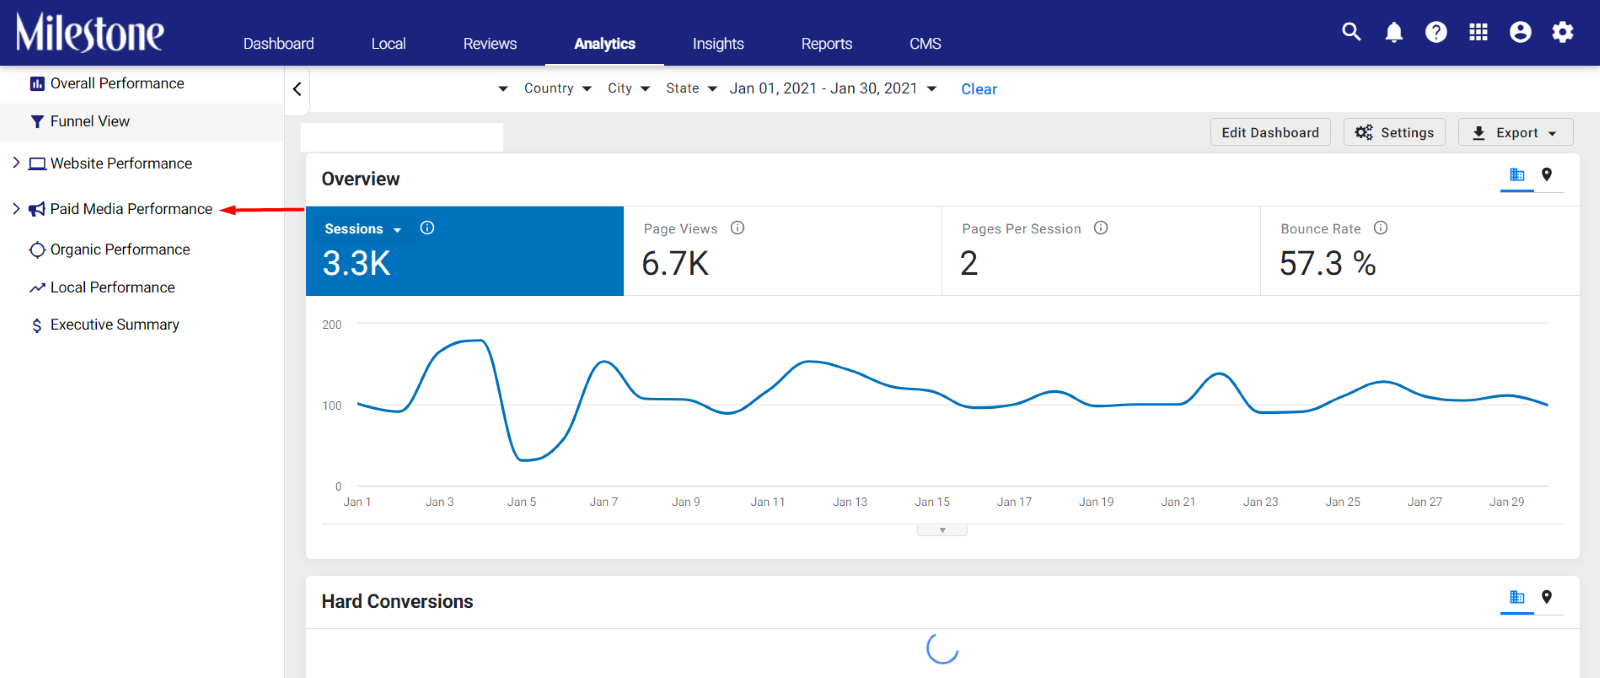
Step 2: Select the source for leads data
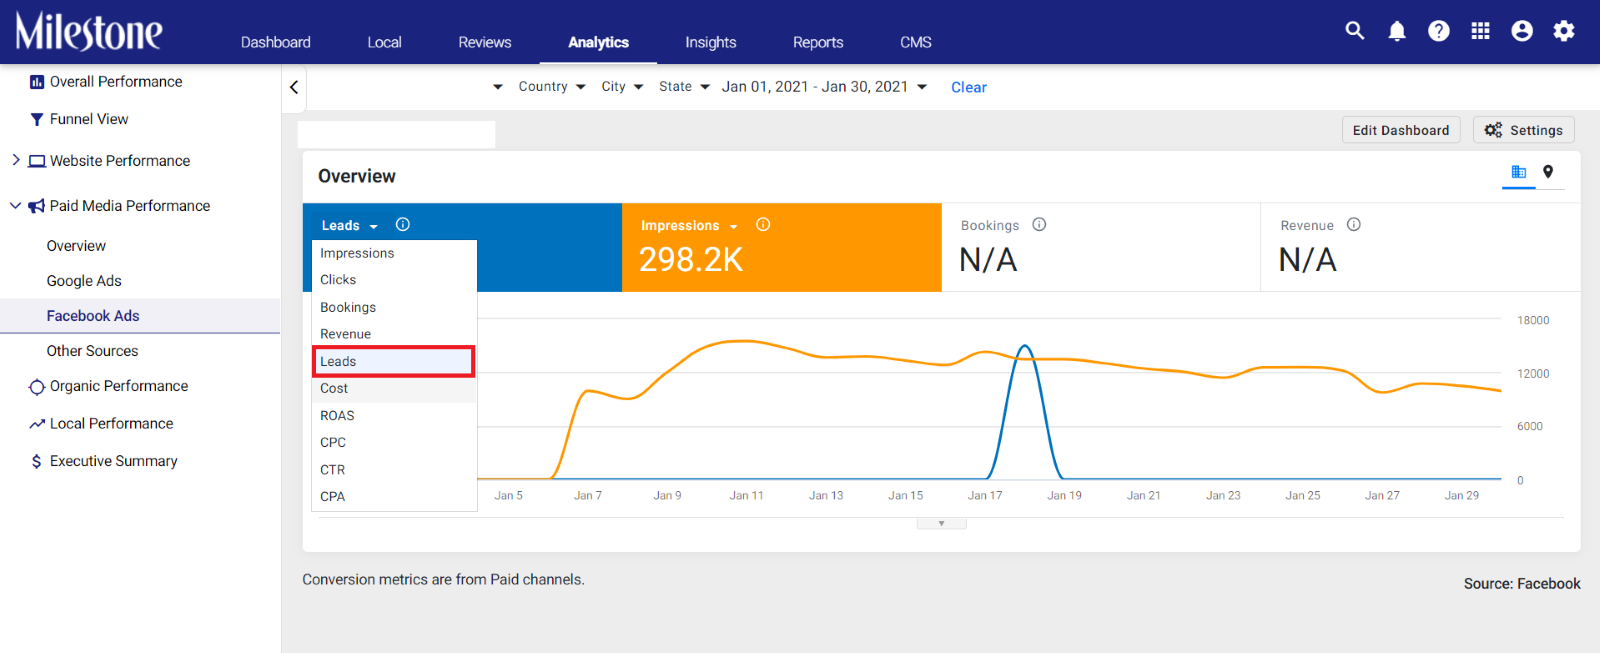
Step 3: Select ‘Leads’ from the dropdown menu in one of the active data tiles
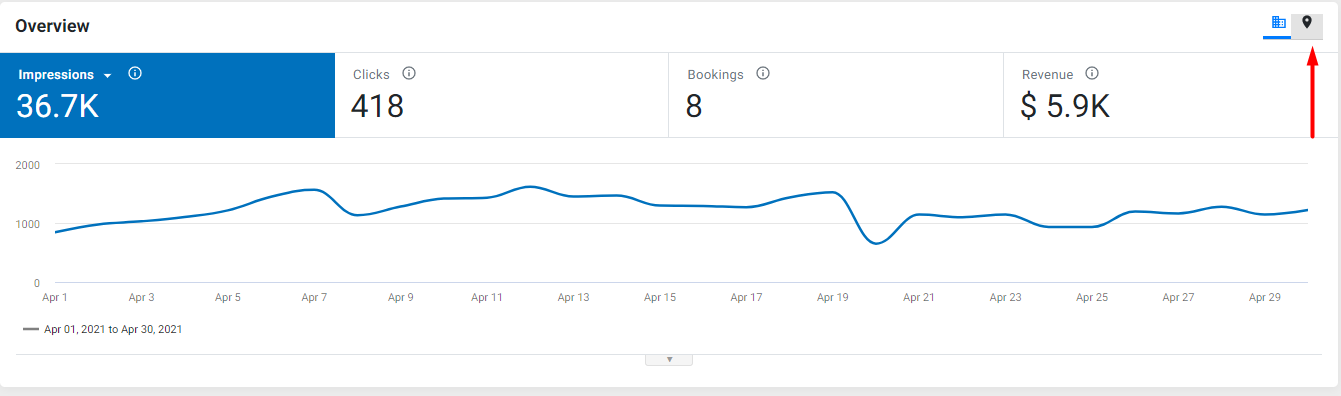
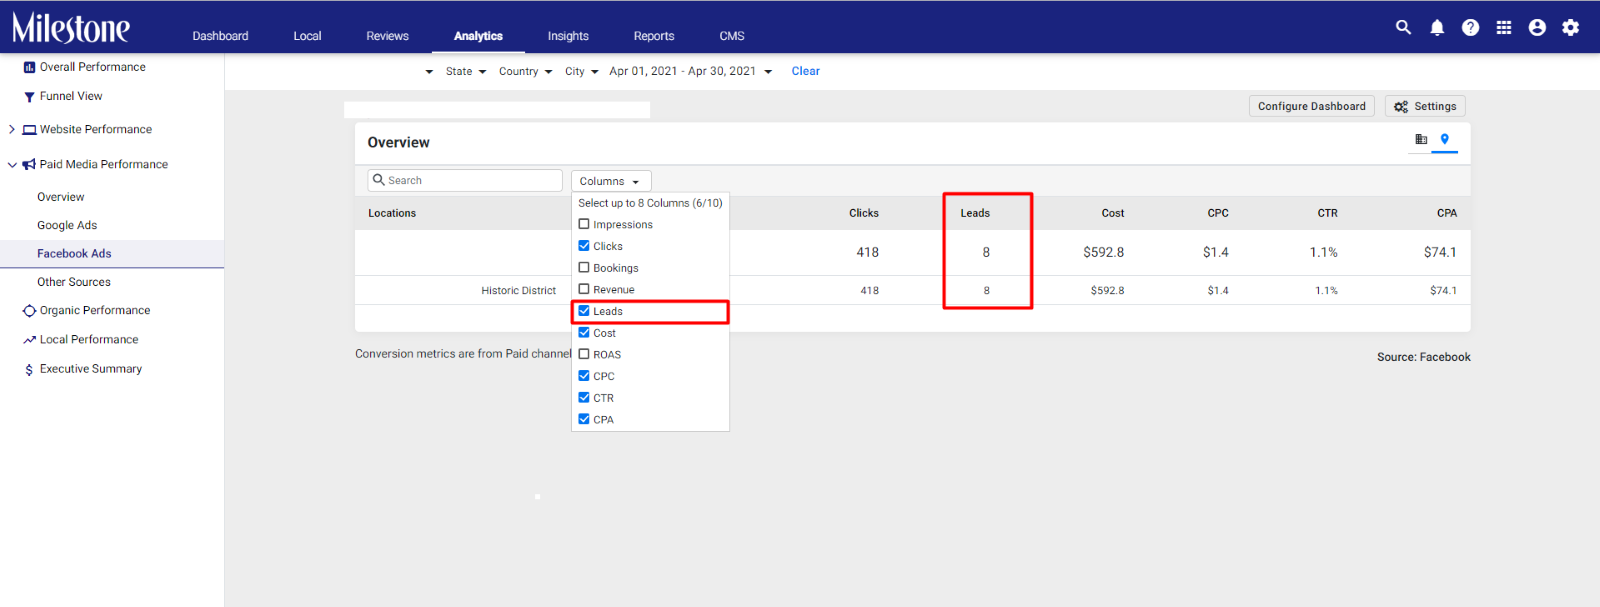
You can view Leads data for specific locations. Click on the ‘Location View’ icon to the top right of the chart
Select ‘Leads’ from the ‘Columns’ dropdown menu
You can also add leads as a metric while creating annotations for your charts
CMS
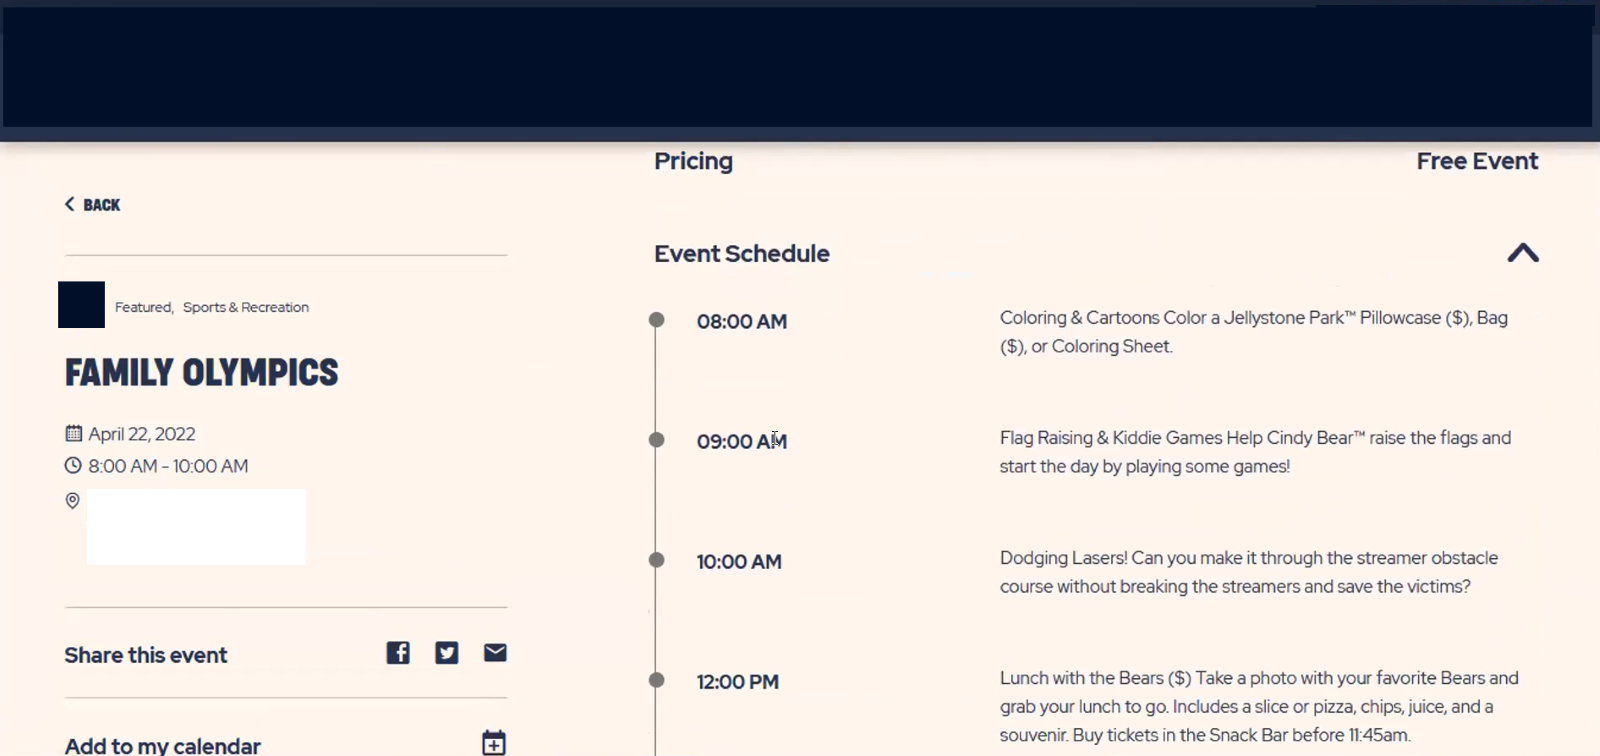
Event Schedule
Opportunity: Updating schedules for events on your website can be a time consuming task, as this might require you to create a new content block and design to display it to your customers in a clear and concise manner.
Solution: Update event schedules from the Milestone CMS Event Calendar and automatically create a visually appealing and easily readable event schedule on your website in no time.
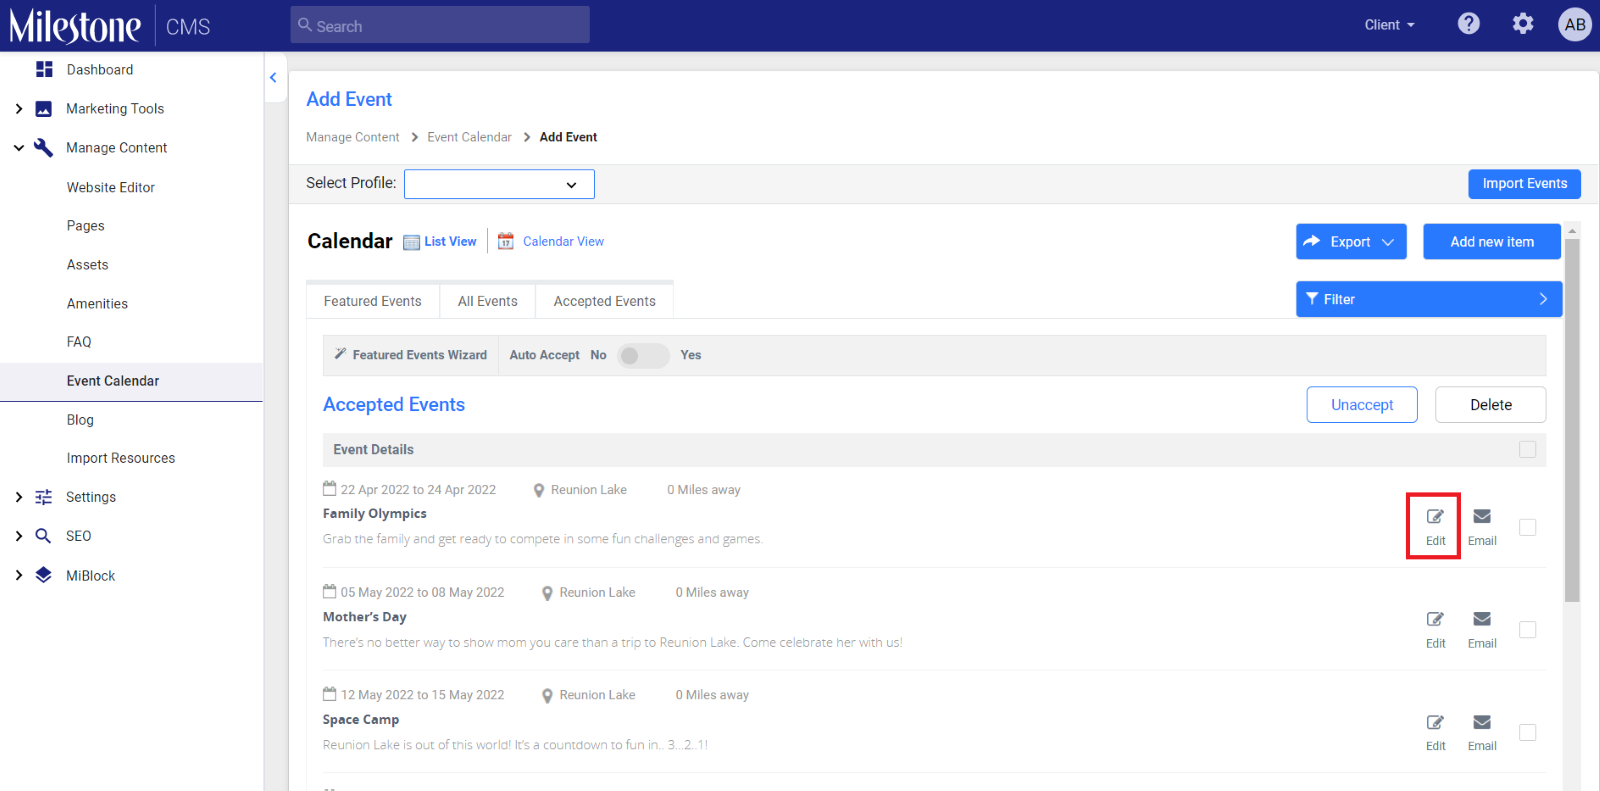
Path: Milestone CMS > Manage Content > Event Calendar
Step 1: From the CMS Dashboard click on ‘Manage Content’ in the left navigation panel
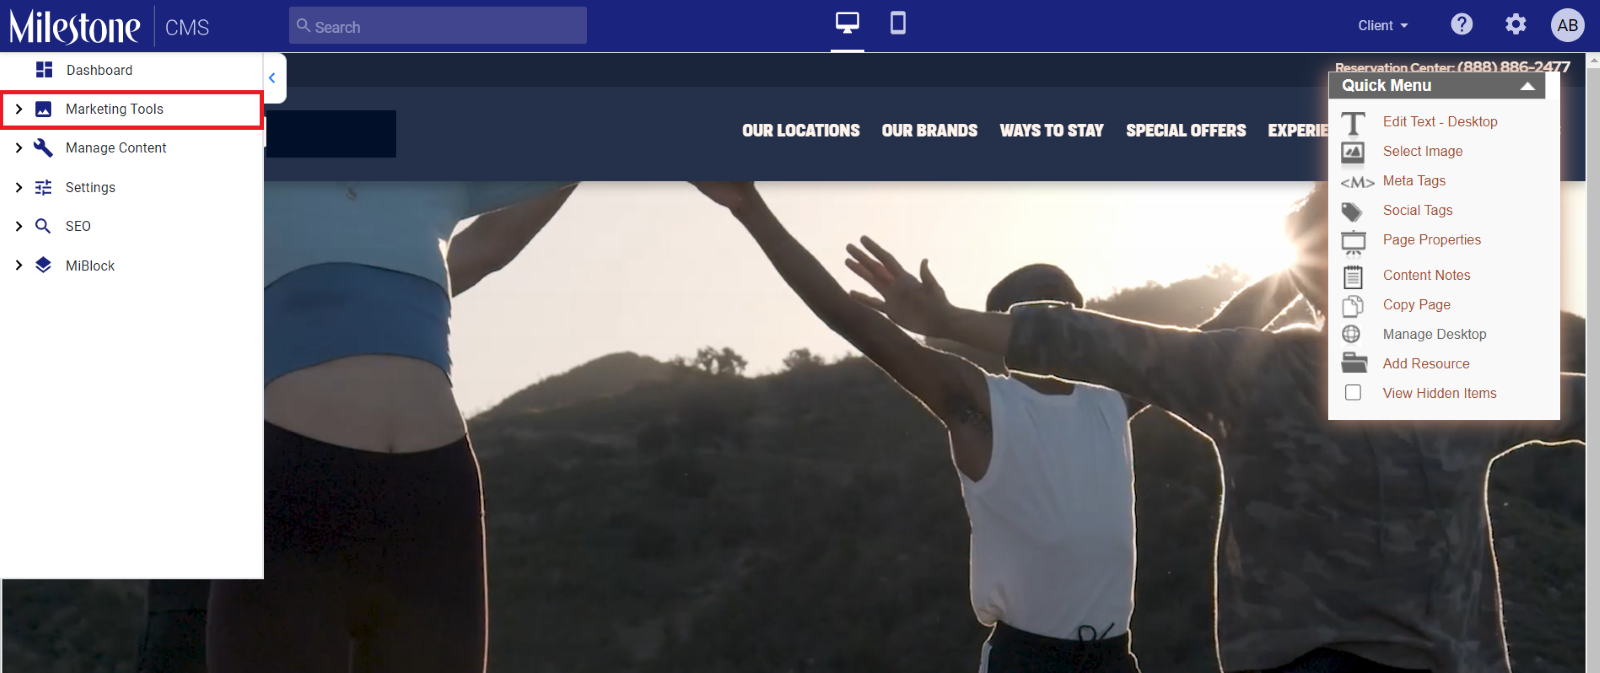
Step 2: Select ‘Event Calendar’ from the expanded menu
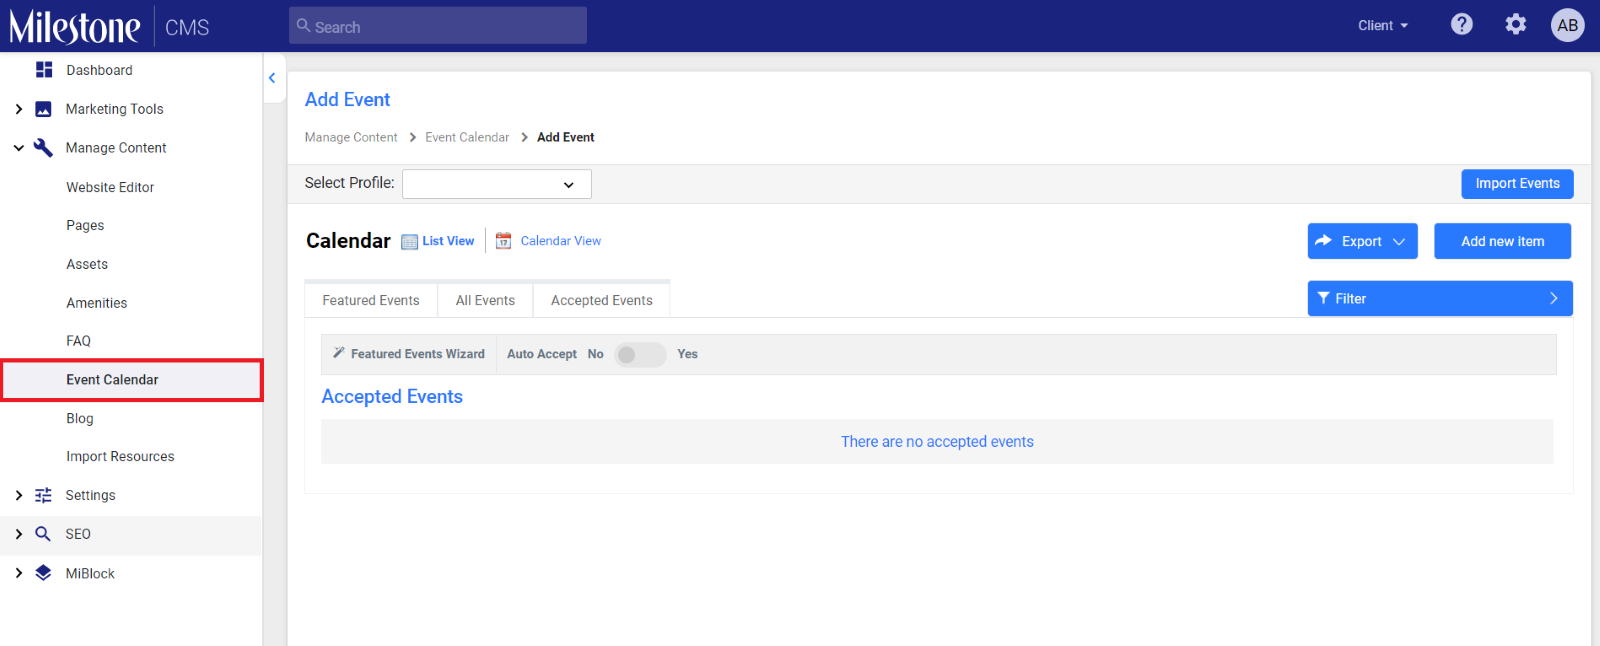
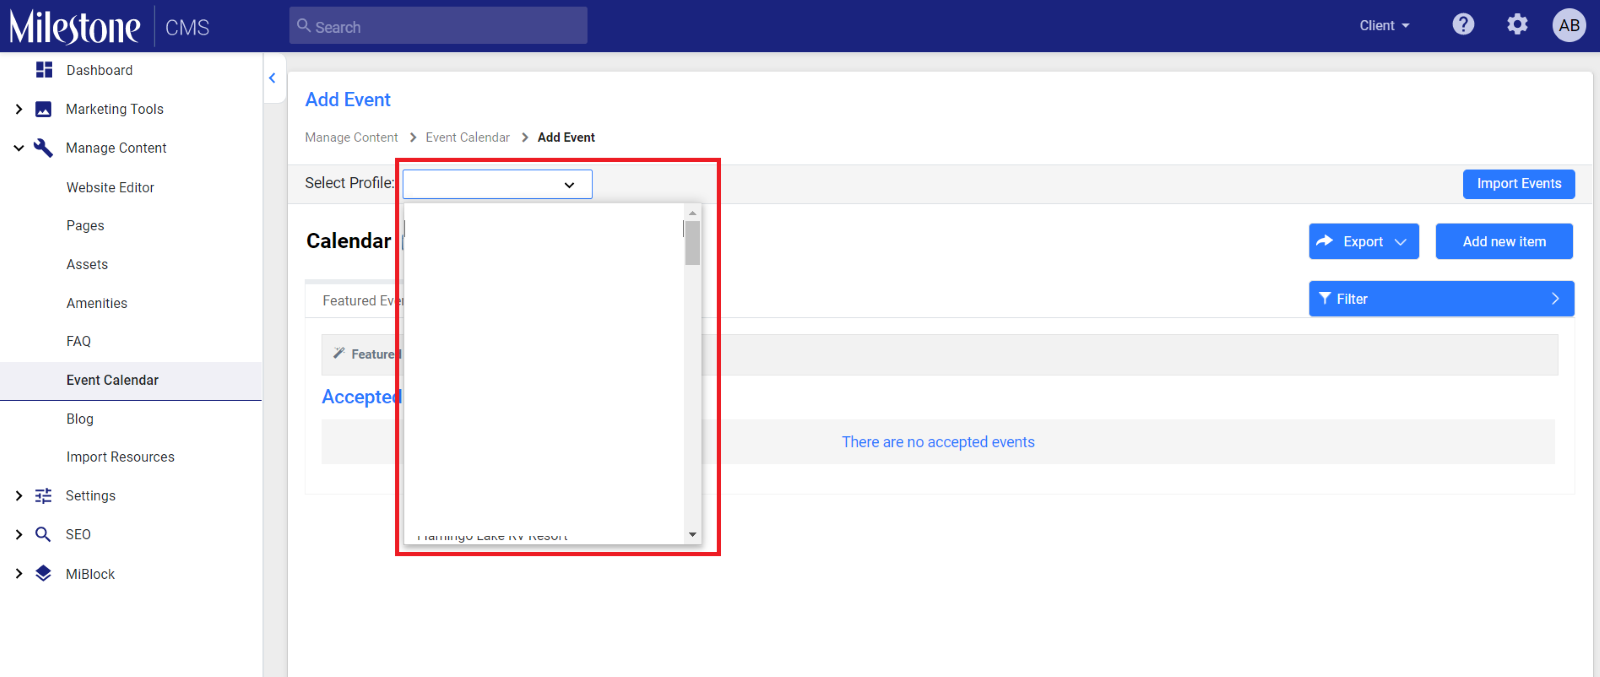
Step 3: Select the location you wish to update the event schedule for from the dropdown menu to the top left
Step 4: If you wish to add a schedule to an existing event click on ‘Edit’ corresponding to the event
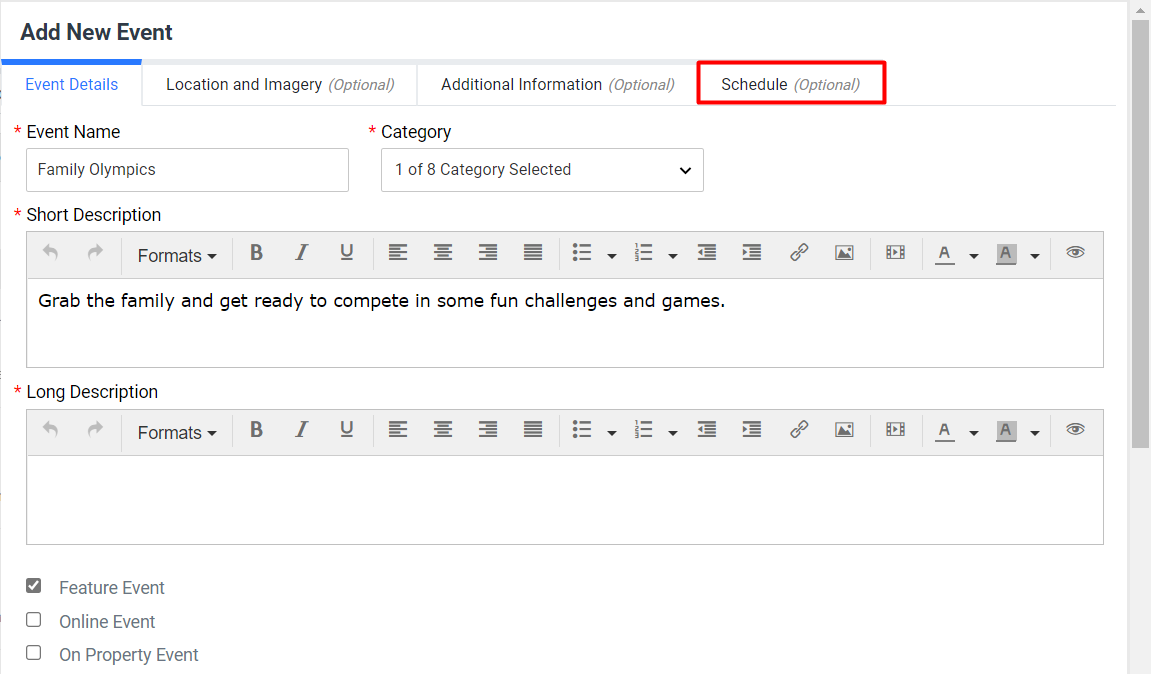
Step 5: In the ‘Add New Event’ section select the ‘Schedule’ tab
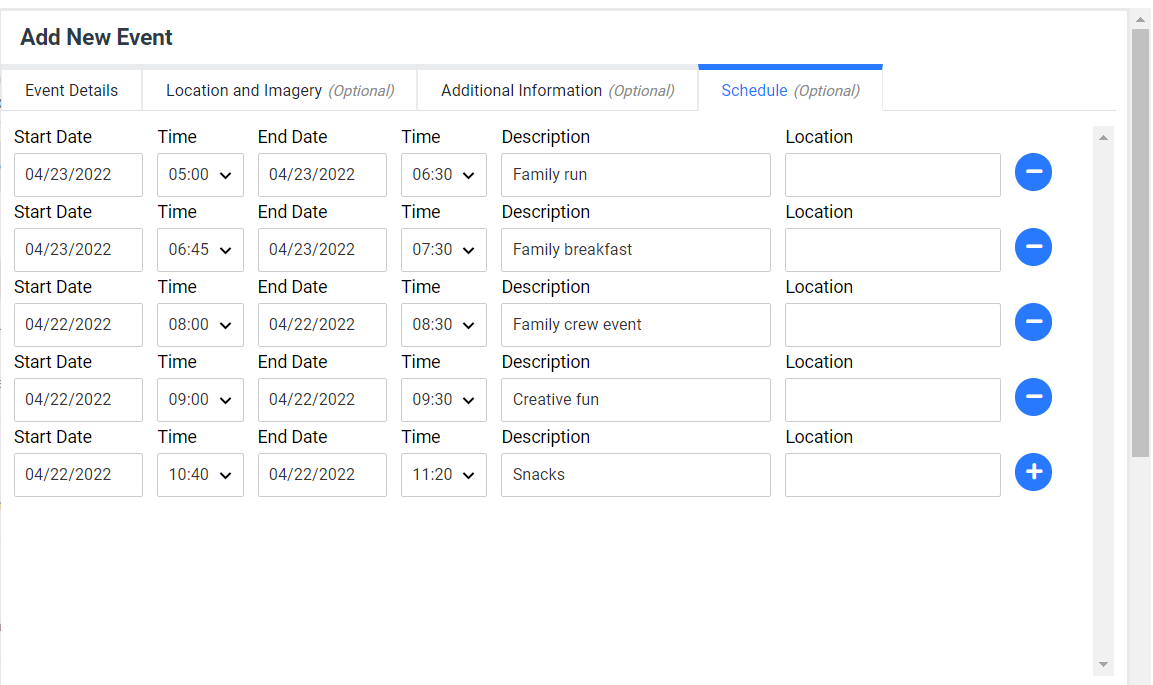
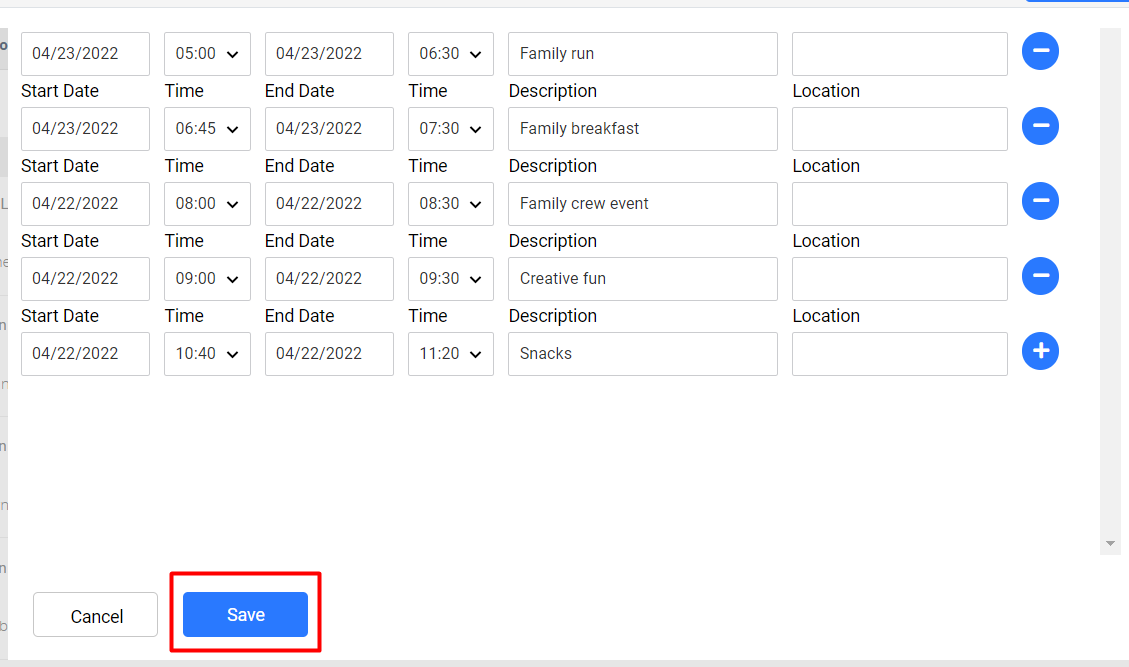
Step 6: Add the schedule for the event. You can add the start and end date and time for each activity and also add a short description along with the location of the activity
Step 7: Click on ‘Save’ at the bottom of the section to save the changes
The event schedule will be updated on the event page