Global Schema: All Functions Guide
Overview
Modern websites often contain repeatable information, such as your organization’s contact details, address, header contacts, or even navigation elements appearing on every page. Instead of tagging the same data repeatedly on each URL, you can set up a global schema.
Global schemas allow you to tag this consistent information once and then deploy or reference it across your entire website. This not only improves efficiency and accuracy but also reduces errors during updates, enhances consistency, and speeds up your overall schema tagging process. This guide will walk you through:
Why global schemas are essential: Learn how they improve your tagging efficiency by standardizing data that remains constant.
Setting up global schemas: Detailed instructions for “Global for All URLs” and “Global Reference” options.
Reusing and managing global schemas: How to reference global schemas on different pages, update them across multiple URLs, and delete global schemas when needed.
Glossary: Definitions for key terms such as schema markup, @id, and global schema.
Part 1: Why Use Global Schemas?
Some content on your website remains the same across pages, such as your address, organizational details, or contact information in the header and footer. Manually adding schema for these elements on every page would be time-consuming and error-prone. Global schemas let you:
Tag Once, Reuse Anywhere: Declare a schema once and apply it across all URLs (Global for All URLs) or reference it where needed (Global Reference).
Reduce Tagging Time: Save time by avoiding duplicate efforts.
Enhance Consistency: Ensure that the same information is tagged uniformly everywhere on your website.
Maintain Efficiency: Update a global schema once and have the changes propagate across all referenced pages.
Part 2: Setting Up Global Schemas
A. Setting as Global for All URLs
This option automatically includes the declared global schema on every page of your website.
Background:
Use this when the schema is meant to be universal—for example, your organization’s address, which every page should display.
Steps:
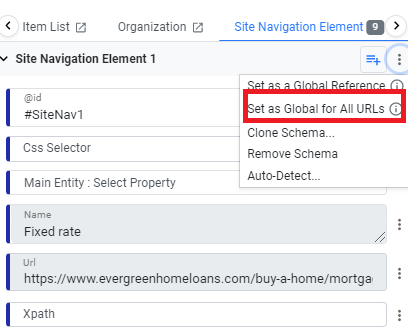
Initiate Global Declaration:
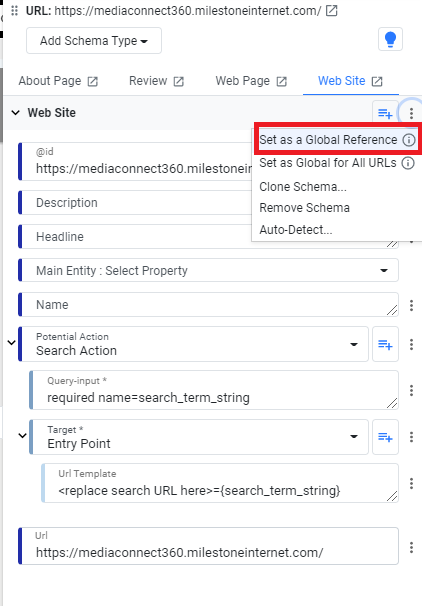
In the Schema Editor, locate the schema you want to set as global (e.g., a ‘Contact Page’ schema with your address).
Click the three dots (⋮) next to the schema.
Select “Set as Global for All URLs.”
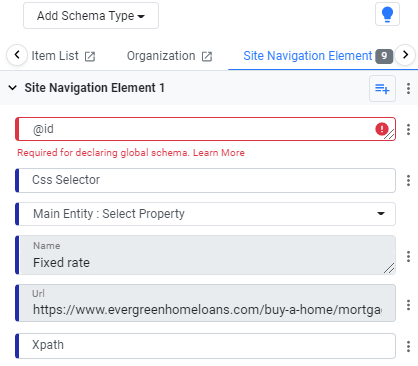
Mandatory Fields – @id and Name:
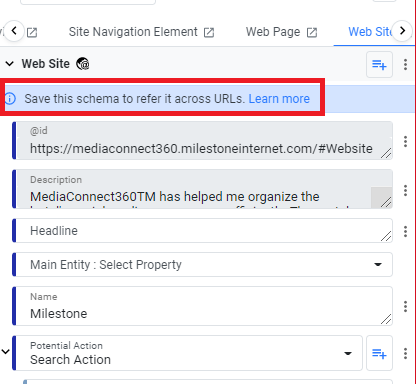
@id: If not already present, add the @id property by clicking “Add Property”, then select @id. Enter a unique URL with a fragment (e.g., https://yourwebsite.com#postaladdress).
Note: The @id must be unique and not reused in any other schema.
Name: Click “Add Property” again, select Name, and enter a descriptive name like “Postal Address.”
If either field is missing, the system will prompt you to complete them before you can declare the global schema.
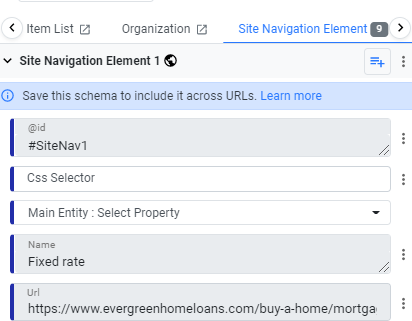
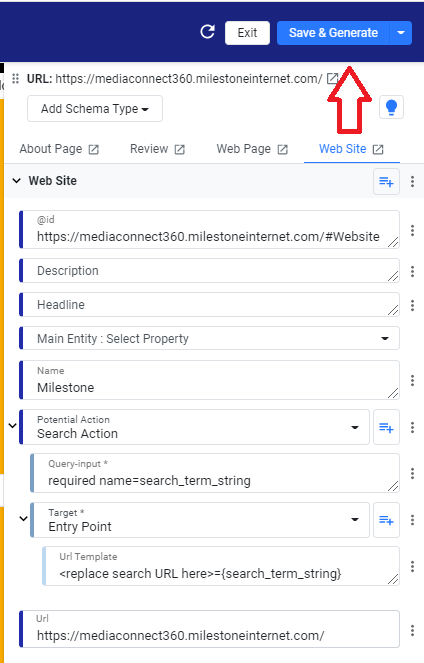
Save and Publish:
After adding the required fields, click “Set as Global for All URLs” again if prompted.
You’ll see a message asking you to save the schema so it can be included across all pages.
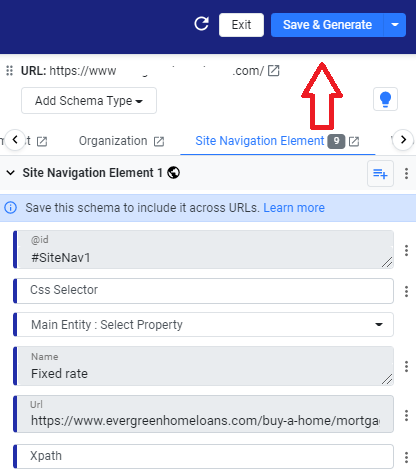
Click “Save and Generate” to publish the schema globally.
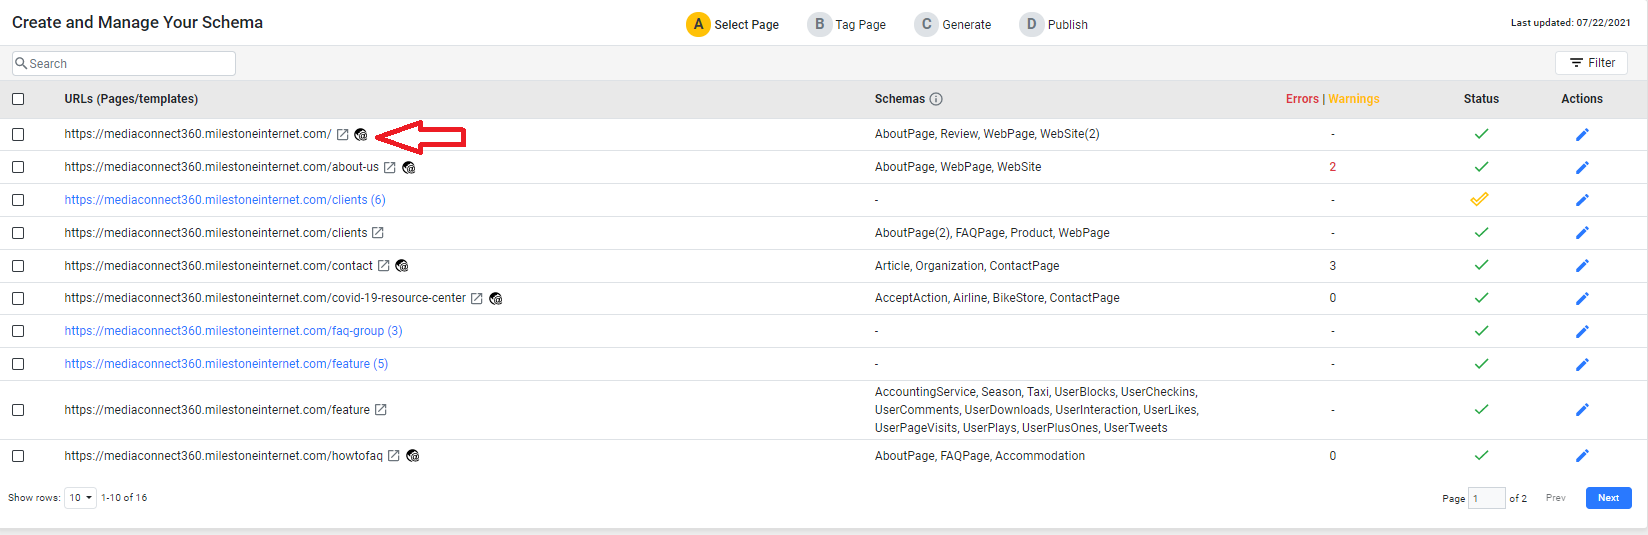
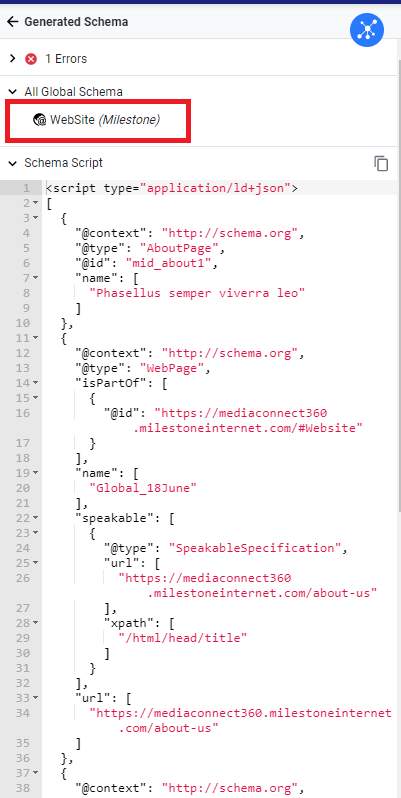
Verification:
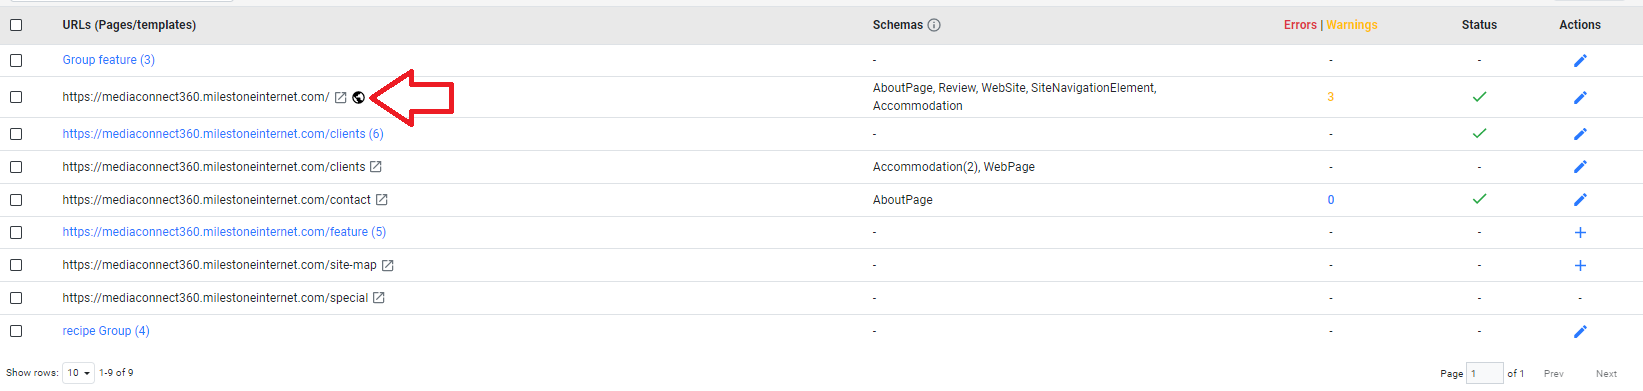
Return to the Tag Schema page.
You should see a Global Schema icon next to the URL indicating that this schema is now applied to all pages.
Note: You can choose to exclude the global schema from specific URLs (for example, an ‘AboutPage’) by unchecking a corresponding tickbox before publishing.
Important Reminder:
After updating and saving a global schema, re-publish all URLs to ensure the latest version is applied everywhere.
B. Setting as Global Reference
This option allows you to create a global schema that can be referenced selectively on pages.
Background:
Use Global Reference when you want to reuse schema data on demand—for example, an organization’s address might be used only on select pages rather than site-wide.
Steps:
Initiate Global Reference:
In the Schema Editor, select the desired schema.
Click the three dots (⋮) in the top-right of the editor.
Choose “Set as Global Reference.”
(As with Global for All URLs, make sure the @id and Name properties are added.)
Save and Publish:
You will see a prompt to save the schema to enable its use as a global reference.
Click “Save and Generate” to publish the schema.
On the Tag Schema screen, a Global Reference icon will appear next to the URL where the schema is saved.
Referencing Global Schemas:
To use the global reference schema on another page:
Open the Schema Editor for the new URL.
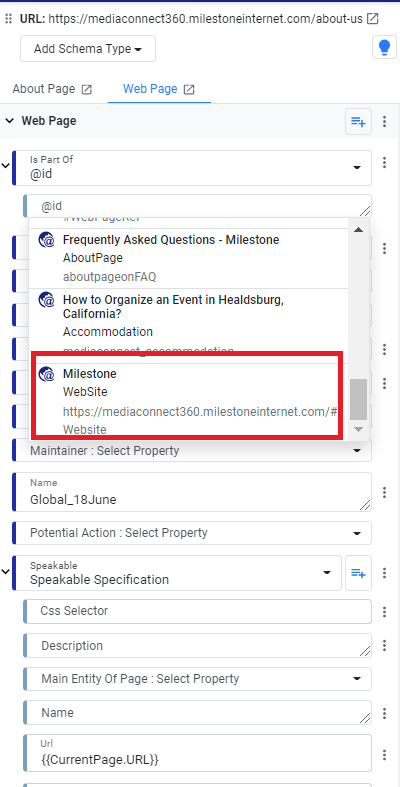
Choose the schema type (e.g., Organization) where the global schema should be referenced.
Click on the @id type field. A list of available global schemas will be displayed.
Select the global schema you created (e.g., “Postal Address”).
Complete any additional properties and click “Save and Generate.”
The Generated Schema preview will include your global schema as a reference.
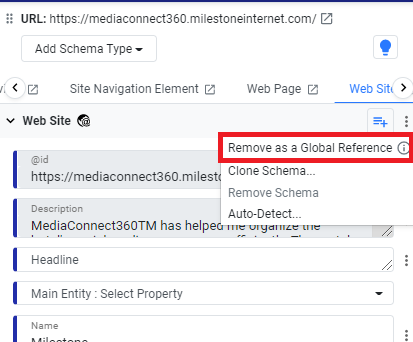
Removing a Global Reference:
To remove a global reference, navigate to the page where it was added.
Click the three dots (⋮) beside the global reference schema.
Select “Remove as a Global Reference.”
If the global schema is still referenced elsewhere, you’ll need to remove those first using the “Show me the referencing URLs” option.
Once removed from all references, click “Save & Generate” to complete the removal.

Part 3: Finding and Managing Global Schemas
A. Using Filters to Identify Global Schemas
Purpose:
Filters let you quickly find which URLs are declaring or referencing global schemas so you can manage and update them efficiently.
Steps:
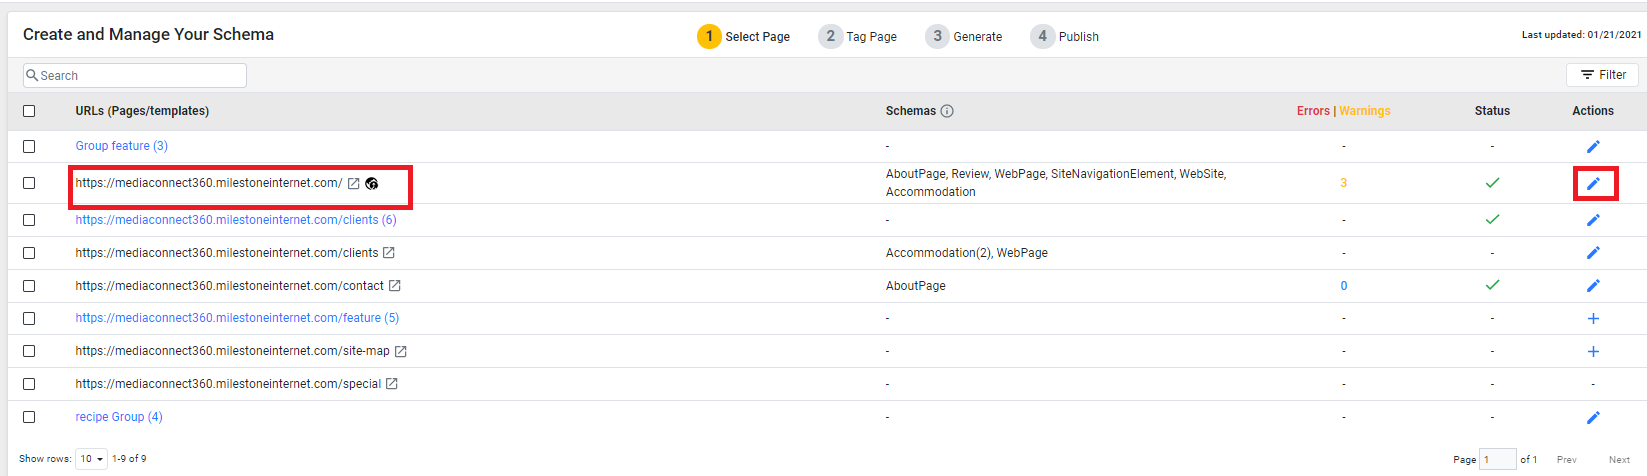
Identifying Declaring URLs:
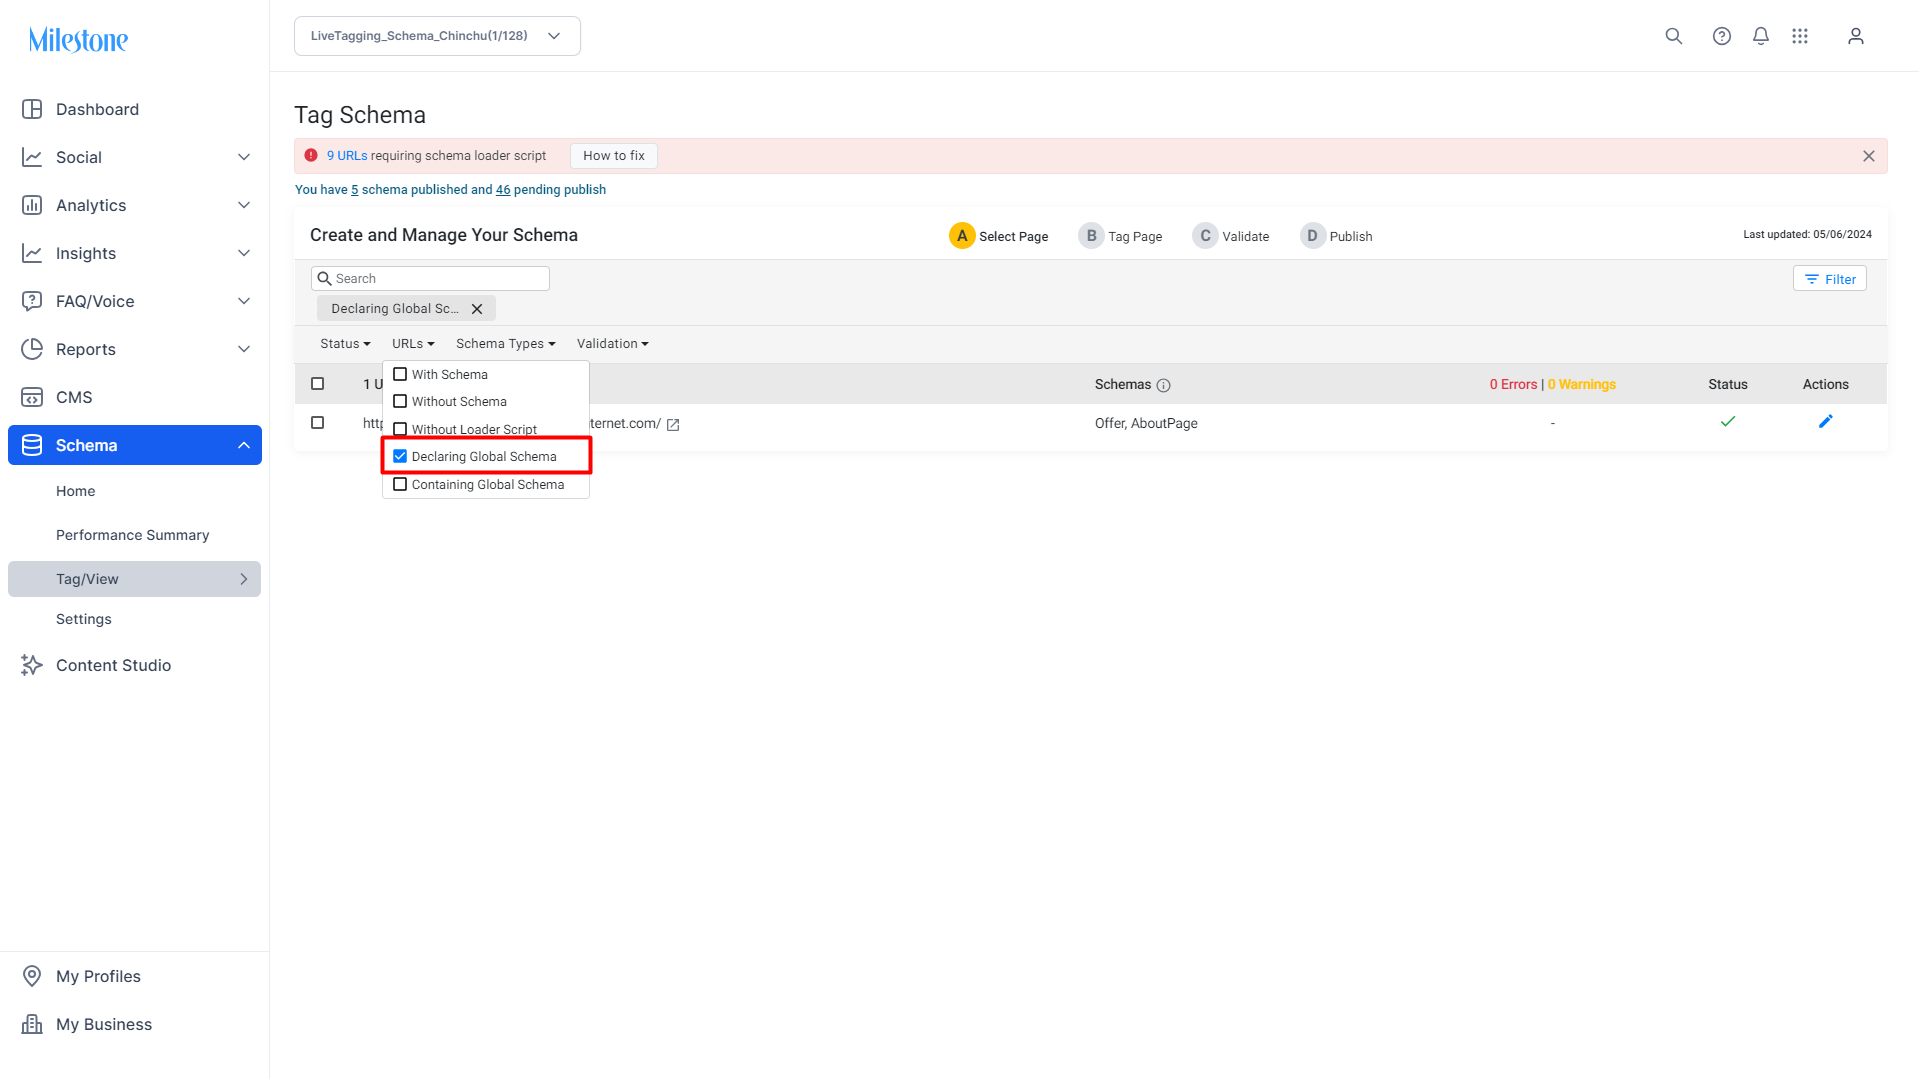
On the Tag Schema page, click the ‘Filter’ option.
Select “Declaring Global Schemas” to display URLs that have a global schema applied.

You can further narrow down your search and look for particular URLs using the 'Schema Types’ filter.
Identifying Referencing URLs:
Use the filter “Containing Global Schemas” to view URLs that reference global schemas.

Additional filter options allow narrowing by Schema Types.

B. Updating Global Schemas (Auto-Update)
Why Updating Matters:
When a schema is declared globally, any changes you make can automatically update across all referencing URLs. This is crucial for maintaining consistency when your business details or navigation elements change.
Steps:
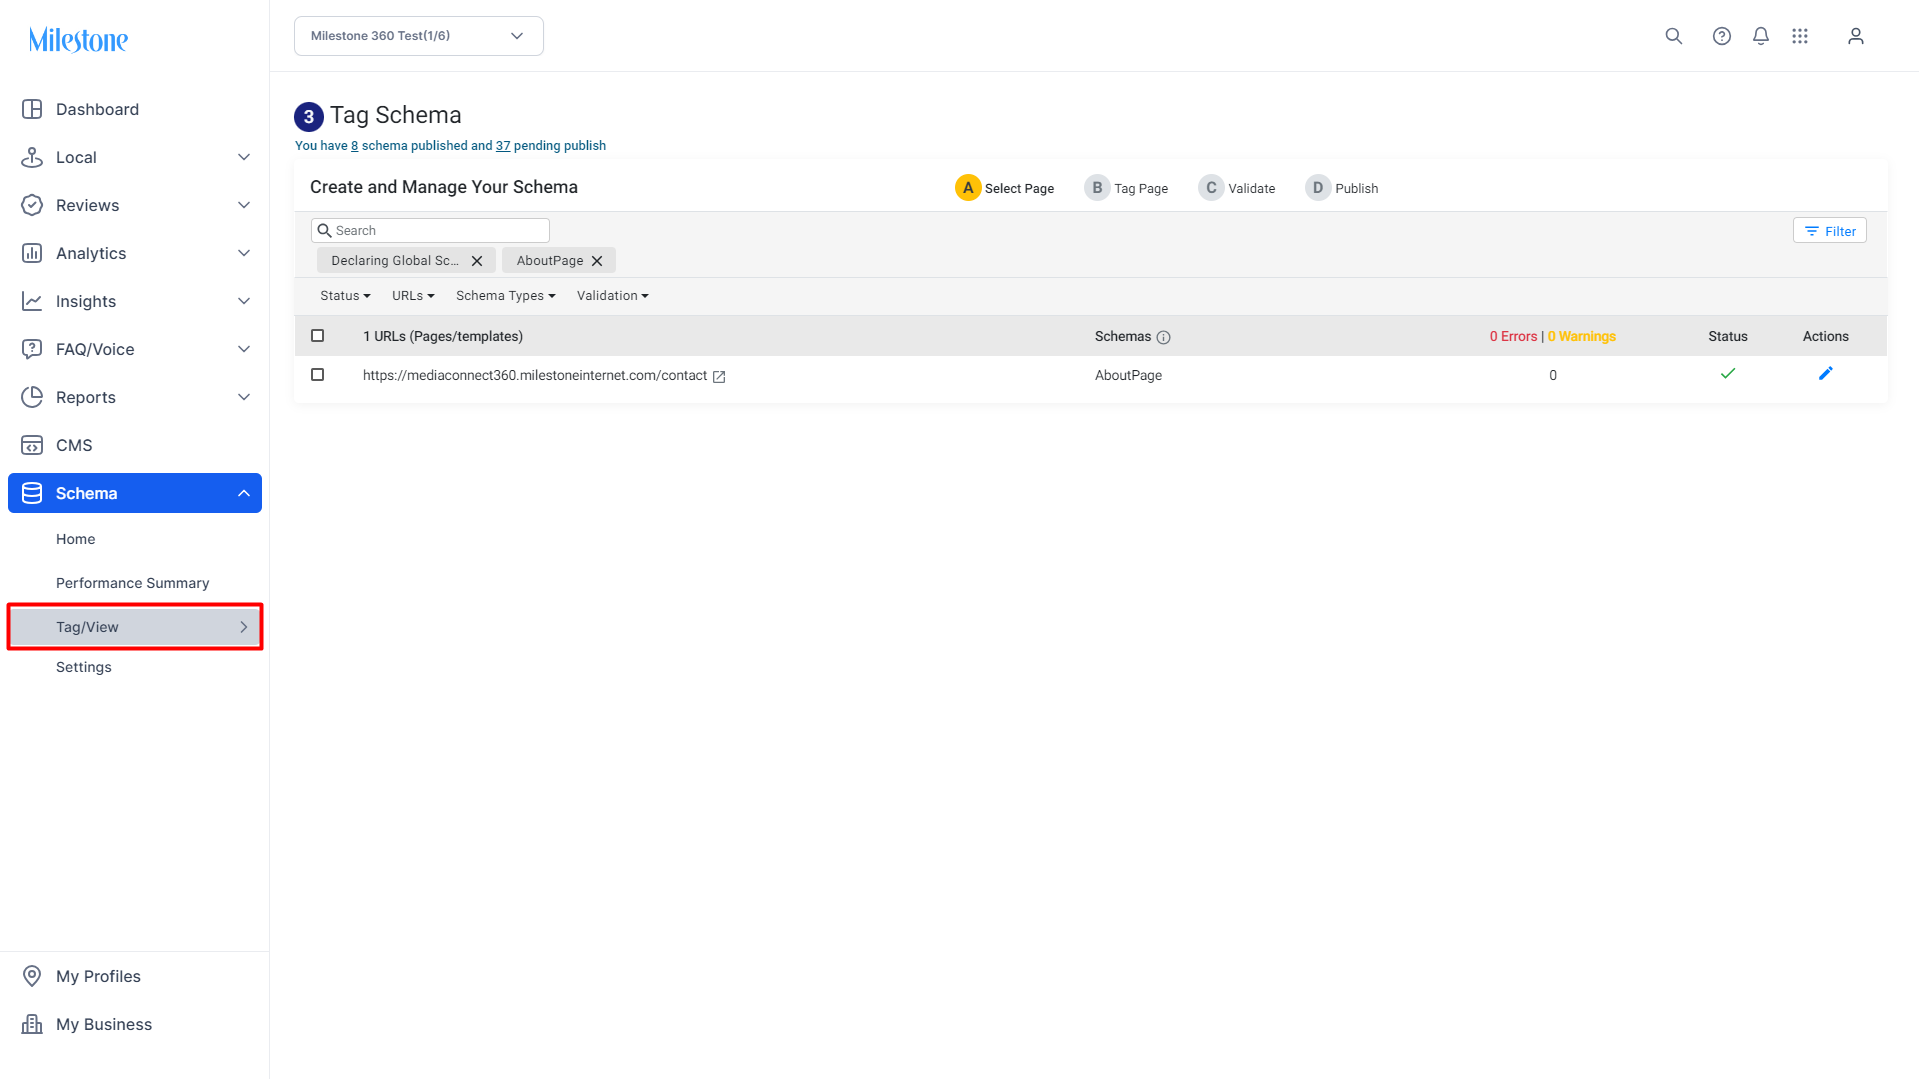
Navigate to the Declaring URL:
In the Schema Manager, go to Tag/View > Tag Schema.
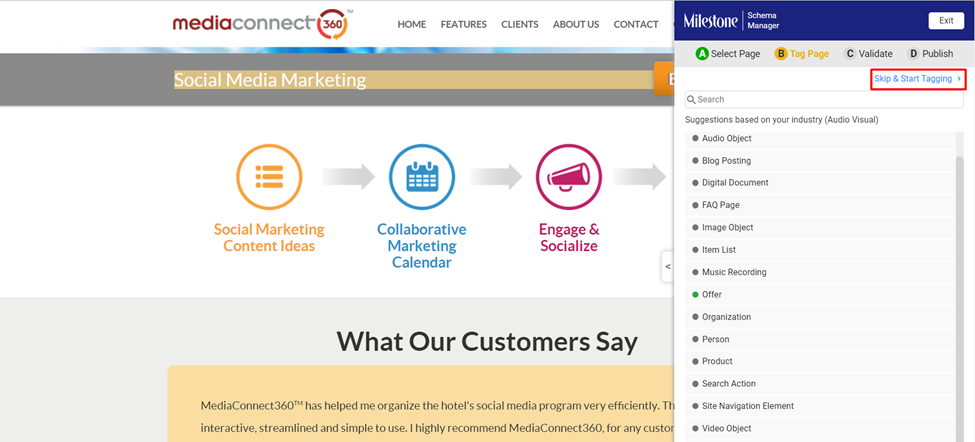
Click “Edit” on the URL where the global schema is declared (for example, the AboutPage).
You can skip the suggested section by clicking on ‘Skip and Start Tagging’.
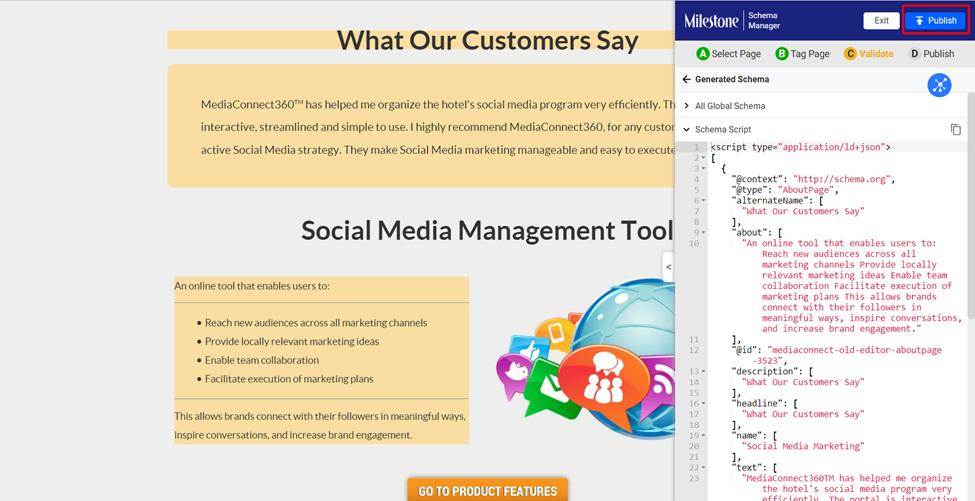
Make Changes:
Update the schema properties (e.g., add an alternate name).
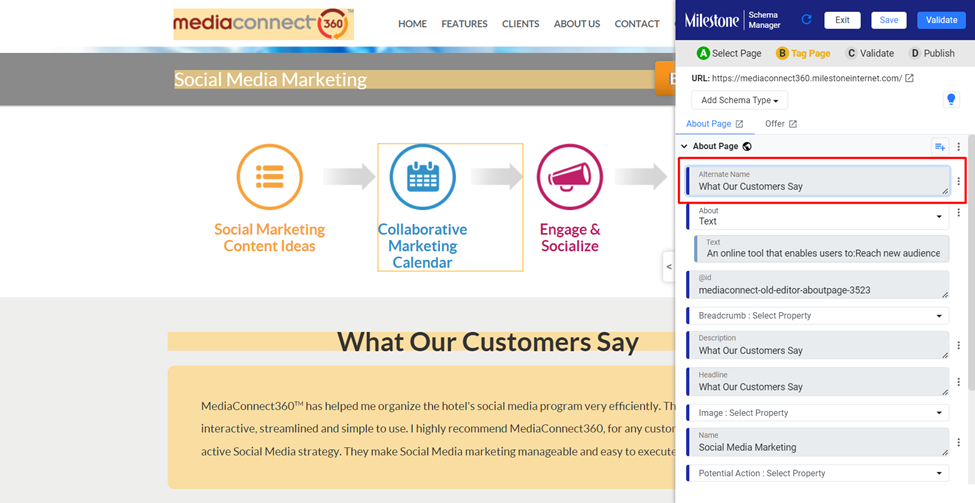
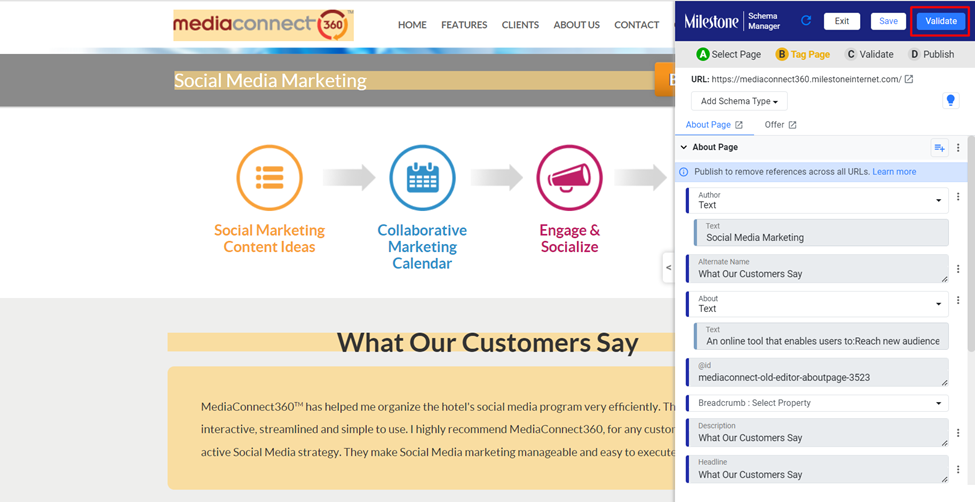
Click “Validate” to check the changes.
You can see that the ‘Alternate Name’ property has been updated to the schema.
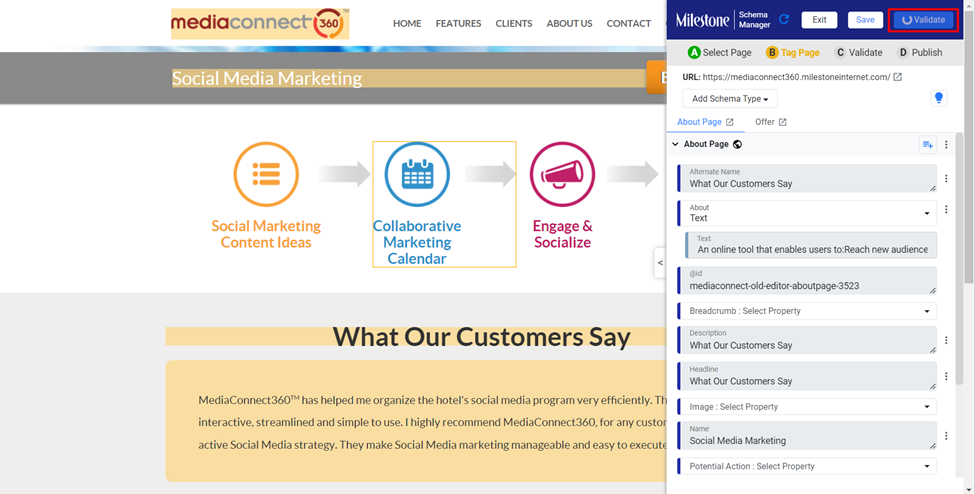
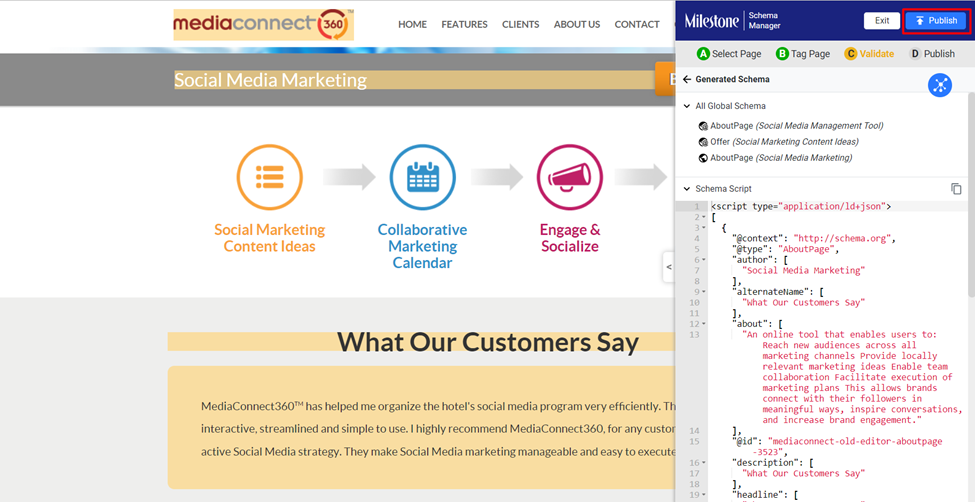
Publish Updates:
Click “Publish”.
Confirm that the changes will affect all pages referencing the global schema.
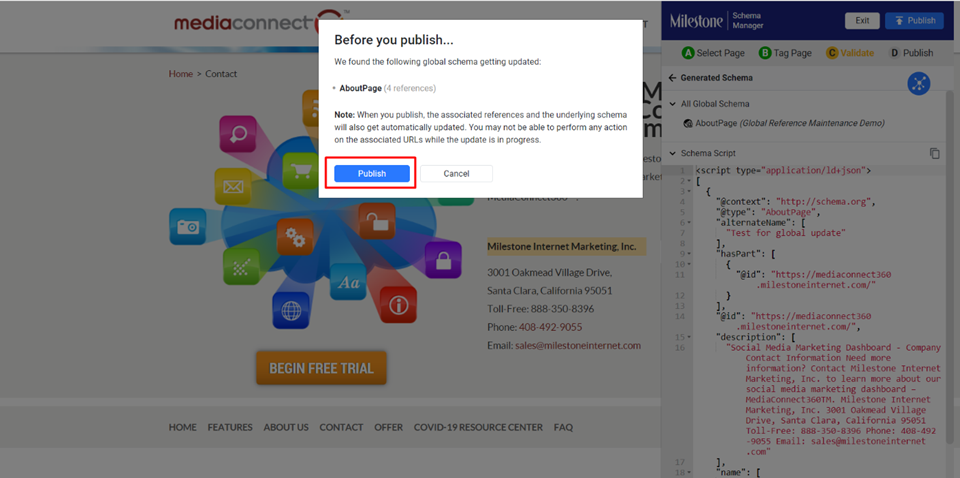
Once published, all referencing URLs will display the updated schema.
Notification:
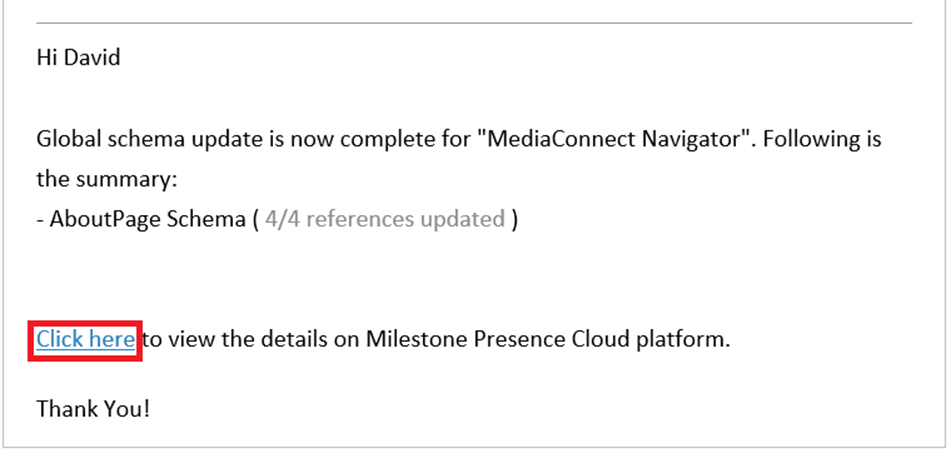
An email notification will be sent showing the affected URLs and publish status.
You can download a status report from Reports for further details.

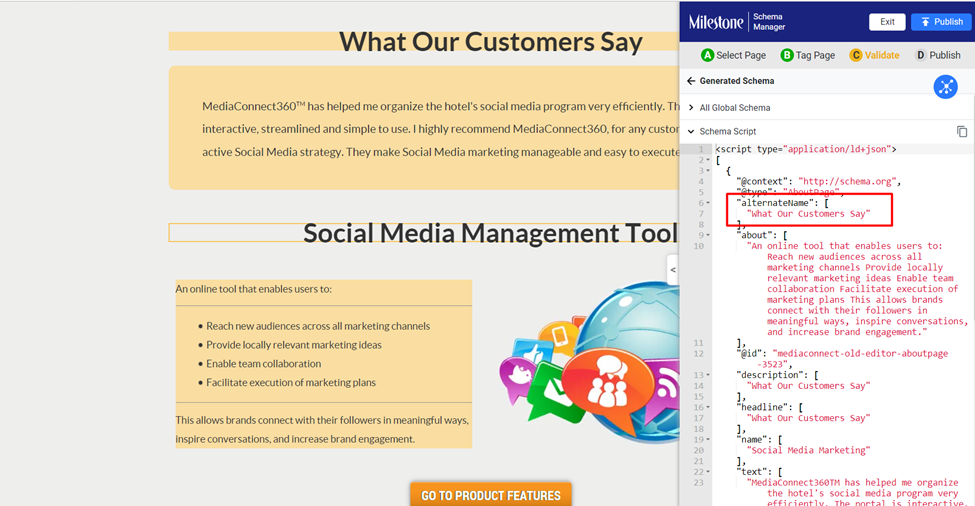
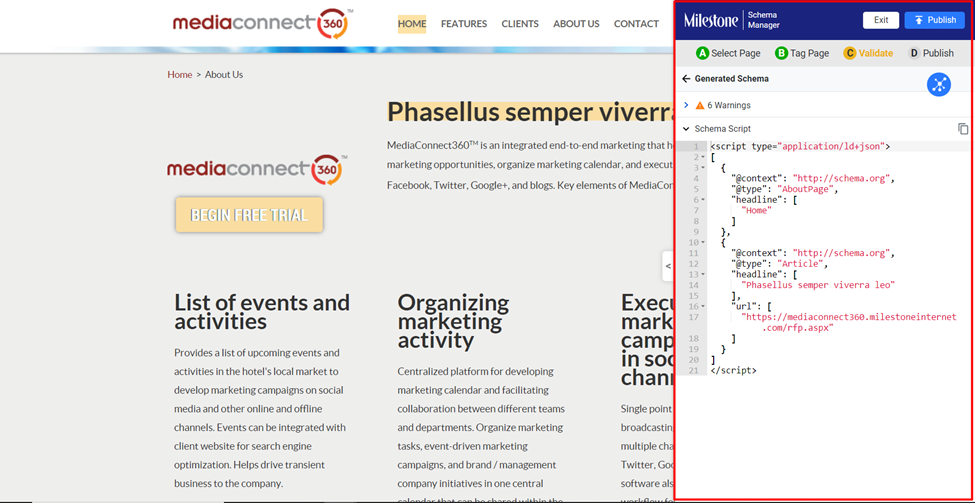
Once the schema has been successfully updated, you can view the updated URLs’ schema in the ‘Navigator’.

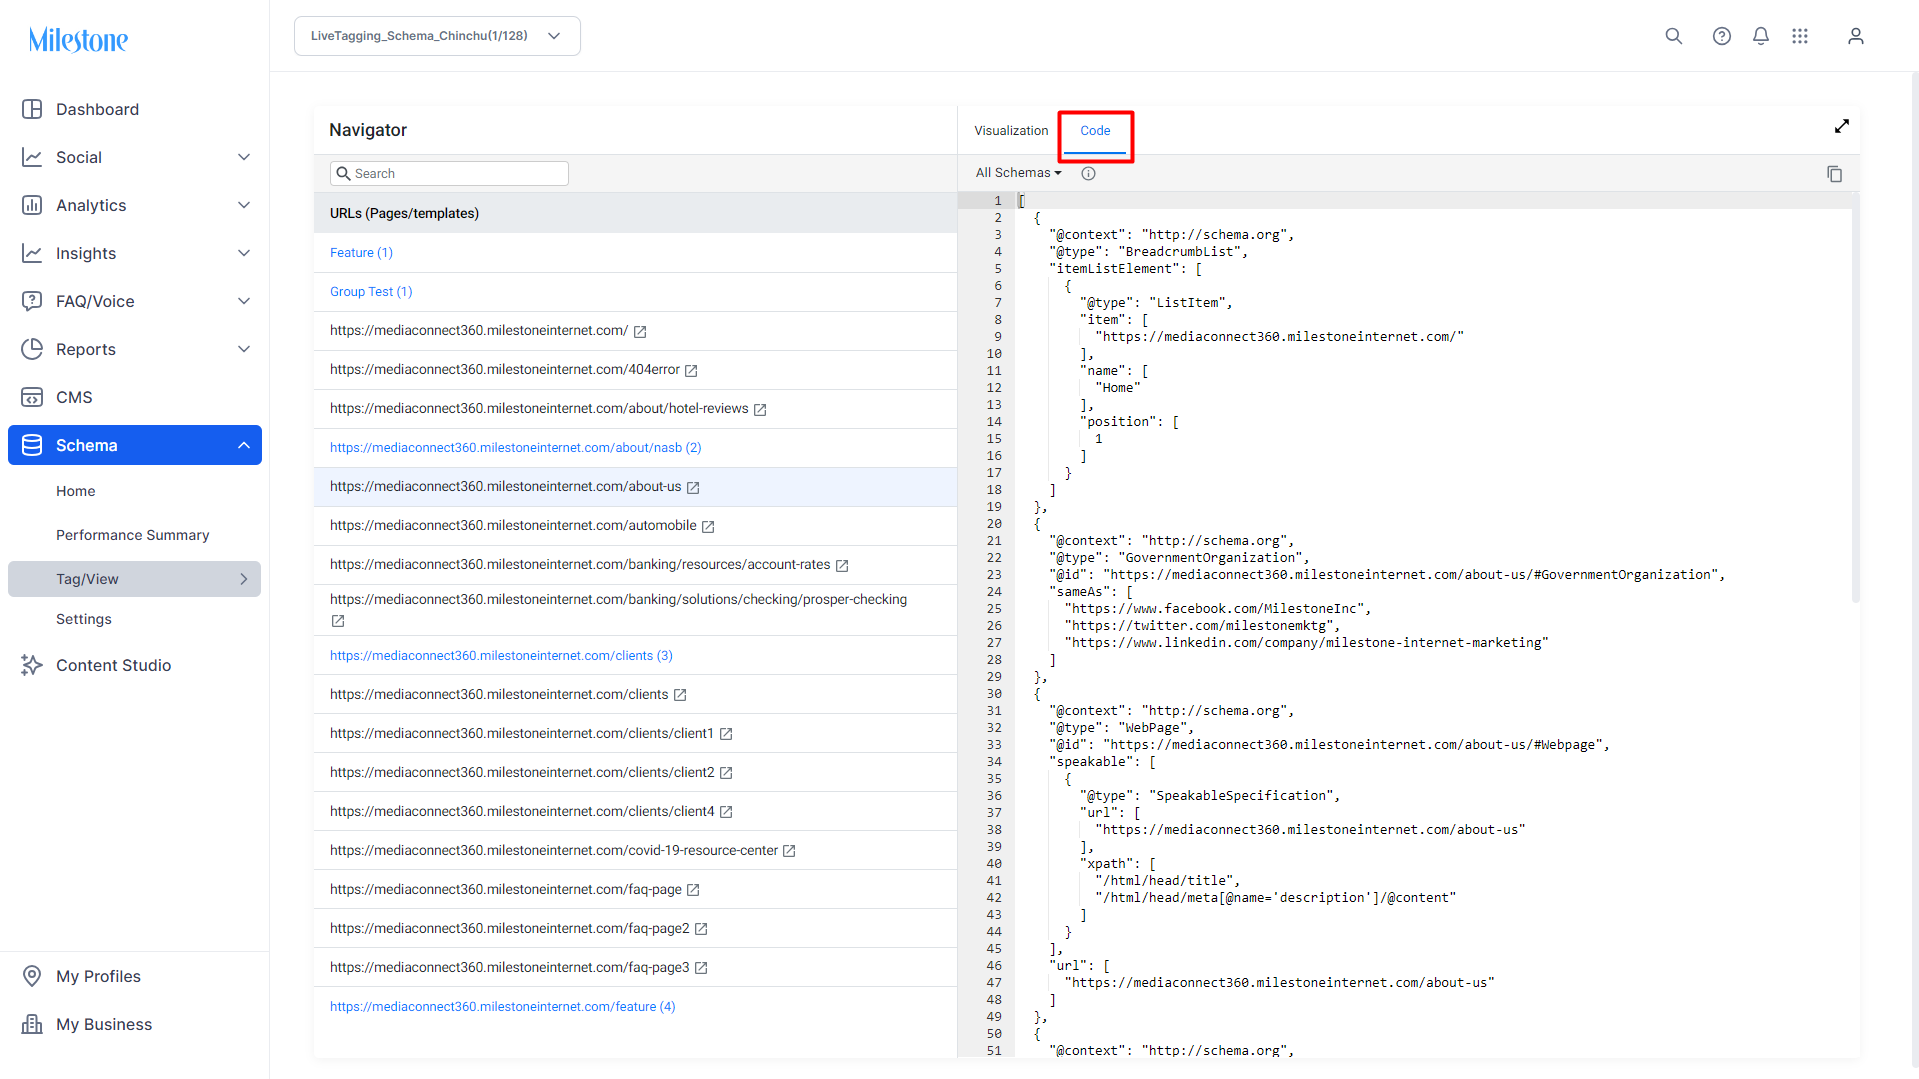
Select one of the referencing URLs.
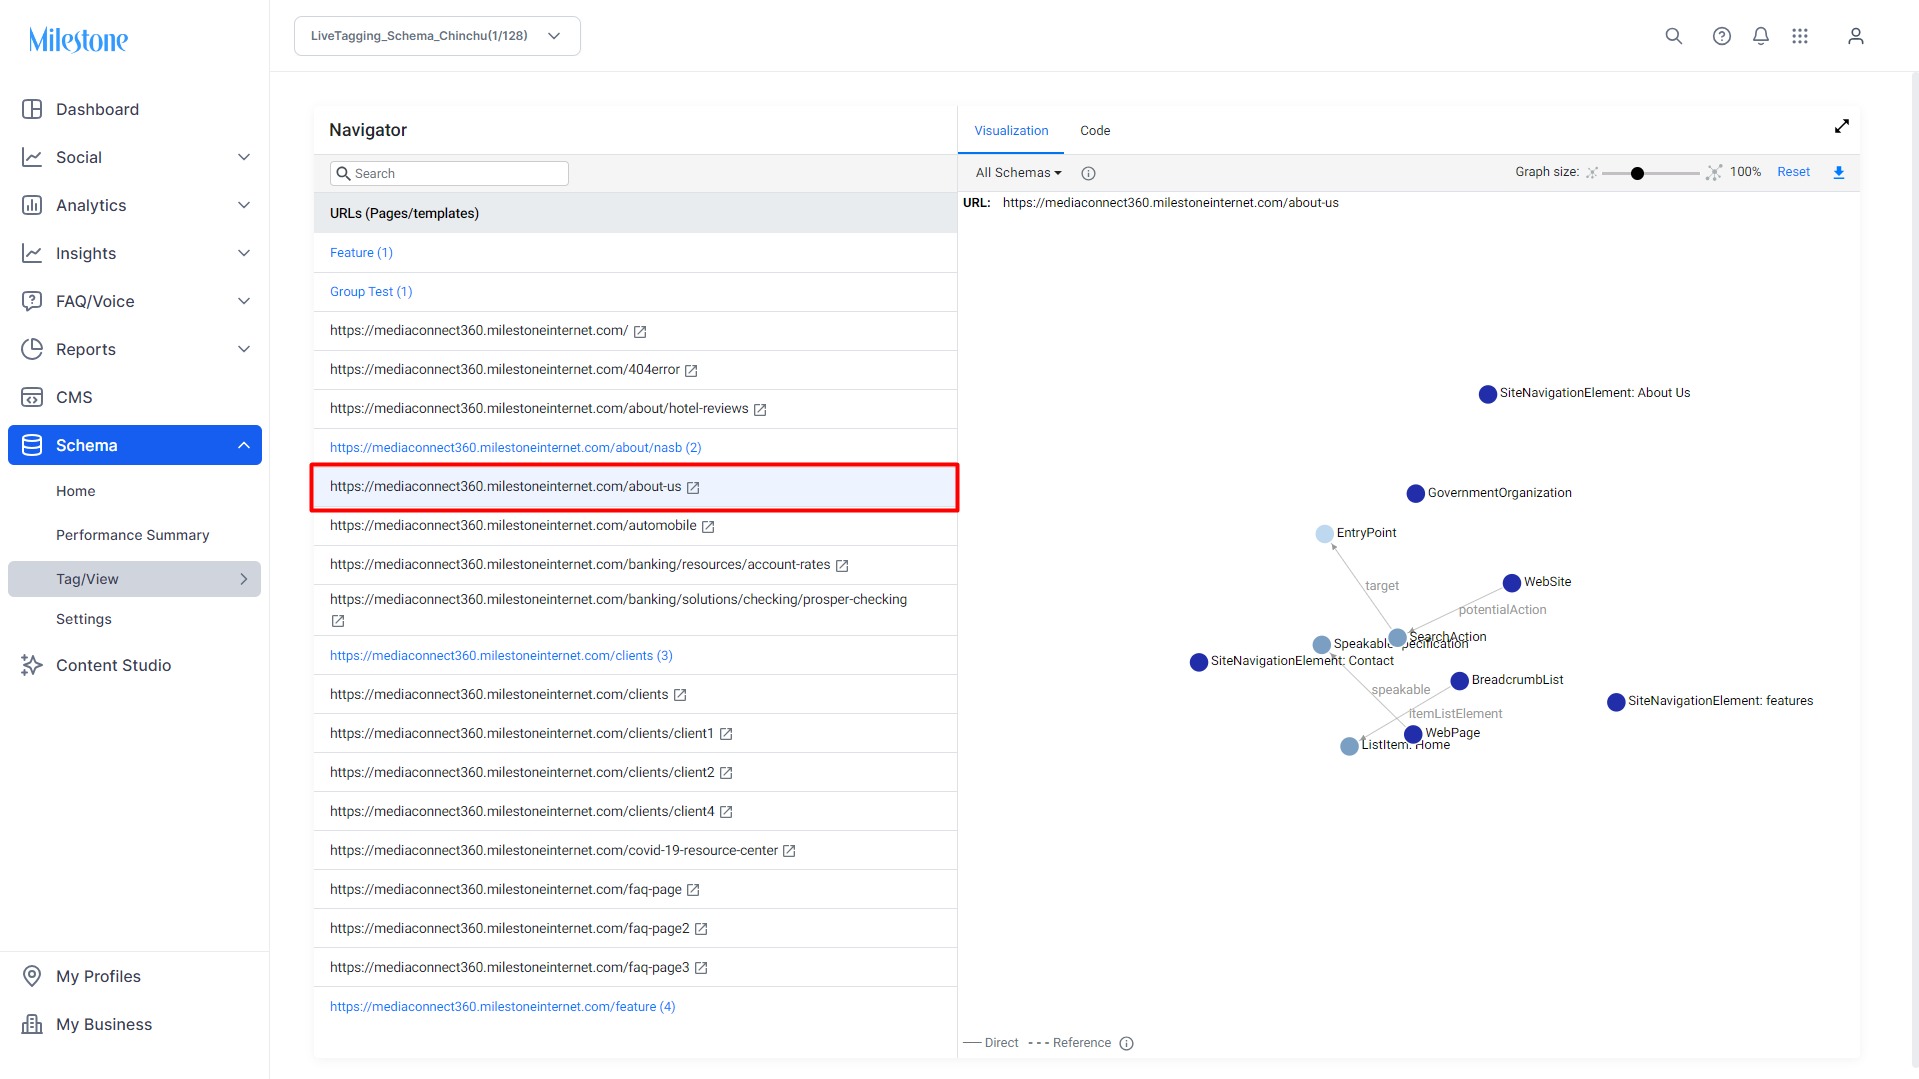
Click on ‘Code’ at the top to view the schema. Here, you can see that the property has been updated from the Global Reference Schema.
Once the action is complete you can download a status report by clicking on the link within the email.
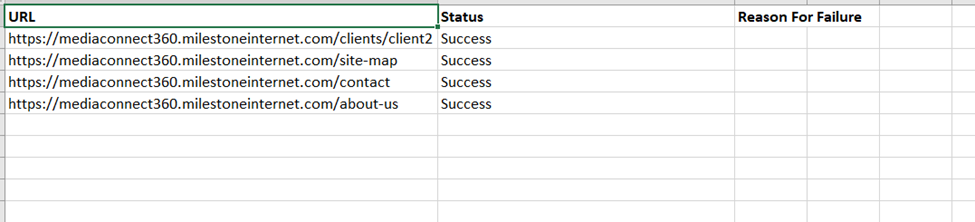
You will be redirected to Milestone Reports. You can use the three-dot menu corresponding to the report to download the spreadsheet.
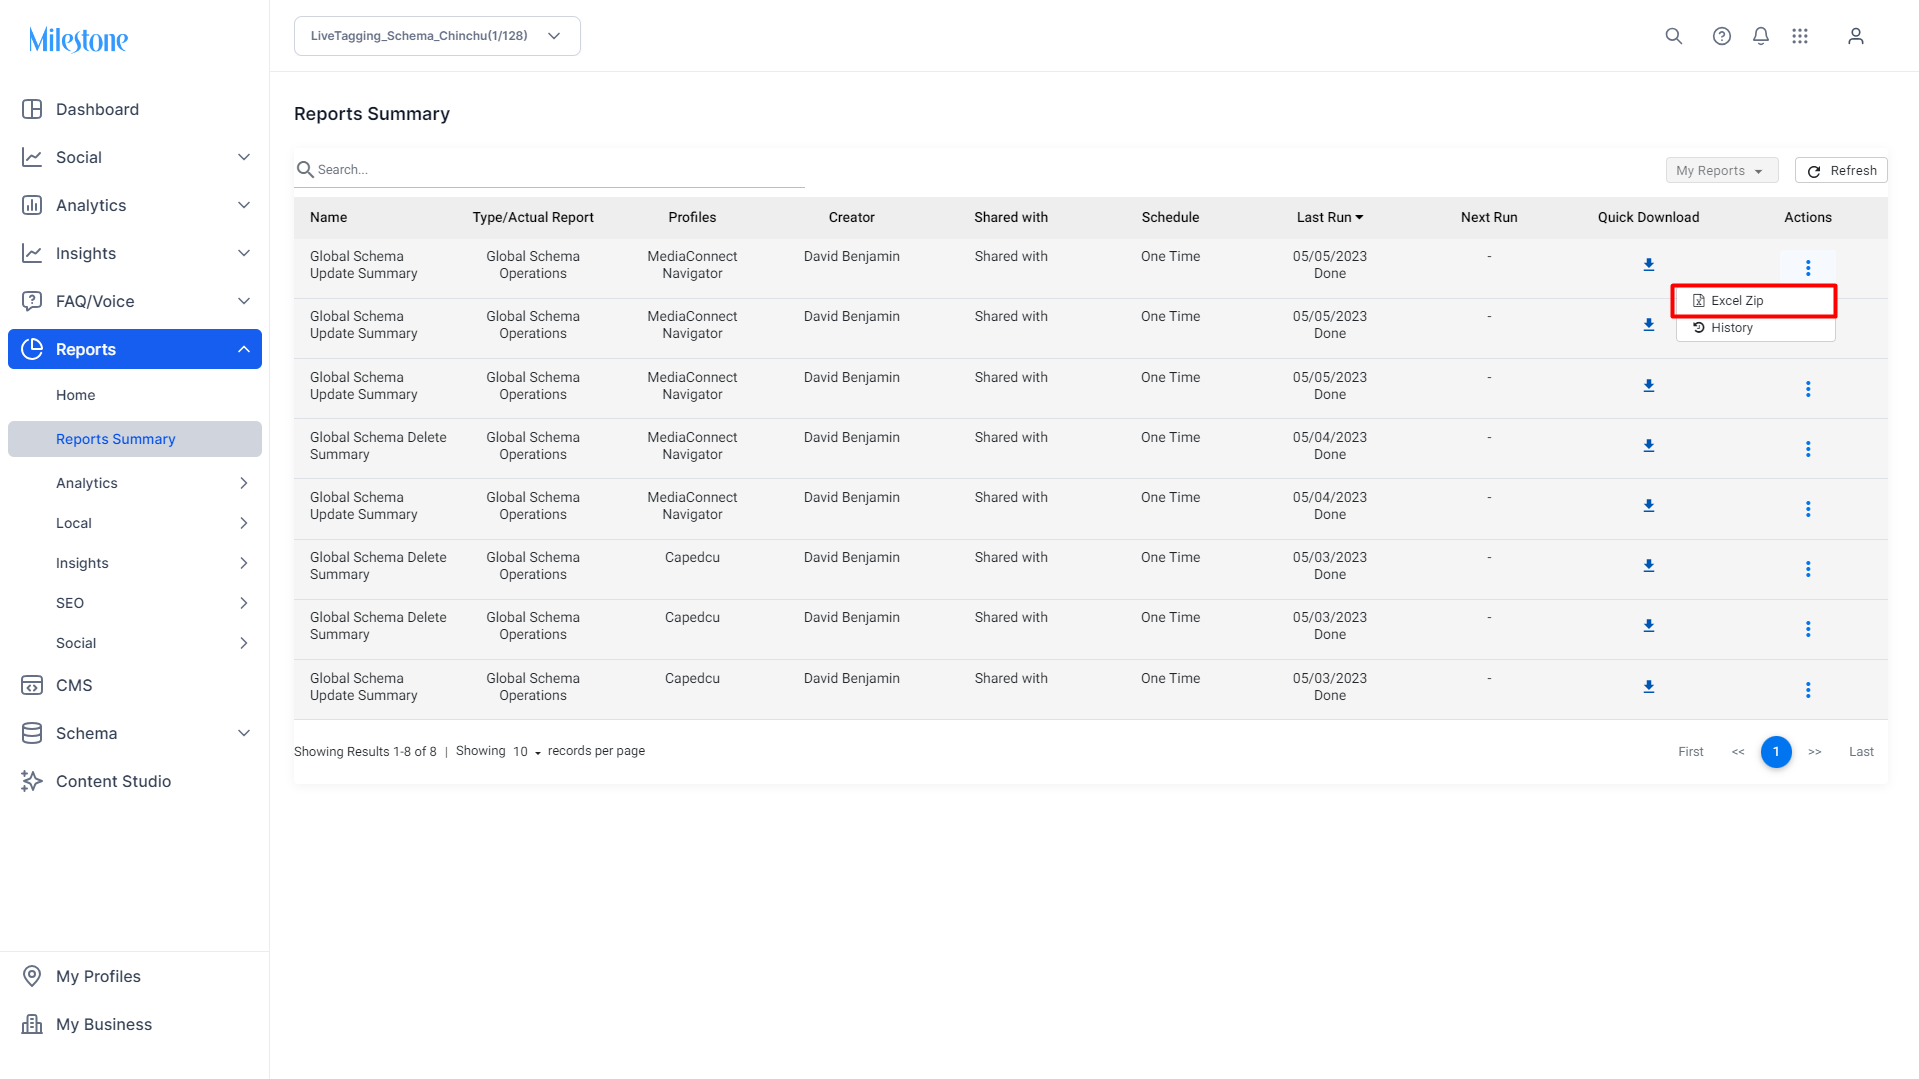
The report displays the affected URLs and the schema publishing status.
C. Deleting a Global Schema
Reminder:
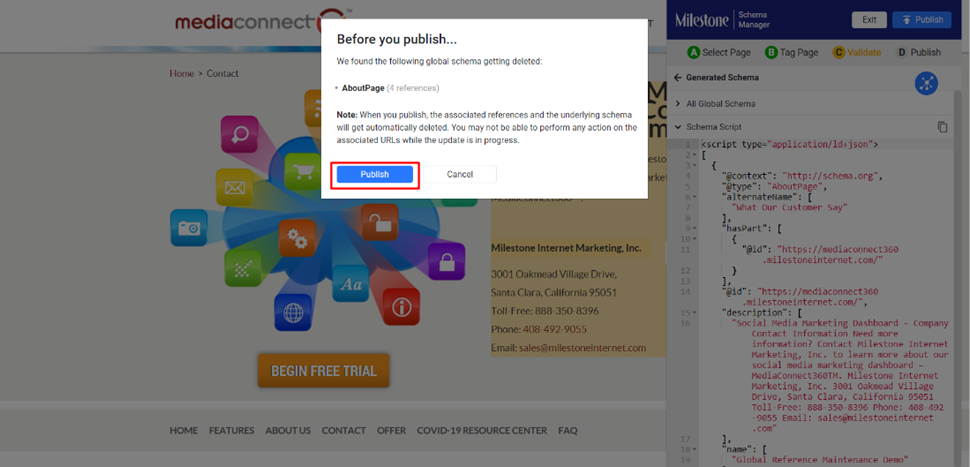
Deleting a global schema will remove it from all pages where it is referenced.
Steps:
Locate the Declaring URL:
Use the filter to find URLs declaring the global schema.
Click “Edit” on the URL.
Remove the Global Declaration:
Click the three dots (⋮) next to the global schema.
Select “Remove as Global for All URLs.”

Validate the update to the schema.
Click “Publish.”
Handling References:
You will be notified of the number of referencing URLs that will be affected.
If necessary, remove these references first.
Confirm the deletion to complete the process.
Upon opening the schema for a referencing URL now, you can see that it is no longer referencing the removed Global Schema.
Please note: This method can be used to update both Global Schema and Global Reference Schema
Glossary
Global Schema: A schema declared to be reusable across all (or selected) pages on your website.
@id: A unique identifier property that distinguishes one global schema from another. This helps search engines link your schema correctly.
Name: A descriptive label for a global schema that, when paired with @id, aids in recognition and reference.
Global for All URLs: A mode in which a declared global schema is automatically applied to every page on your website.
Global Reference: A mode allowing you to create a global schema that can be selectively referenced in other schemas as needed.
Tag Schema: The process of applying schema markup to your website’s content.
Schema Manager: A tool that provides a visual interface to add, edit, and manage schema markup.
Validation: The process where the system checks your schema entries for errors and warnings before publishing.
Tips for Success
Think Globally: Use global schemas for content that appears on every page (e.g., organization details, contact information) to save time.
Double-Check Uniqueness: Always ensure your @id values are unique to prevent conflicts.
Filter Regularly: Use the filtering options to keep track of where your global schemas are declared or referenced.
Maintain Consistency: Re-publish URLs when you update a global schema, ensuring consistency across your site.
Stay Informed: Use reports and notifications to monitor the status and impact of your global schema updates.