Custom Rules
Add custom rules for schema to map on-page text to schema properties
In some cases the content on the screen does not match schema properties that need to be tagged. Applying a custom schema rule to map certain pieces of page content to schema can greatly reduce tagging and deployment times.
Milestone Schema Manager lets you create custom rules for schema on a page so that you do not need to individually tag and map pieces of page content to schema properties.
Path: Milestone Schema Manager > Tag/View > Tag Schema > Edit
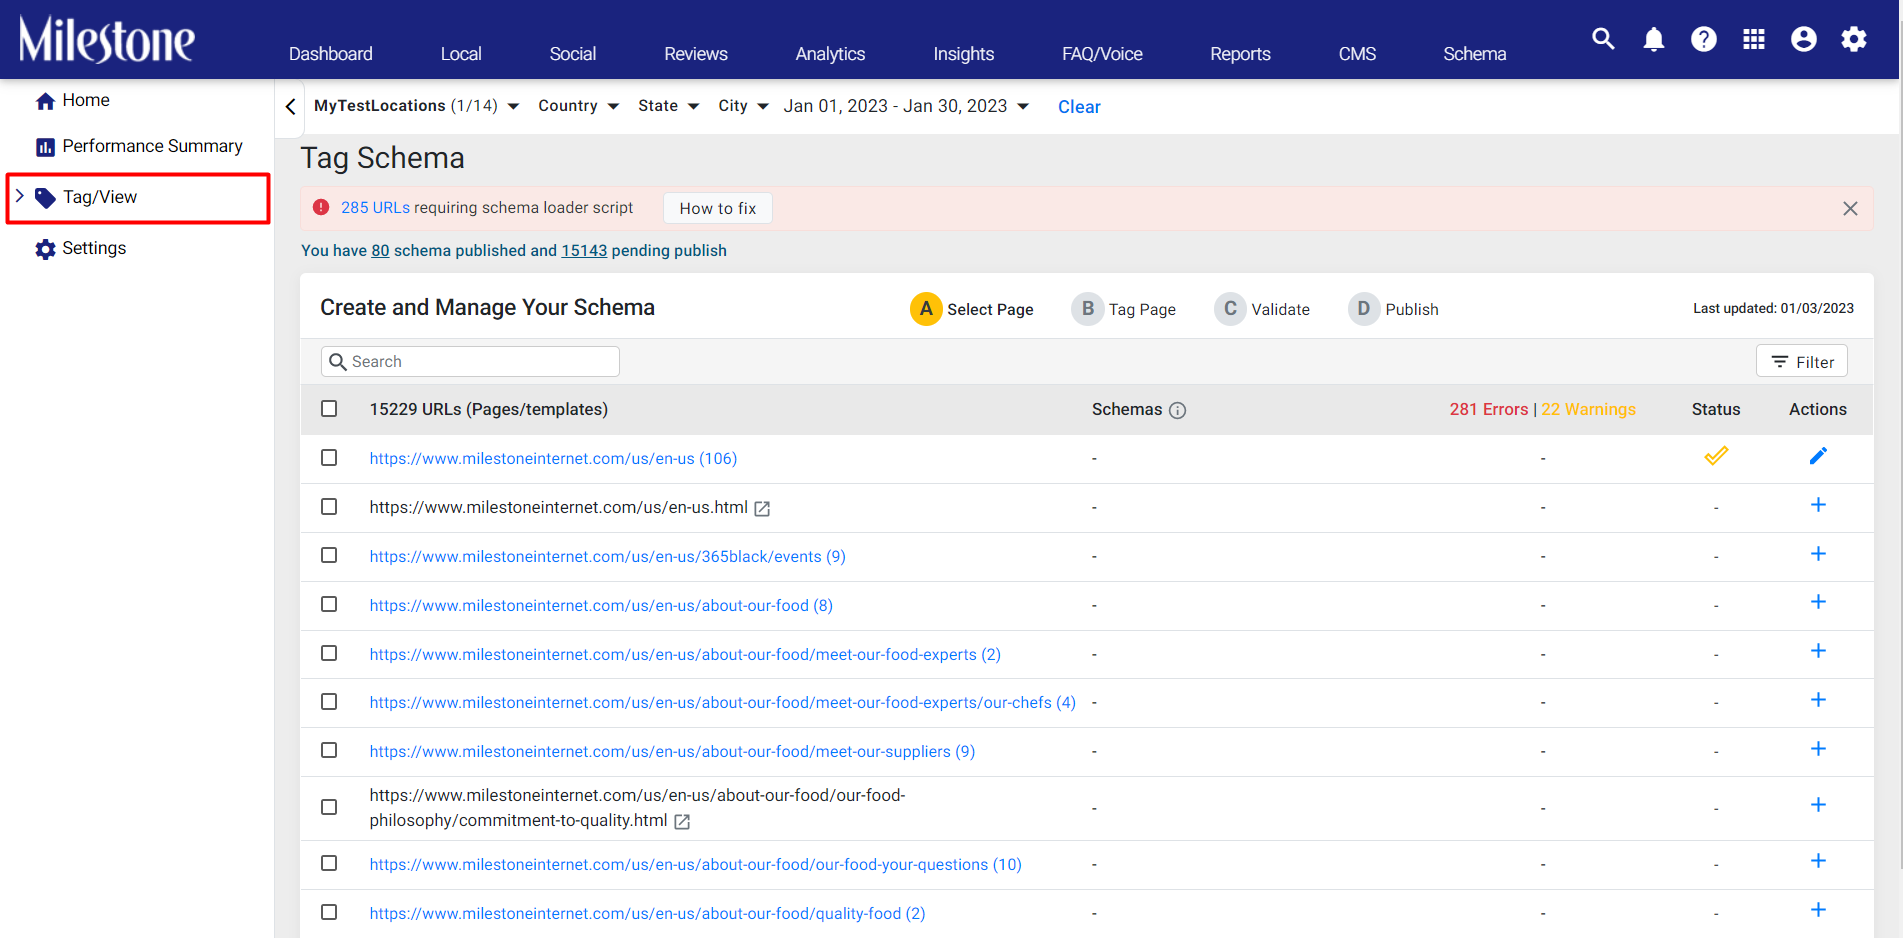
Step 1: Click on ‘Tag/View’ in the left navigation panel of Milestone Schema Manager
Step 2: From the expanded menu click on ‘Tag Schema’
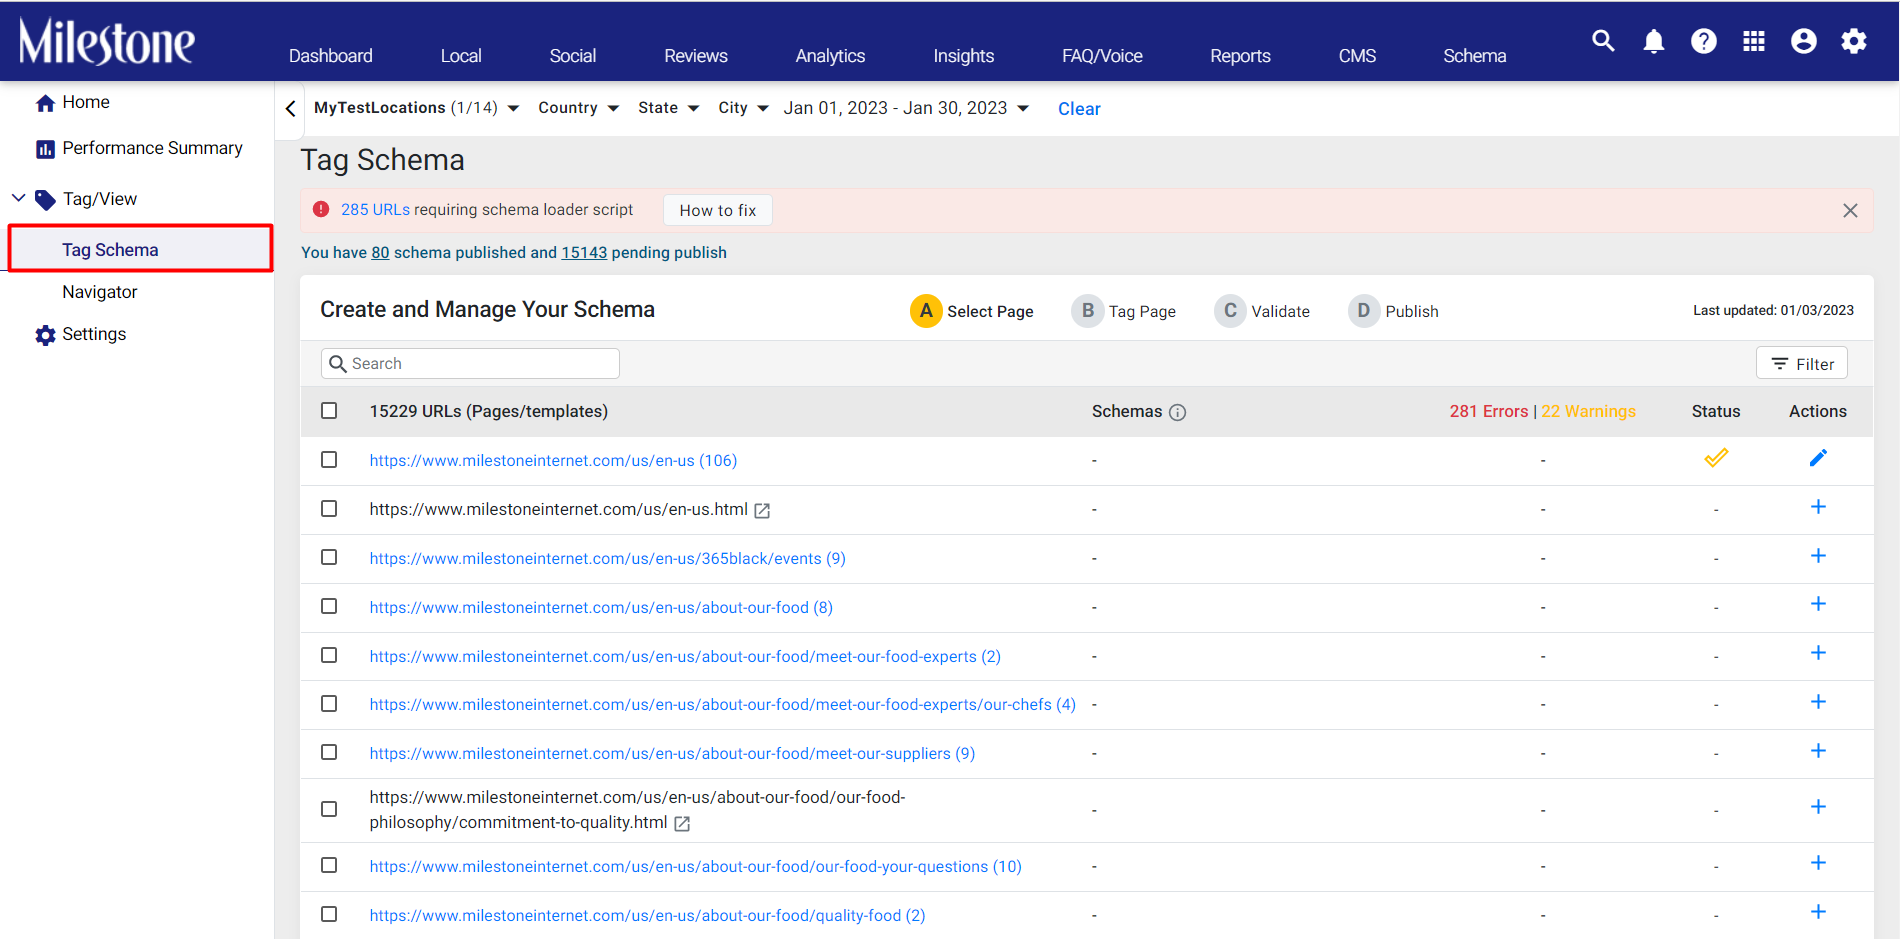
Step 3: Click on the edit icon in the right column corresponding to the schema you wish to apply the custom rule to

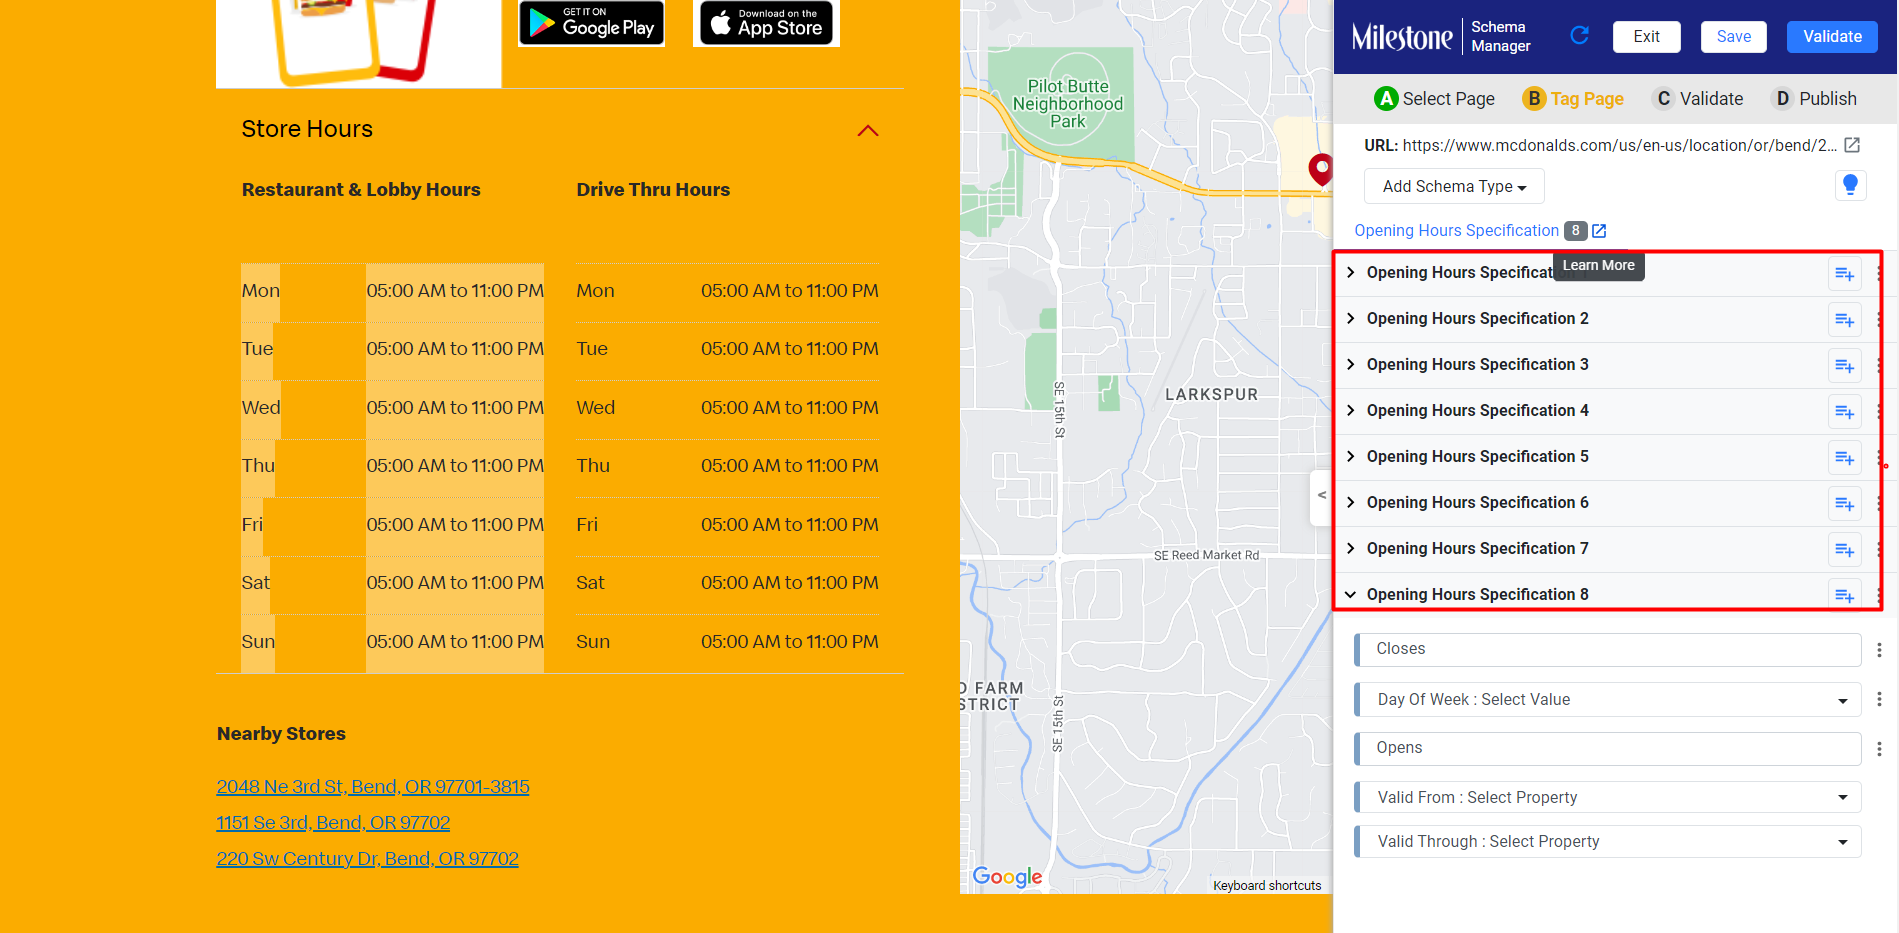
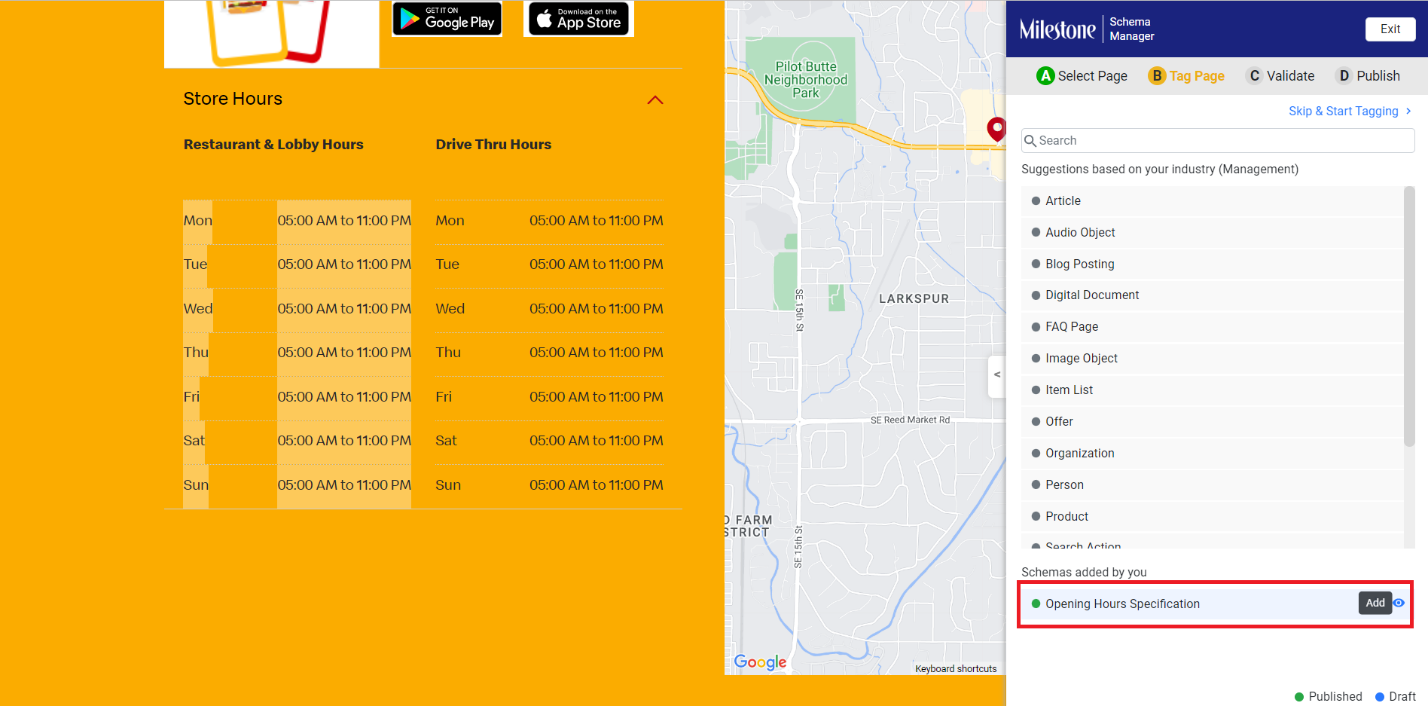
Step 4: From the schema manager toolbar to the right click on the ‘+’ corresponding to the schema you wish to add the custom rule to
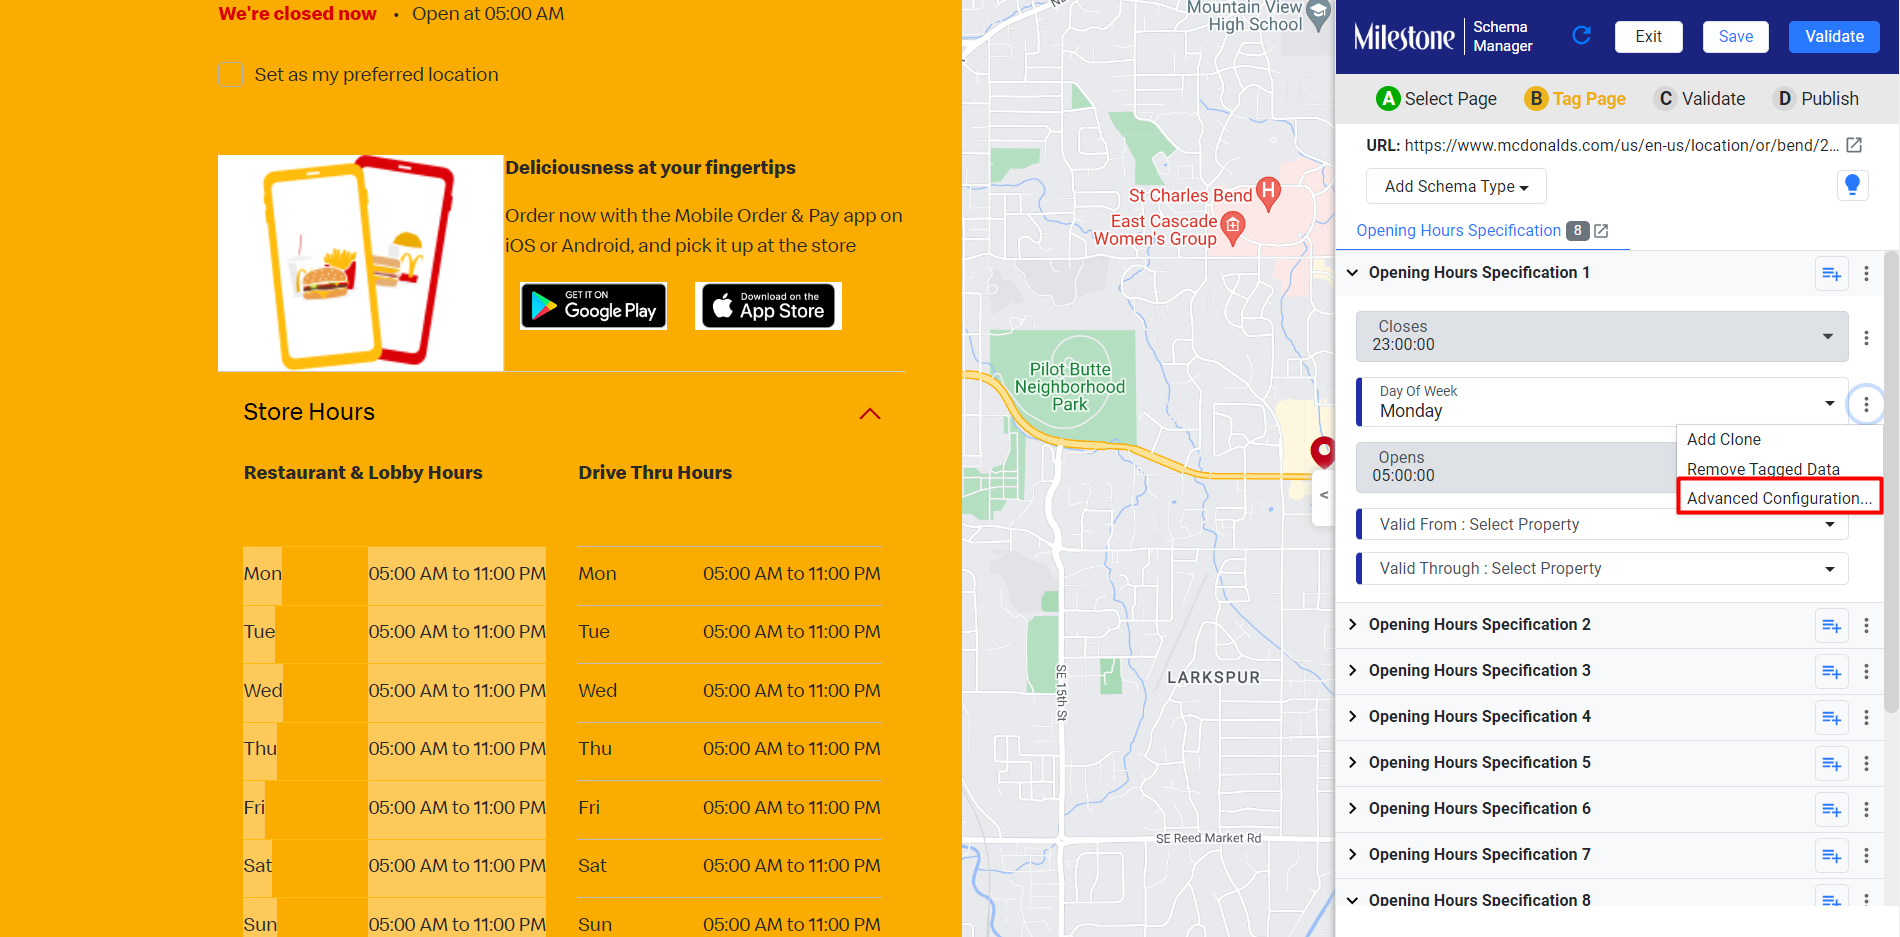
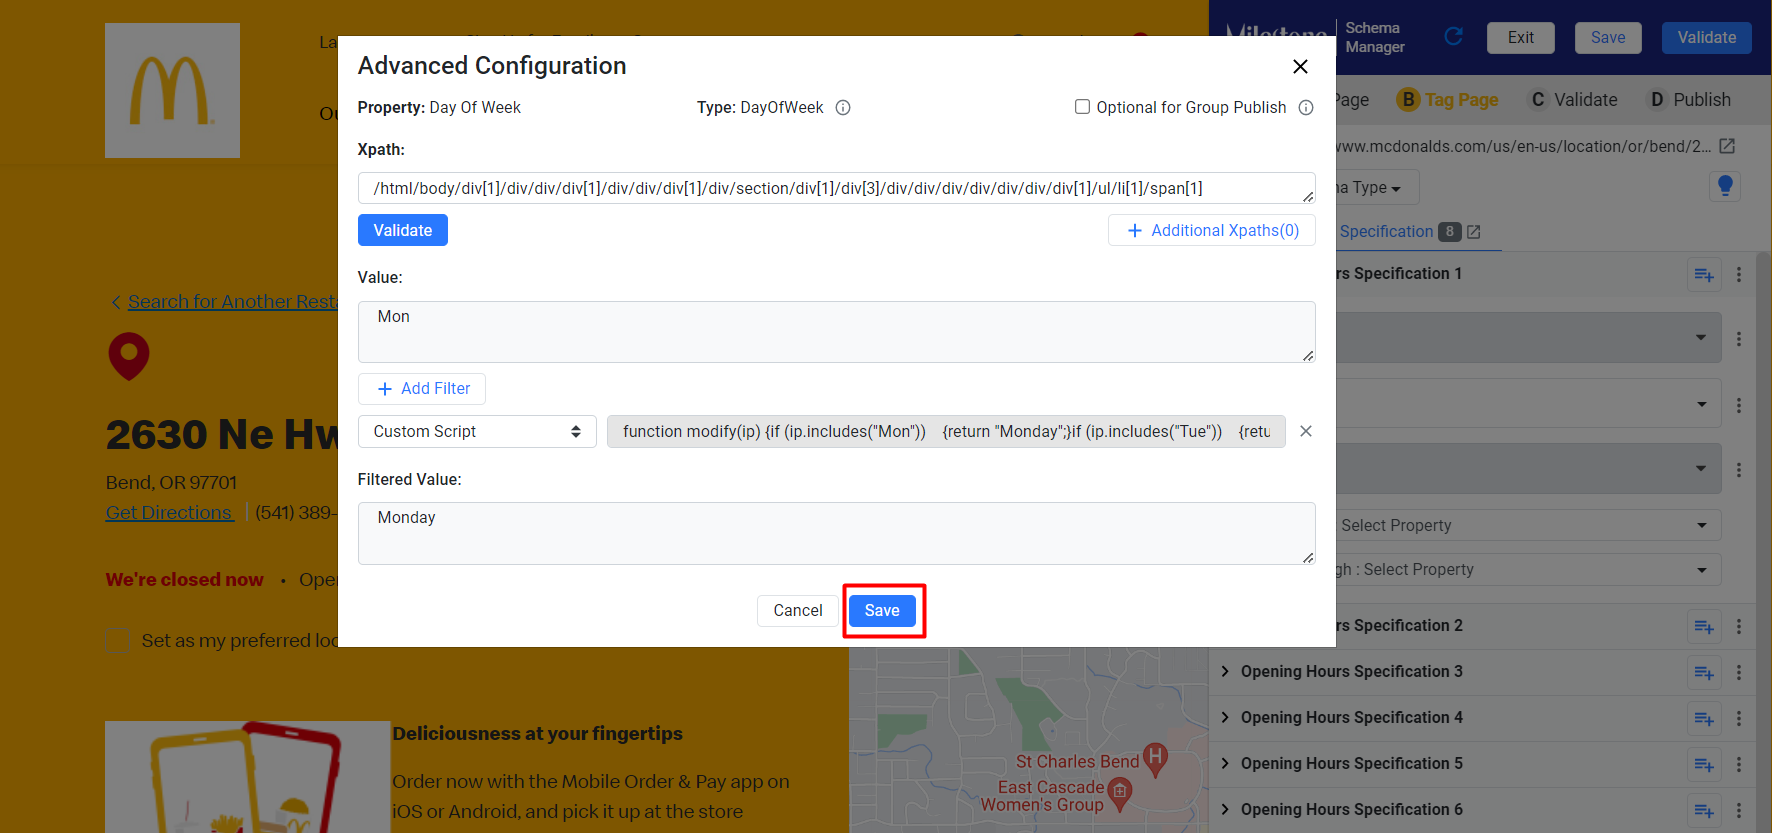
Step 5: In the schema property click on the three-dot menu corresponding to the element you wish to add the custom rule to and go to ‘Advanced Configuration’.
In this case the days of the week at displayed as ‘Mon’, ‘Tue’, ‘Wed’, etc., on the page but schema vocabulary uses ‘Monday’, Tuesday’, ‘Wednesday’, etc.
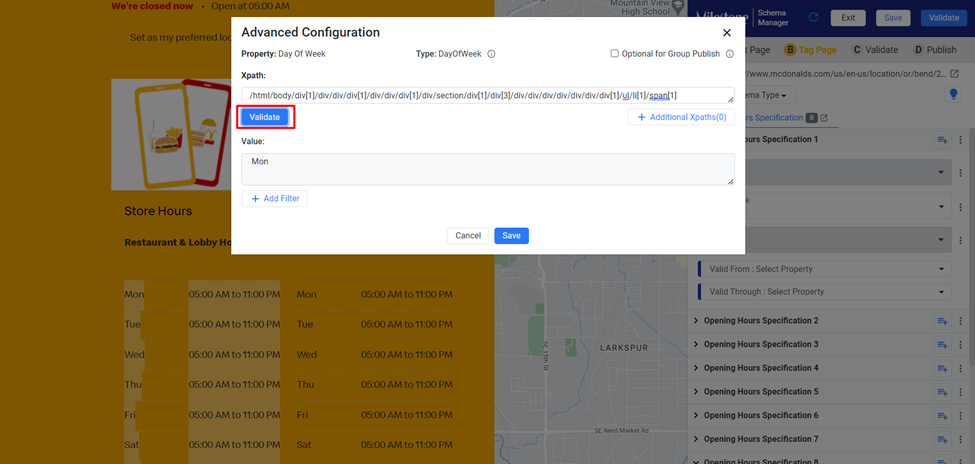
Step 6: From the ‘Advanced Configuration’ menu we can validate the x-path for the element.
In the case the x-path returns the value ‘Mon’, we wish for it to return ‘Monday’
Step 7: To add a custom rule for this x-path click on ‘Add Fiter’ and select ‘Custom Script’ from the dropdown menu

Step 8: Click on the script section to view and edit the script
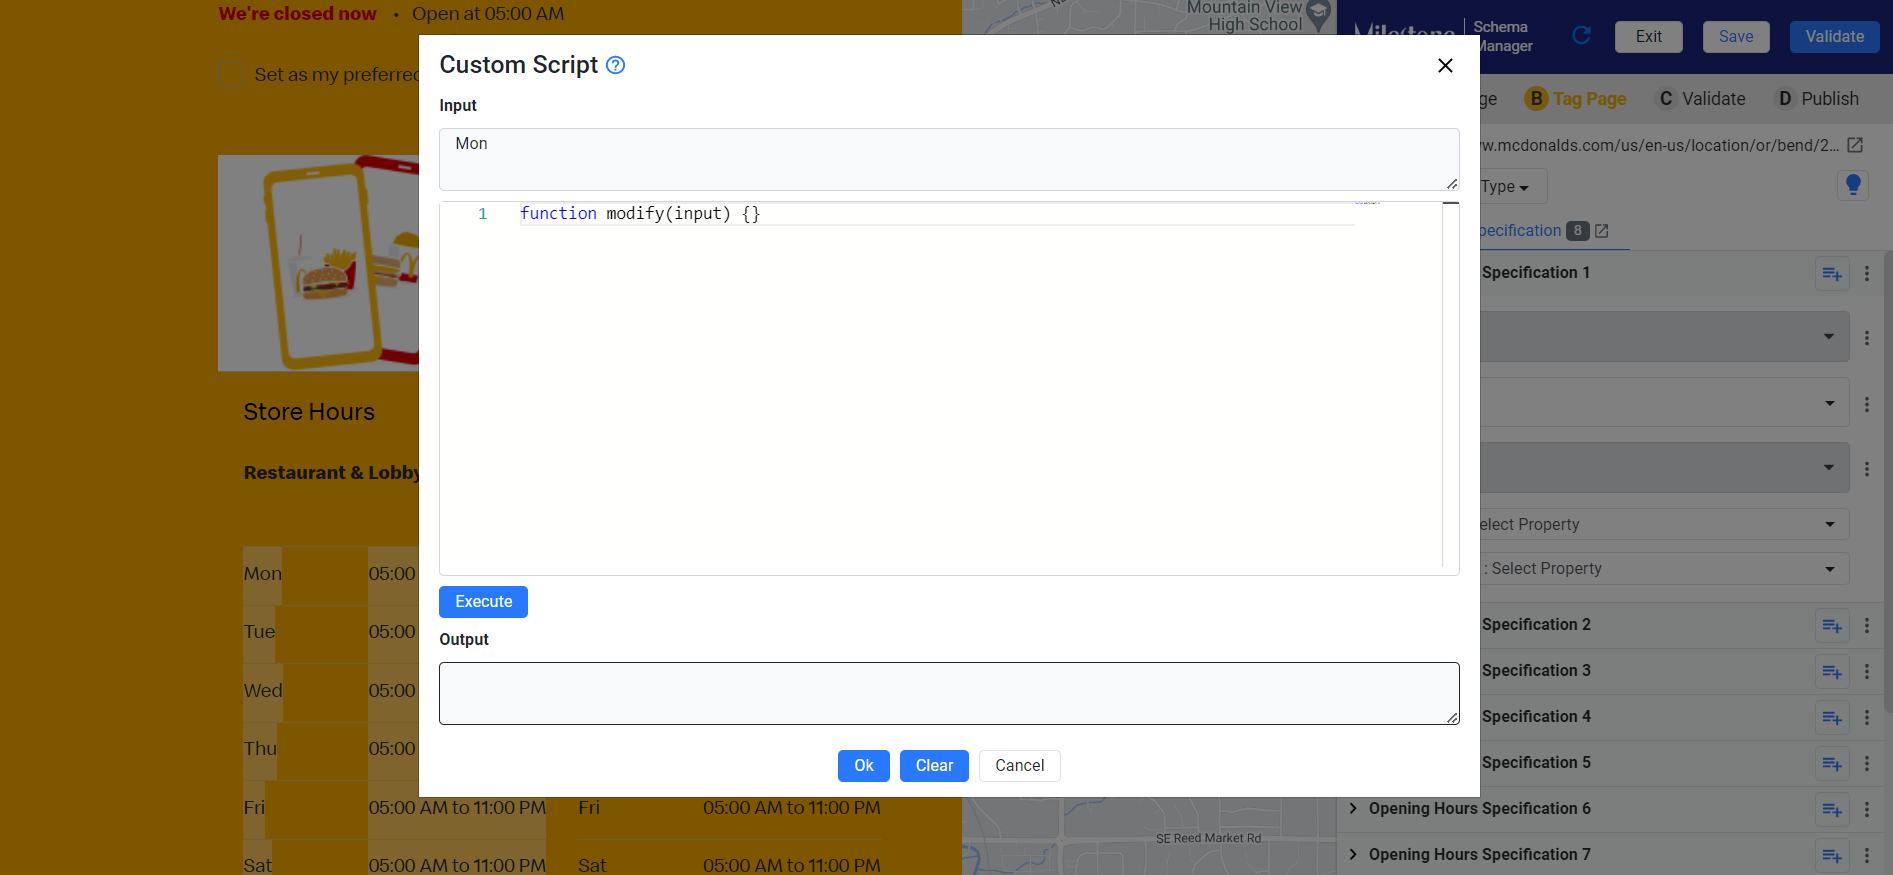
Step 9: To the top of the ‘Custom Script’ section you can see the Input value
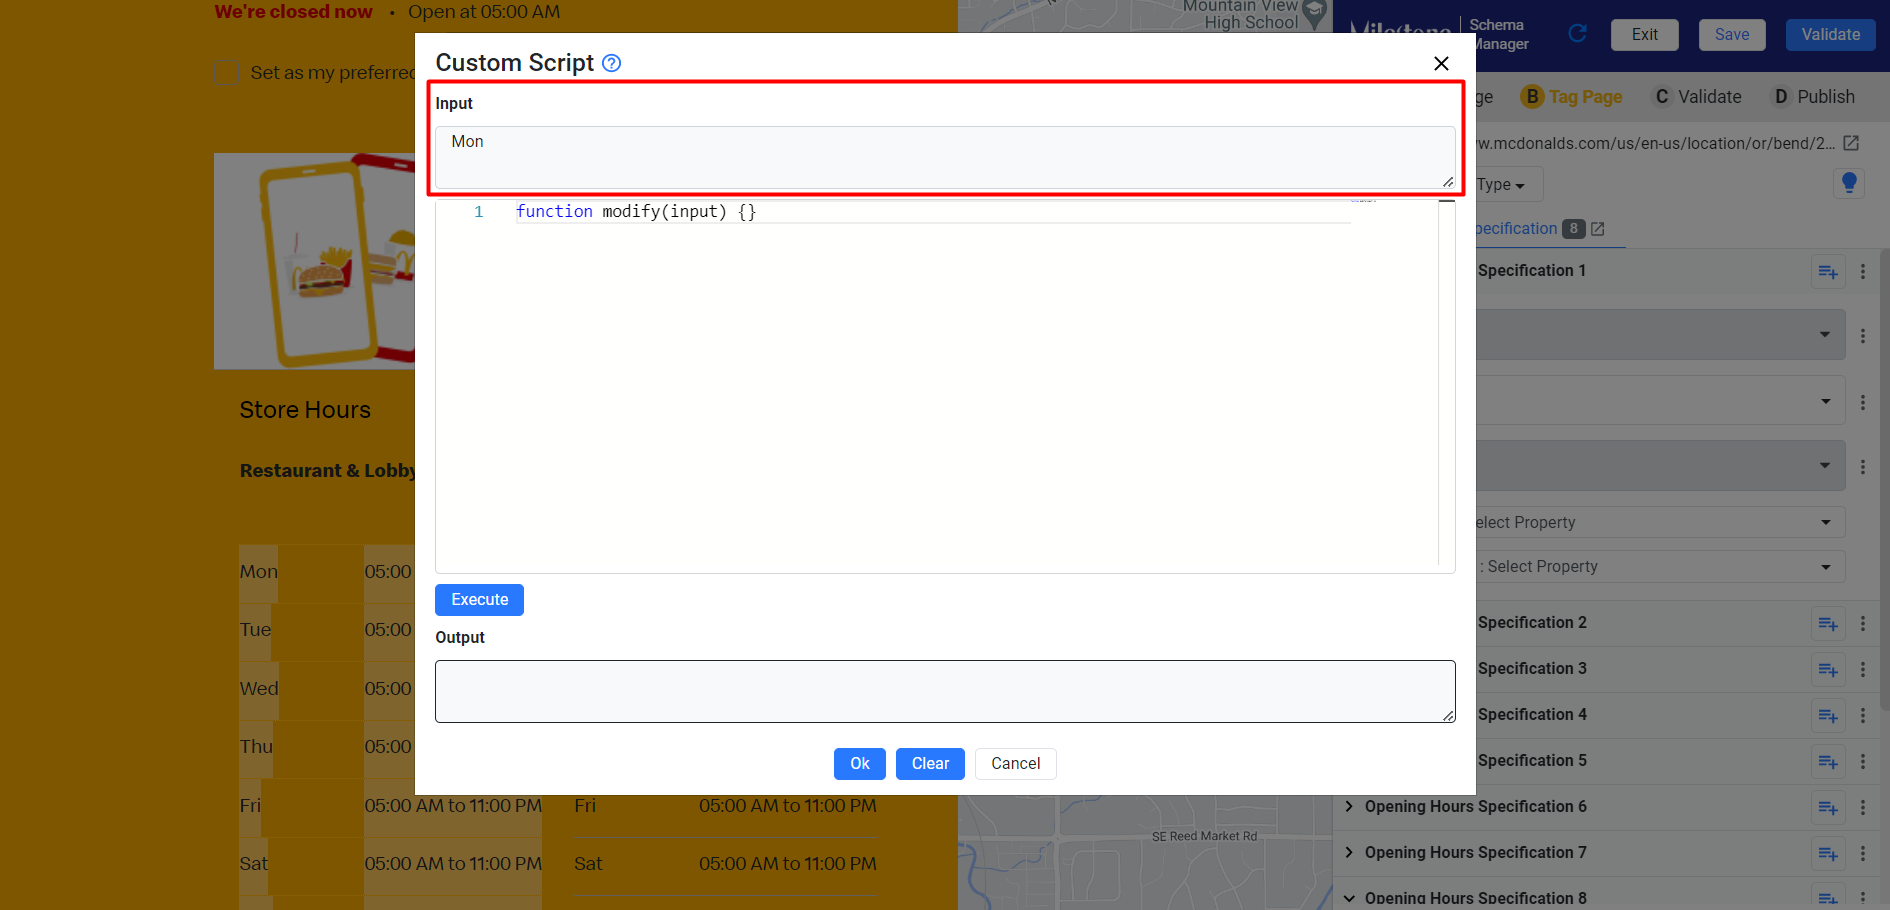
Step 10: Add the custom script below this and click on ‘Execute’
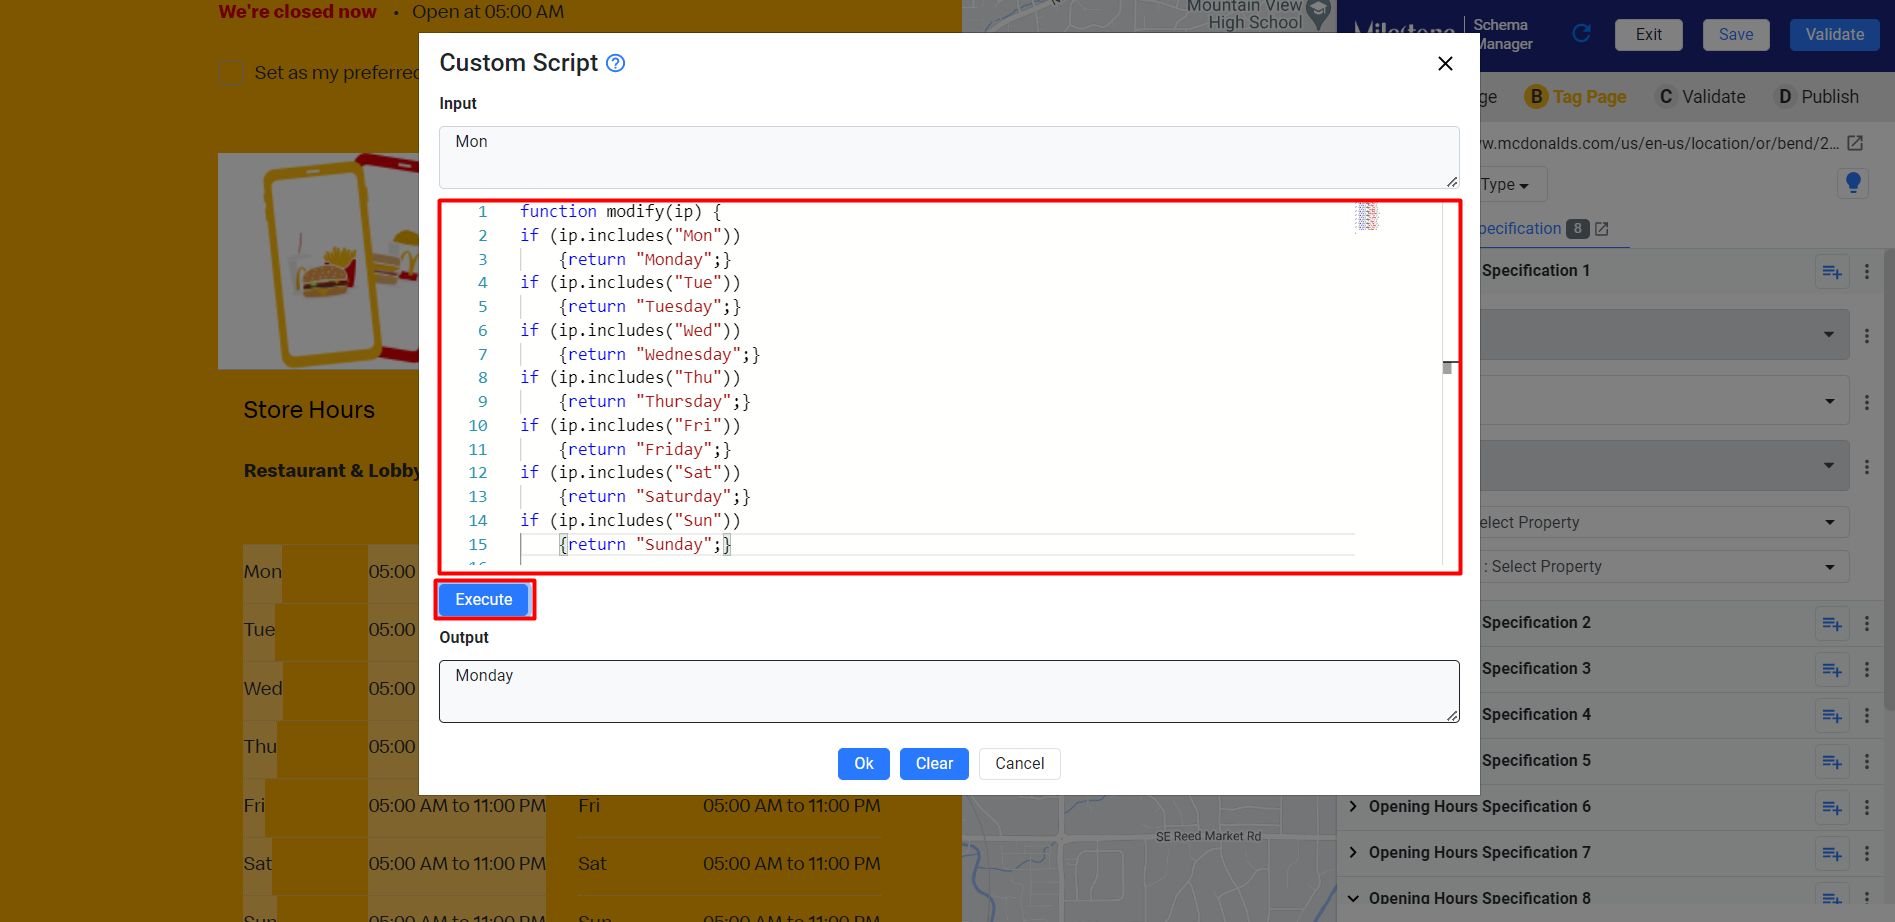
Step 11: The output will be displayed below
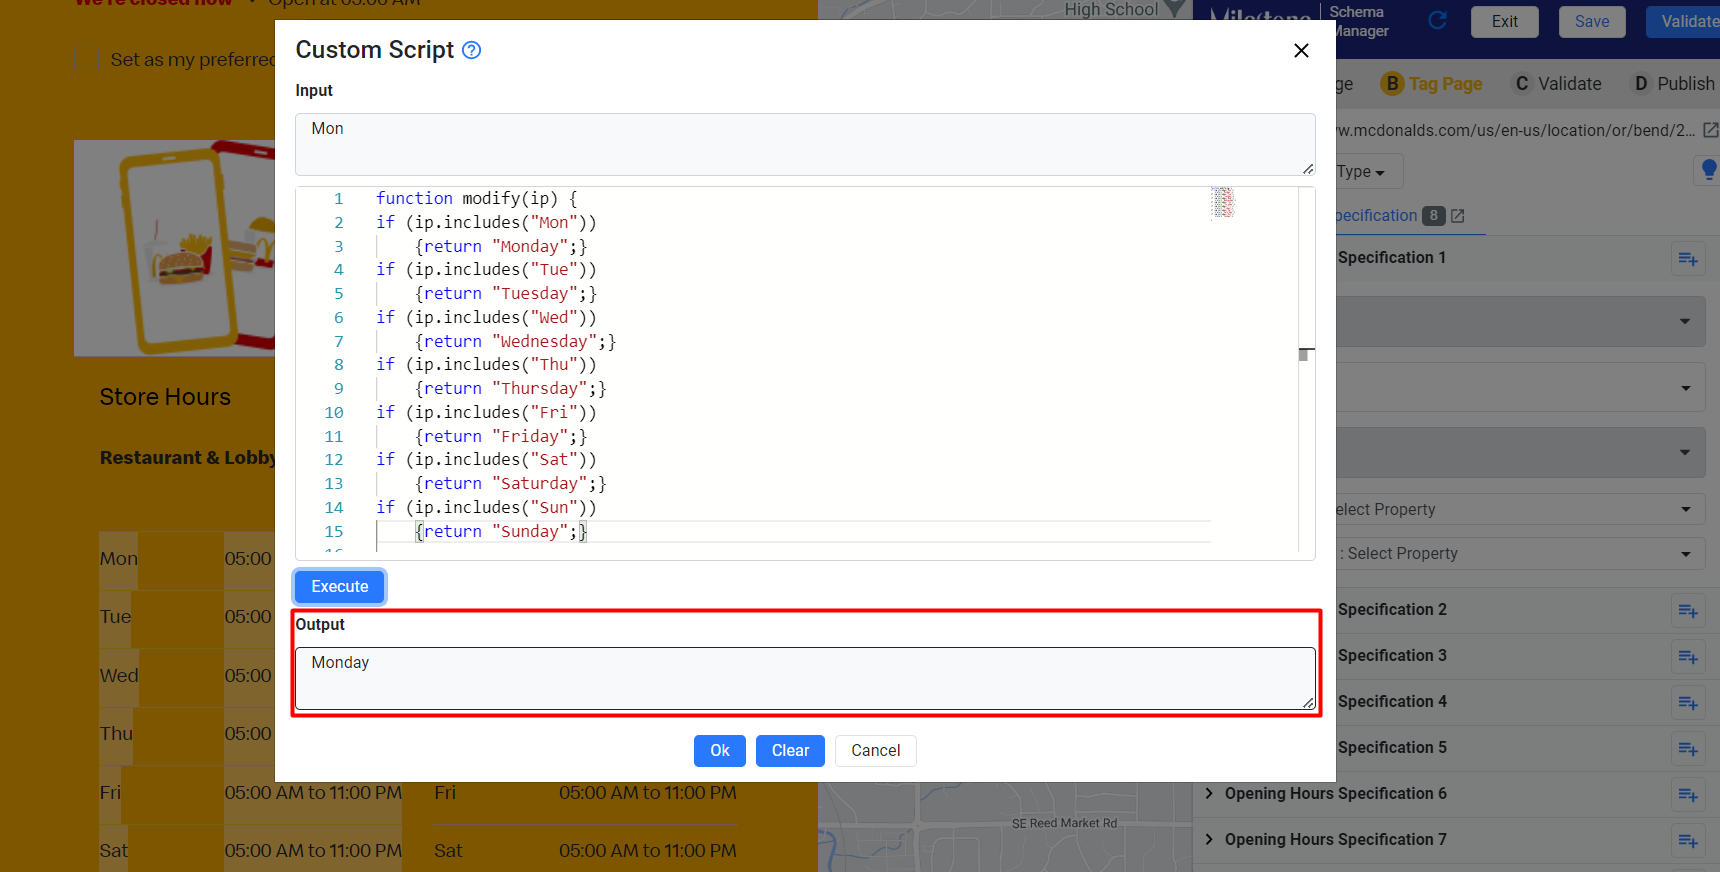
Step 12: Click on ‘Ok’ to apply the custom script

Step 13: Click on ‘Save’ to apply the custom rule to the schema
Once you have applied the custom rule the properties will automatically update in the Schema Manager live tagging section